How to Delete a Network in the Temple Wallet
Learn the simple steps to delete custom networks in your multichain Temple Wallet. Keep your Tezos and EVM network list clean and organized with this easy guide.
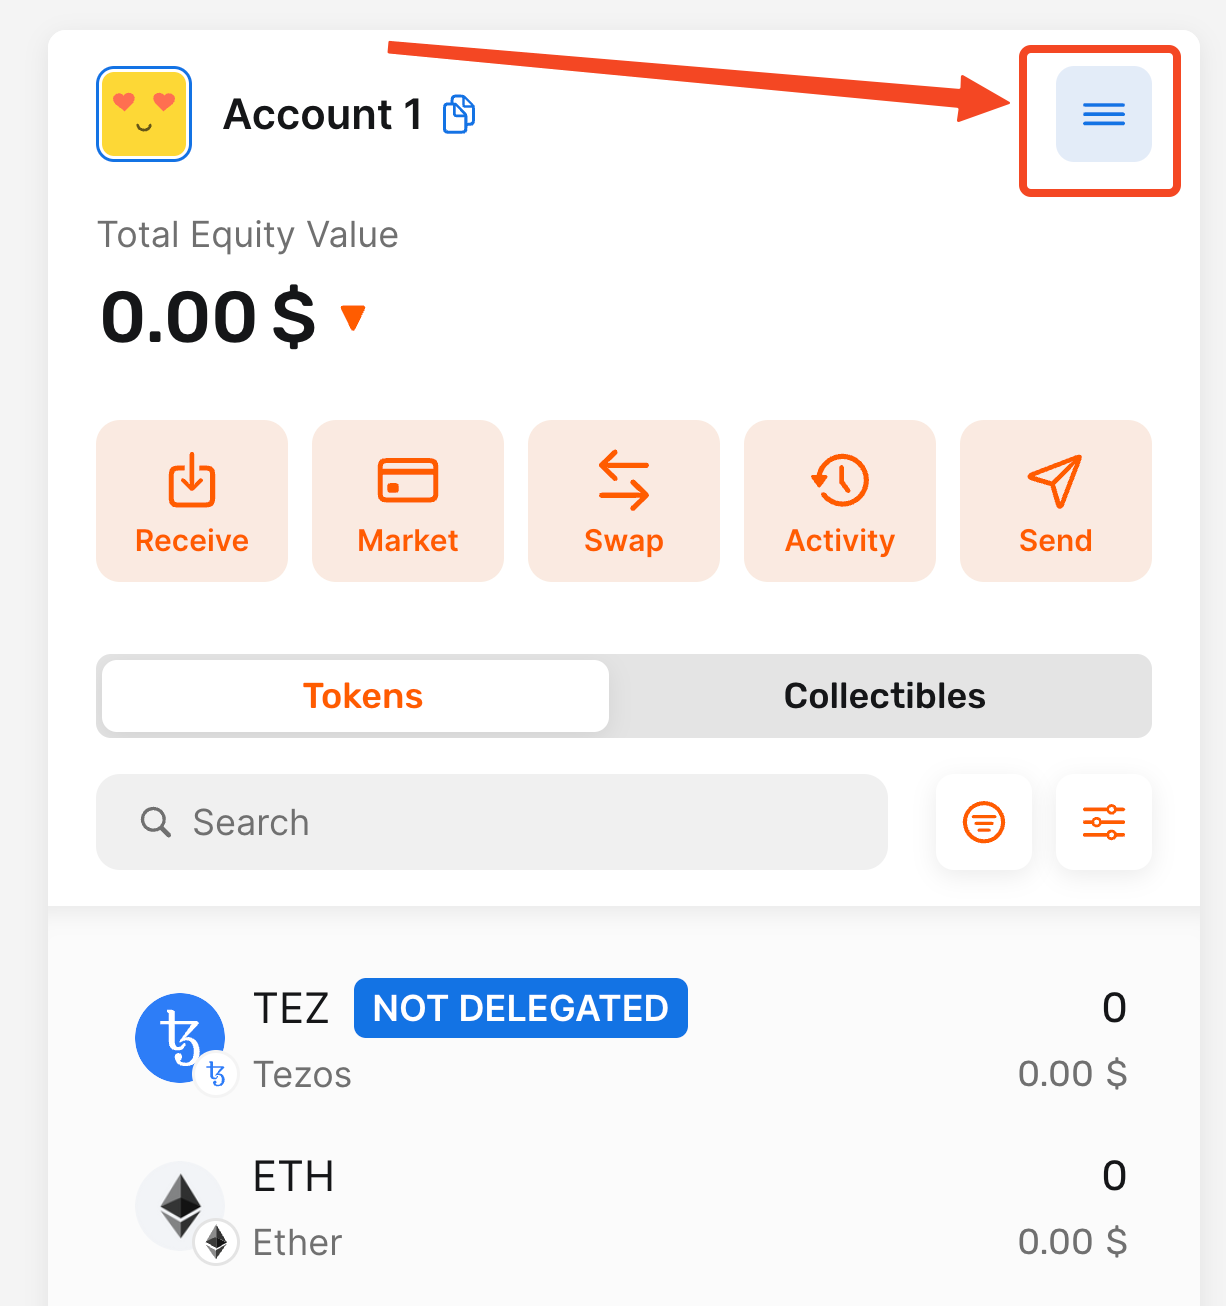
1. Open your Temple Wallet Extension and click on the Menu icon
By clicking on the Menu icon, you will open the Menu dropdown with a lot of necessary options on how to manage your wallet.
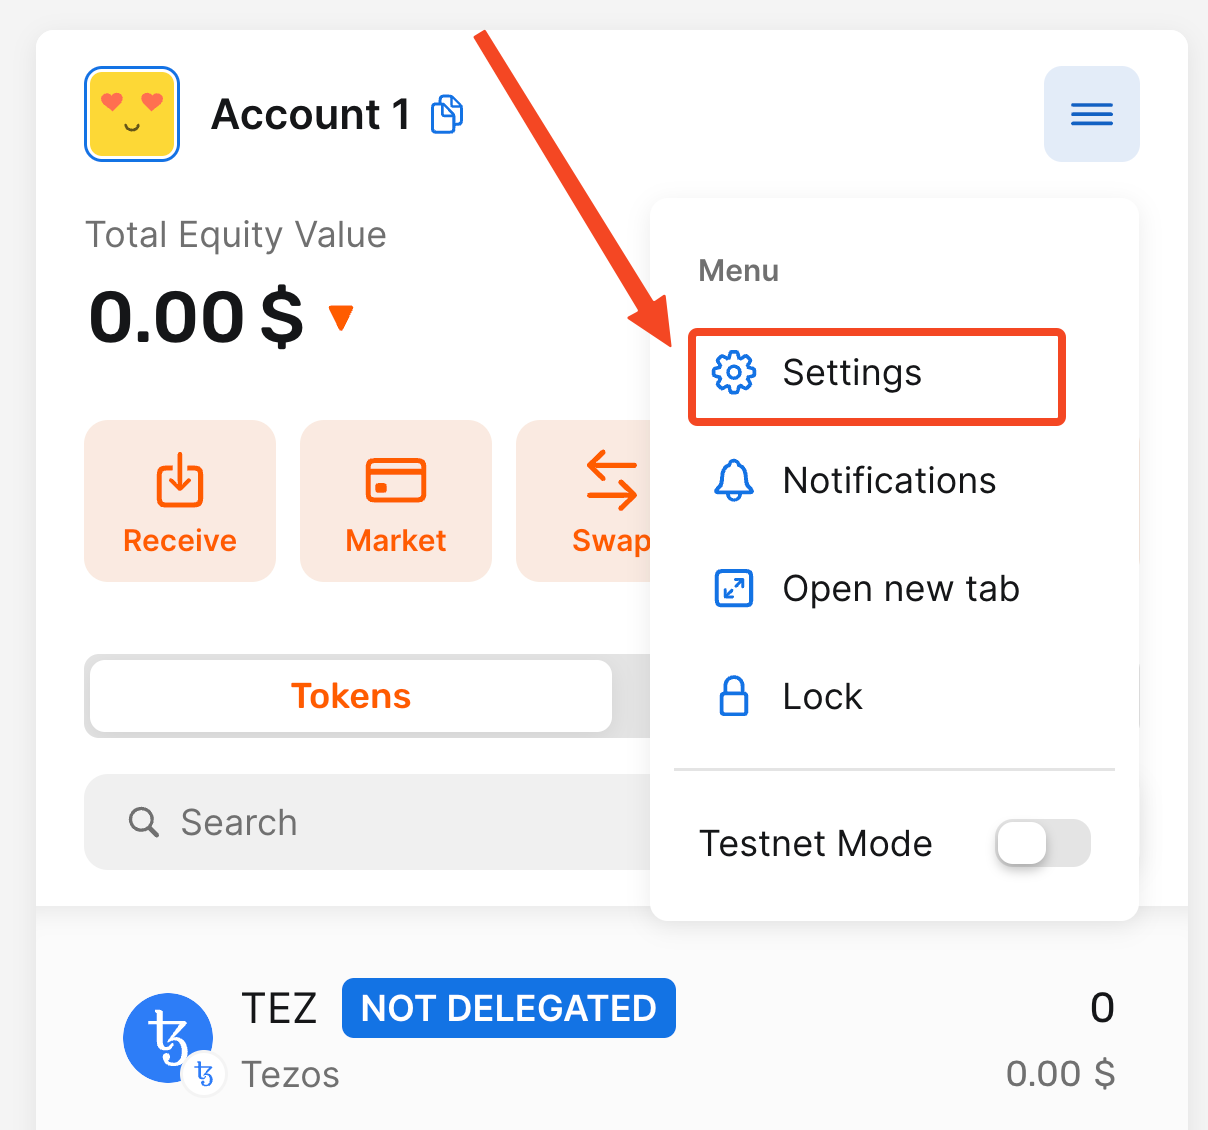
2. Click on the Settings option
Click on the Settings option in the Menu dropdown to open the settings in the Temple Wallet Extension.
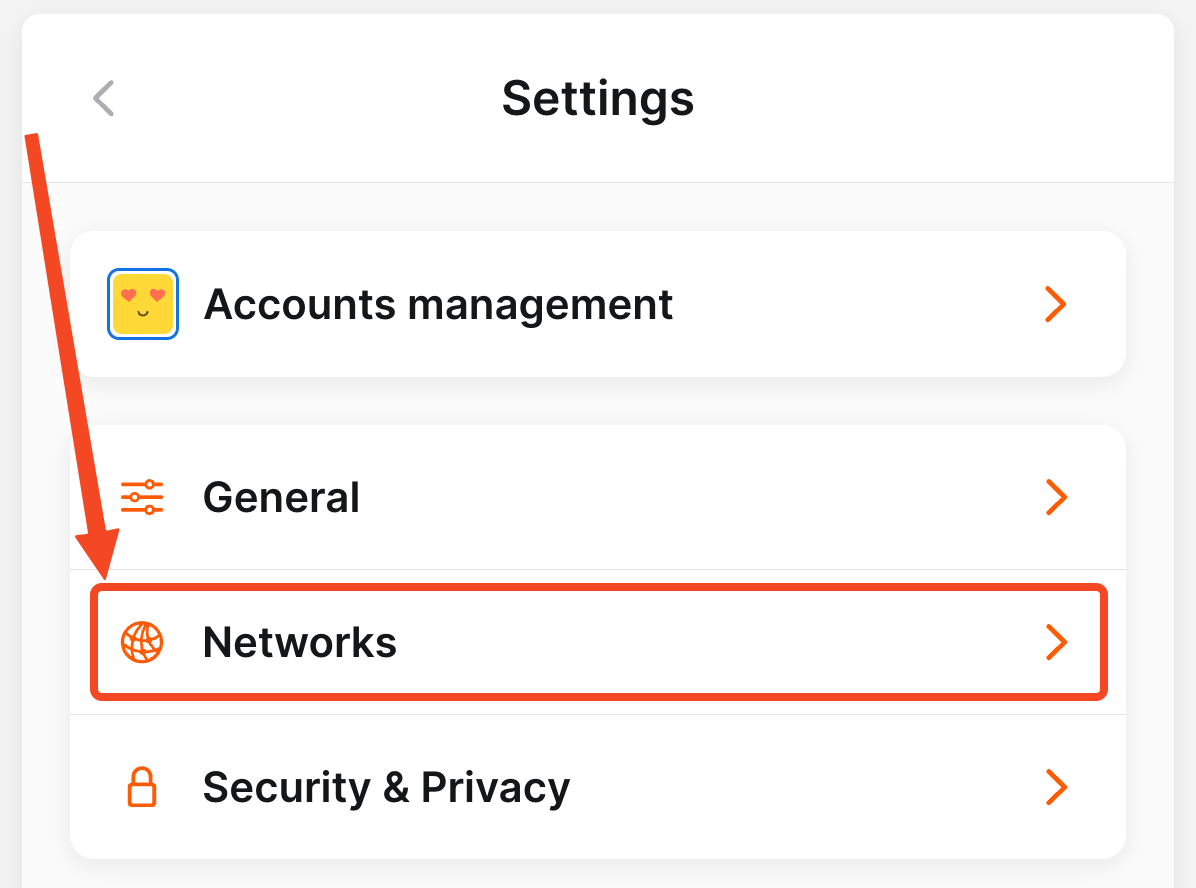
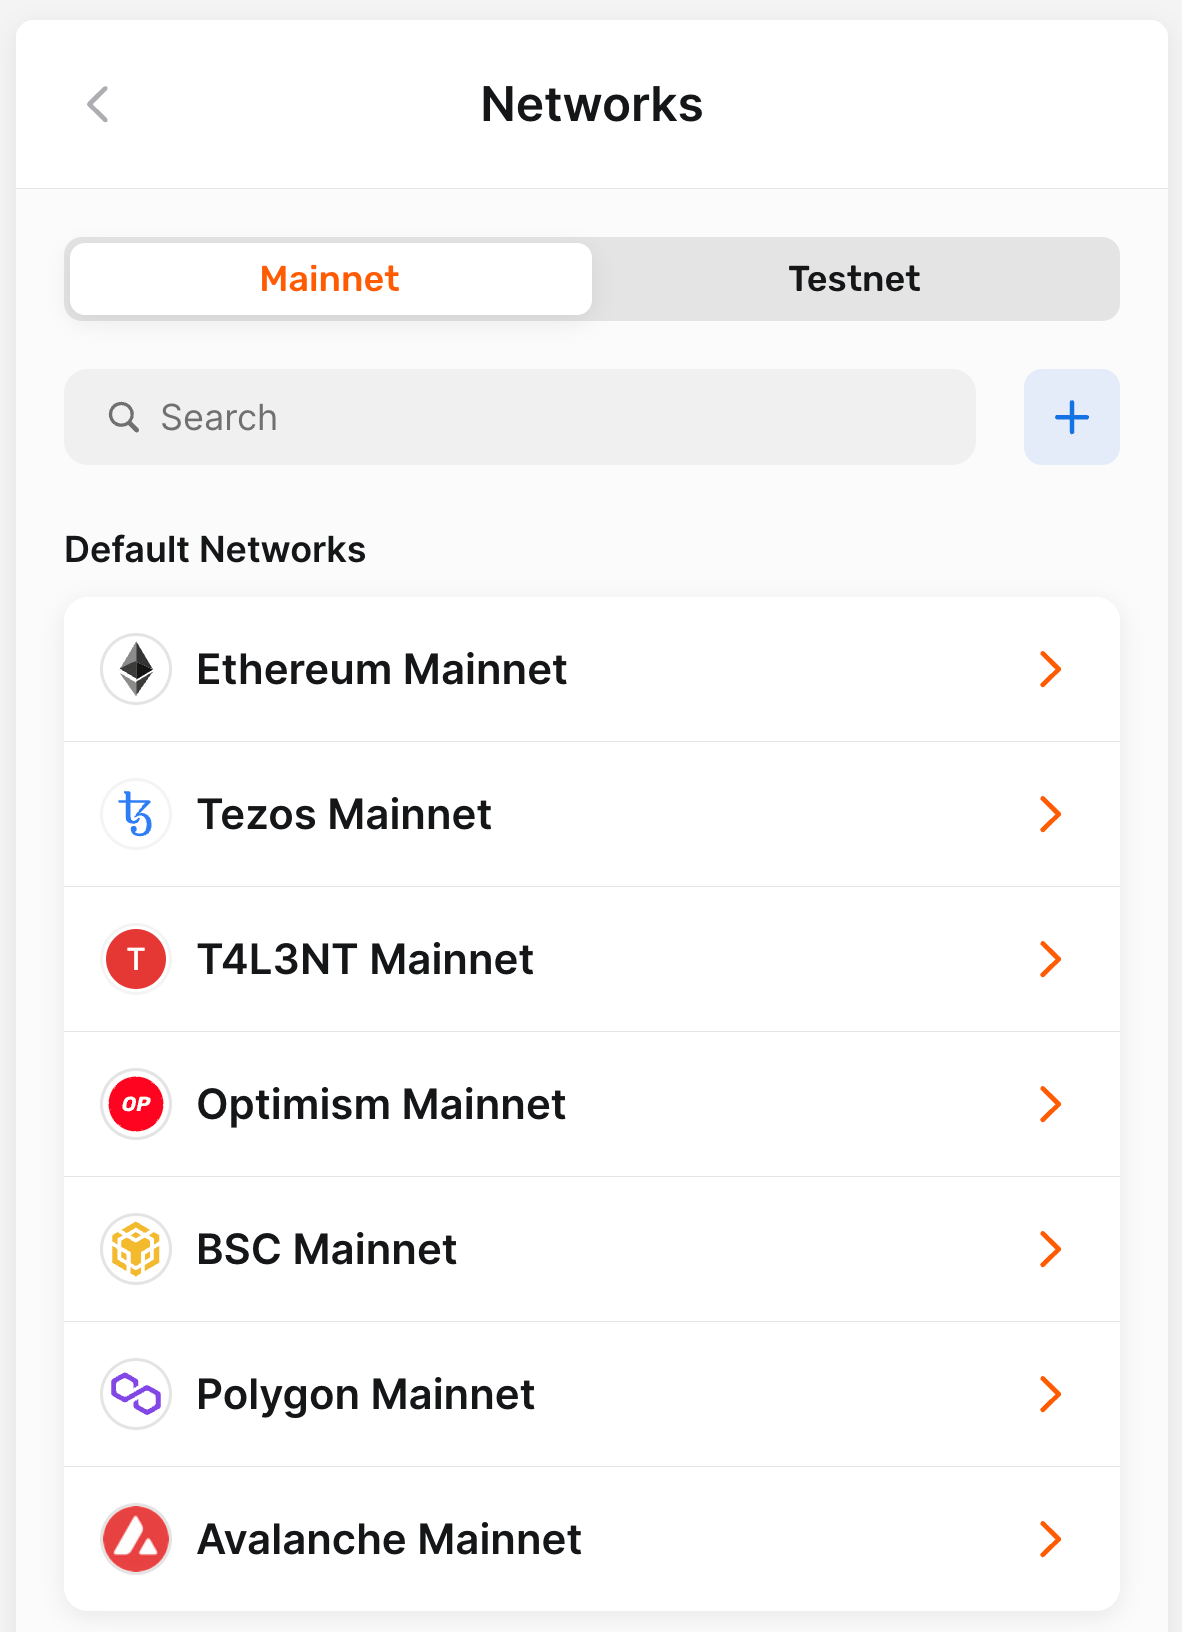
3. Click on the Networks option
Click on the Networks option to open the Networks page.
4. Click on the network that you want to delete
Click on the network in the Custom Networks section that you want to delete.
 Temple Wallet
For our example, we will click on the Celo network that we have added in the How to Add a Network in the Temple Wallet guide listed below.
Temple Wallet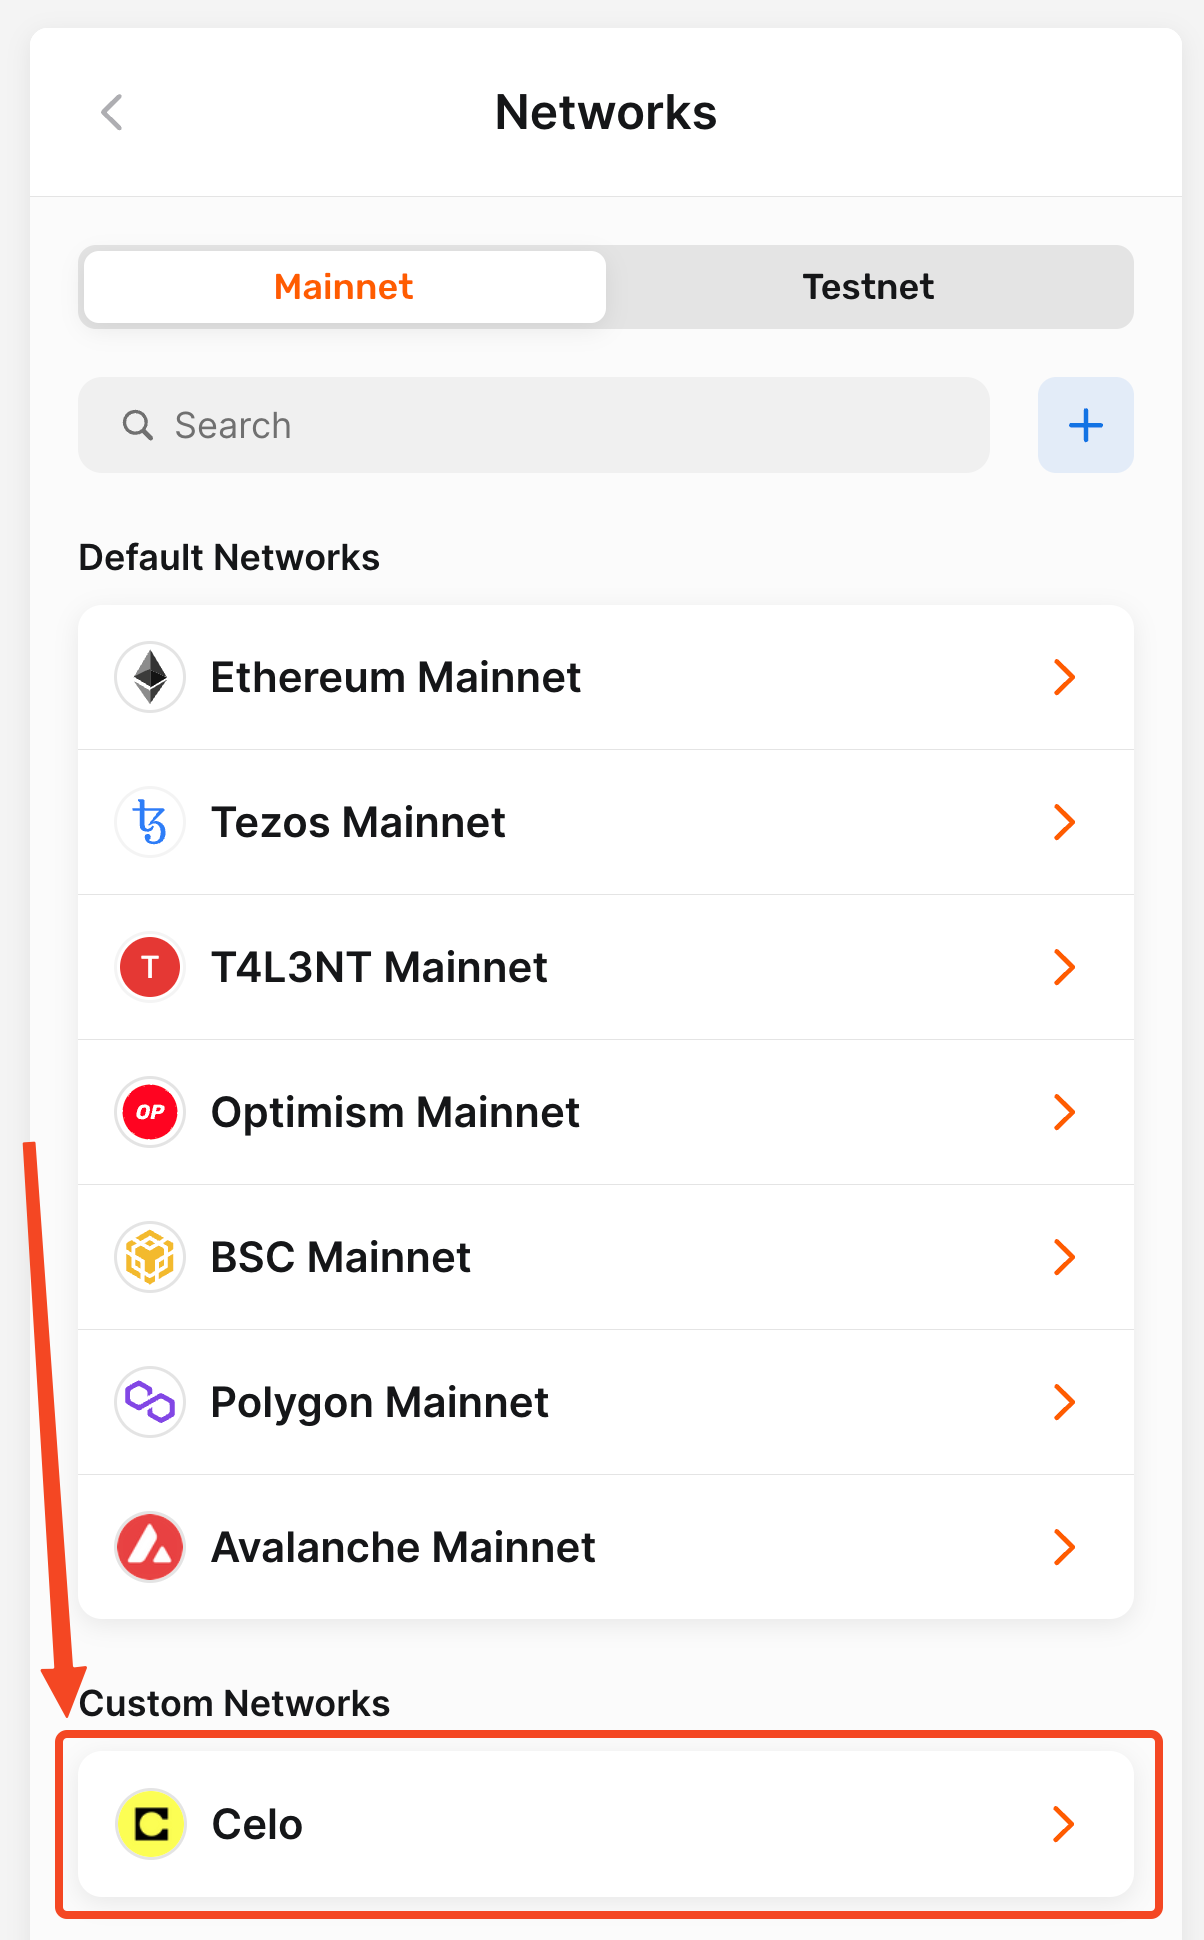
5. Click on the Remove Network button
Click on the Remove Network button to delete the currently selected network.

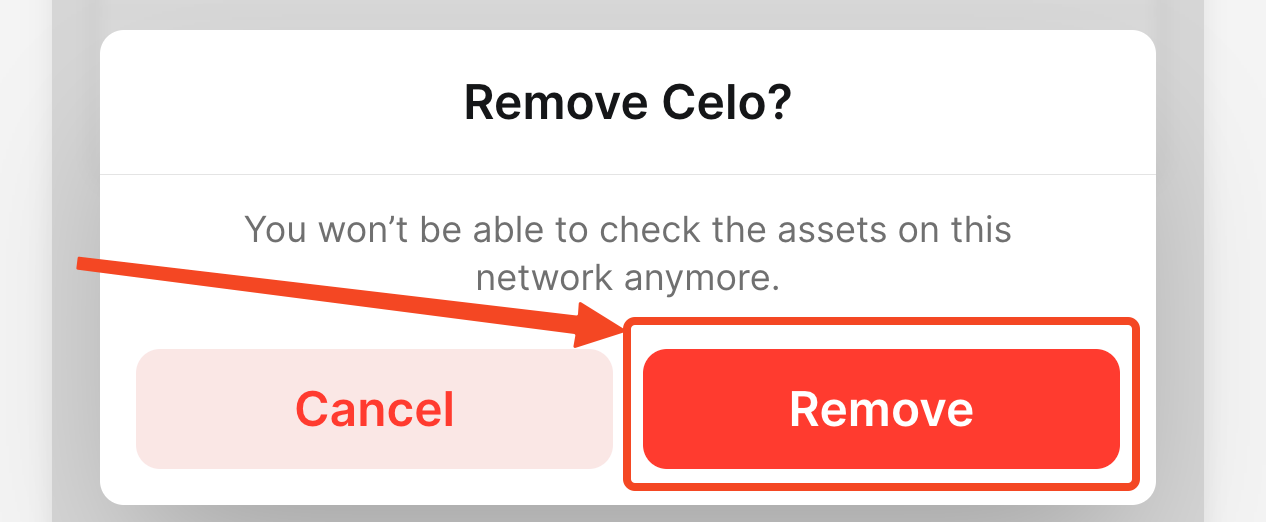
6. Click on the Remove button
Click on the Remove button to confirm removing the currently selected network.
7. Verify the successful deletion of the network
The network that you deleted will no longer be on the Networks list.
Conclusion
Effectively managing your connections within the Temple Wallet is straightforward, and this guide has detailed the precise steps for deleting networks you no longer need. As Temple Wallet embraces its role as a powerful multichain wallet, supporting both the Tezos ecosystem and a growing range of EVM blockchains (like Ethereum, Binance Smart Chain, Polygon, Etherlink, and more), keeping your network list organized becomes increasingly important for a seamless user experience.
Following the procedure outlined above – navigating through the Menu icon to Settings, then Networks, selecting the specific custom network, and confirming its removal – allows you to easily delete unwanted networks from your Temple Wallet interface. Remember, this process is specifically for removing custom networks that you have added manually. Default networks integrated by Temple cannot be deleted using this method, though they can often be disabled if needed.
By periodically deleting unused custom networks, you declutter your wallet, streamline your workflow, and ensure you are connecting only to the blockchains relevant to your current activities. Whether you need to remove a testnet or an outdated EVM network configuration or simply clean up your list, the ability to delete networks in the Temple Wallet provides essential control over your multichain environment. Keep this guide handy for efficient network management within your versatile Temple Wallet.