How to Create a New Wallet in the Temple Wallet
Learn how to easily create a new wallet in the Temple Wallet extension with this simple step-by-step guide. Securely set up your multichain account for managing assets on Tezos and EVM blockchains, including crucial instructions for safely recording and verifying your seed phrase.
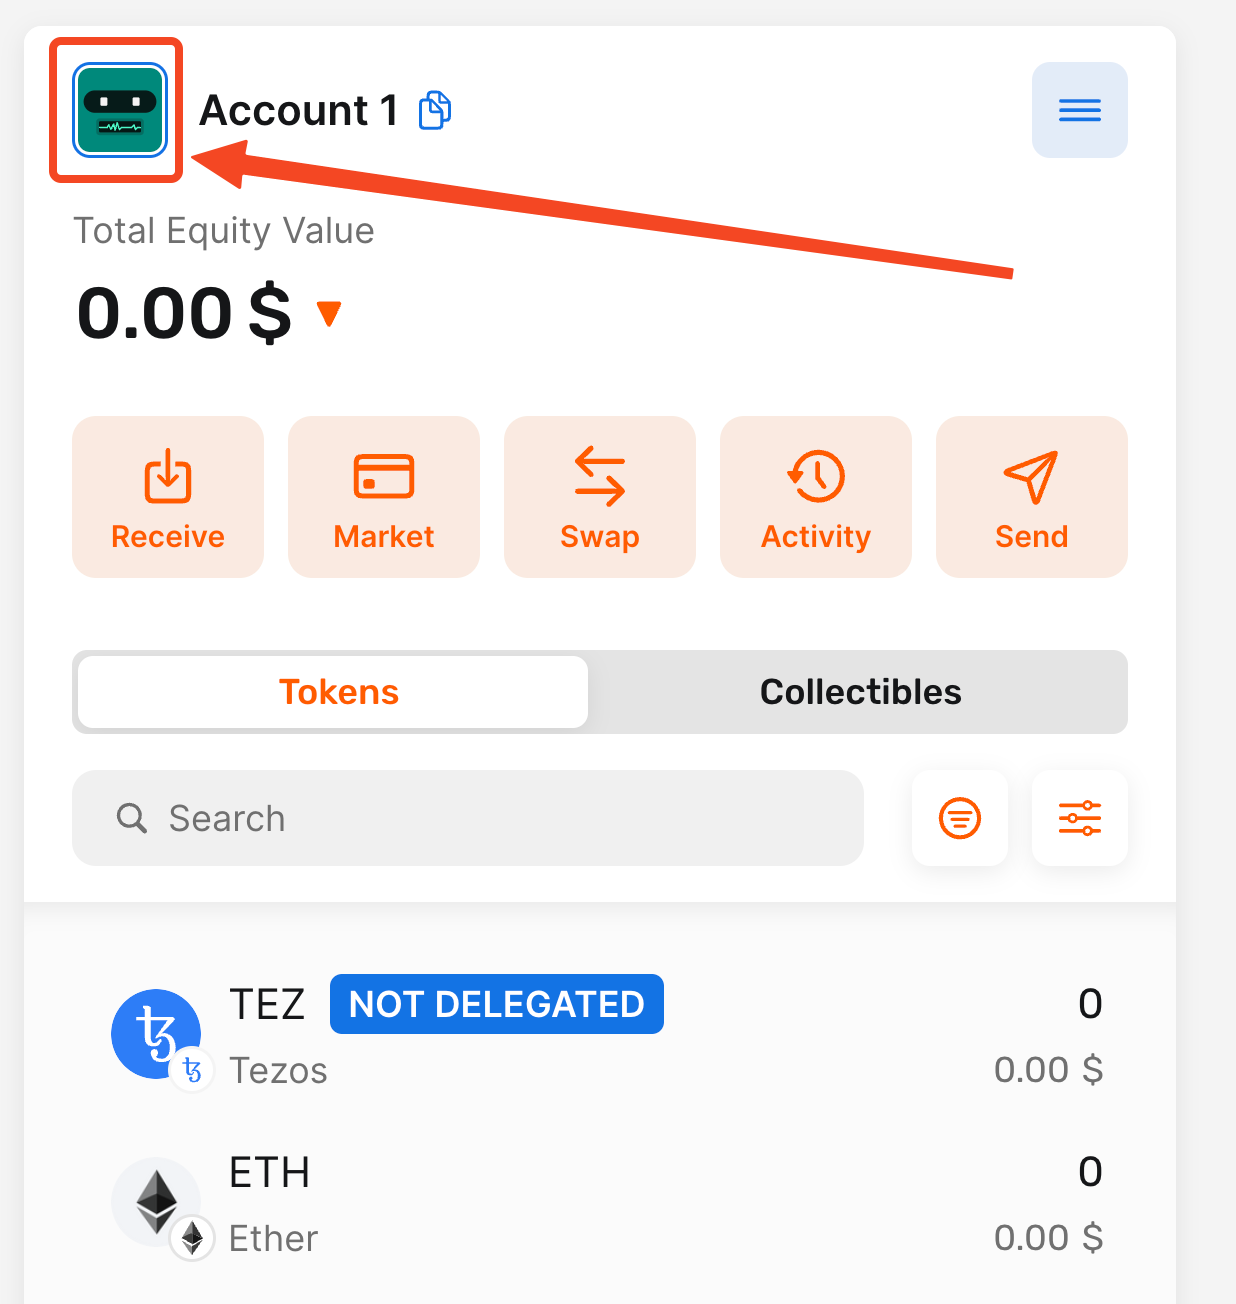
1. Open your Temple Wallet Extension and click on your account icon (PFP)
By clicking on your account icon (PFP), you will open the My Accounts menu in the Temple Wallet Extension.
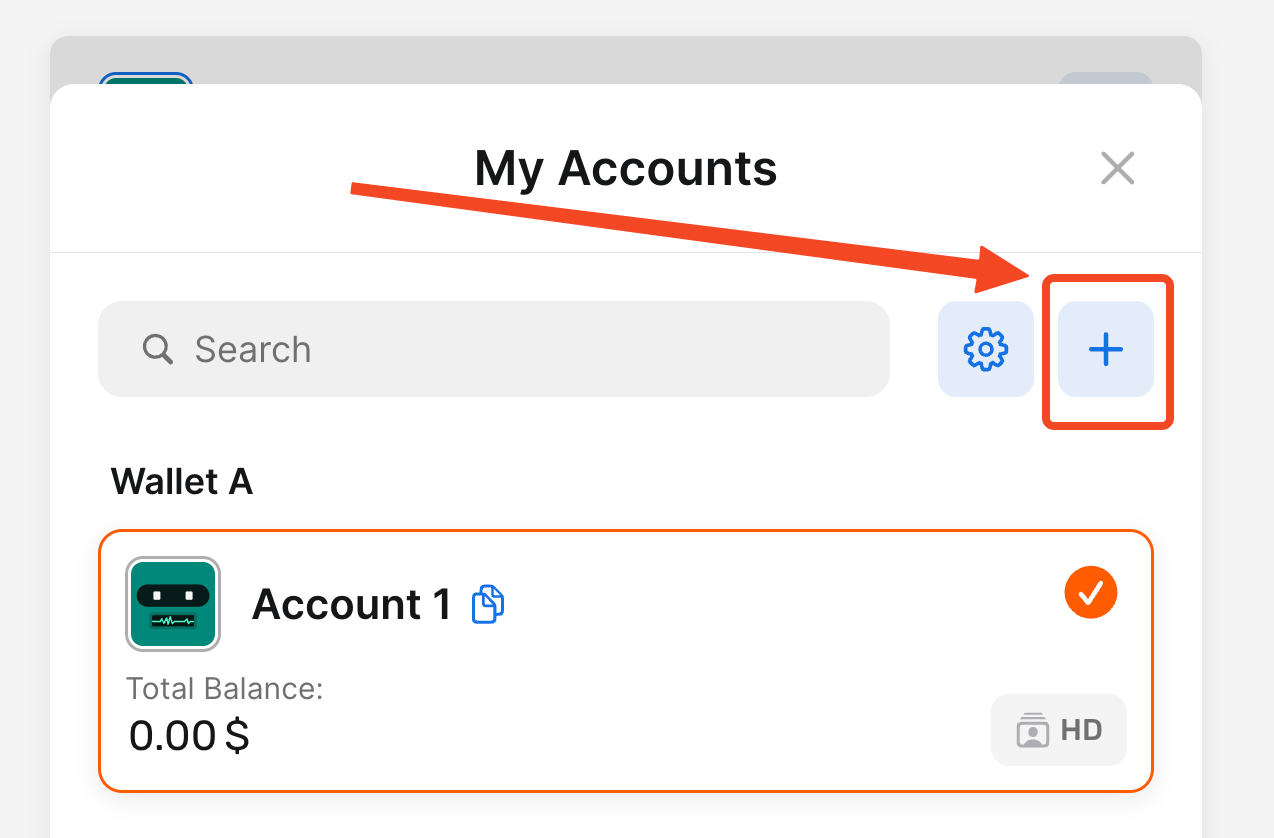
2. Click on the + button
Clicking on the + button will open the Add New Wallet drop-down menu.
3. Click on the Create Wallet option
The Add New Wallet drop-down menu has several possible options:
- Create Wallet – allows you to create a new wallet
- Import Wallet – allows you to import your existing wallet
- Ledger connect – allows you to connect your Ledger wallet
- Watch-only – allows you to connect any wallet just by using its address
For our example, we are choosing the Create Wallet option.

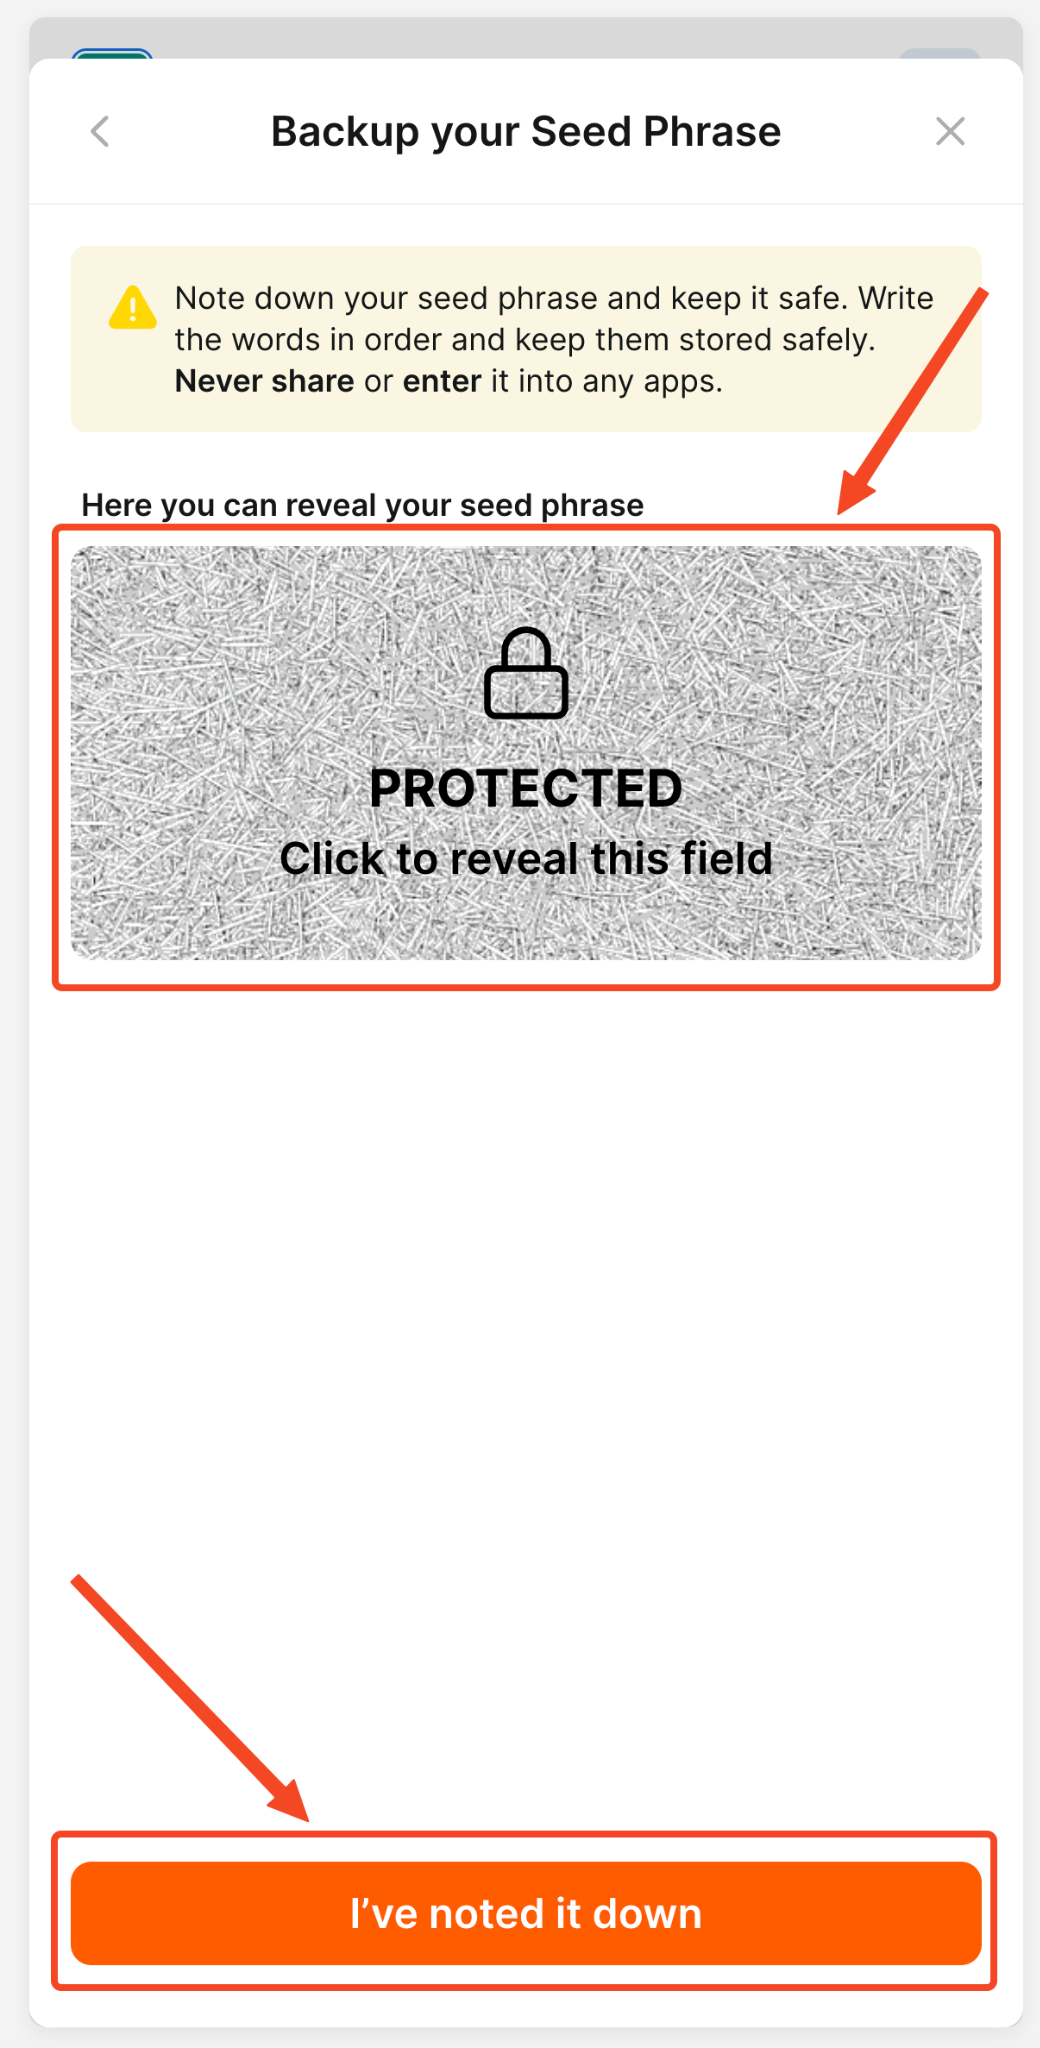
4a. Click on the field PROTECTED
After clicking, you will be able to see your seed phrase. Write down your seed phrase and keep it safe.
4b. Click on the I've noted it down button
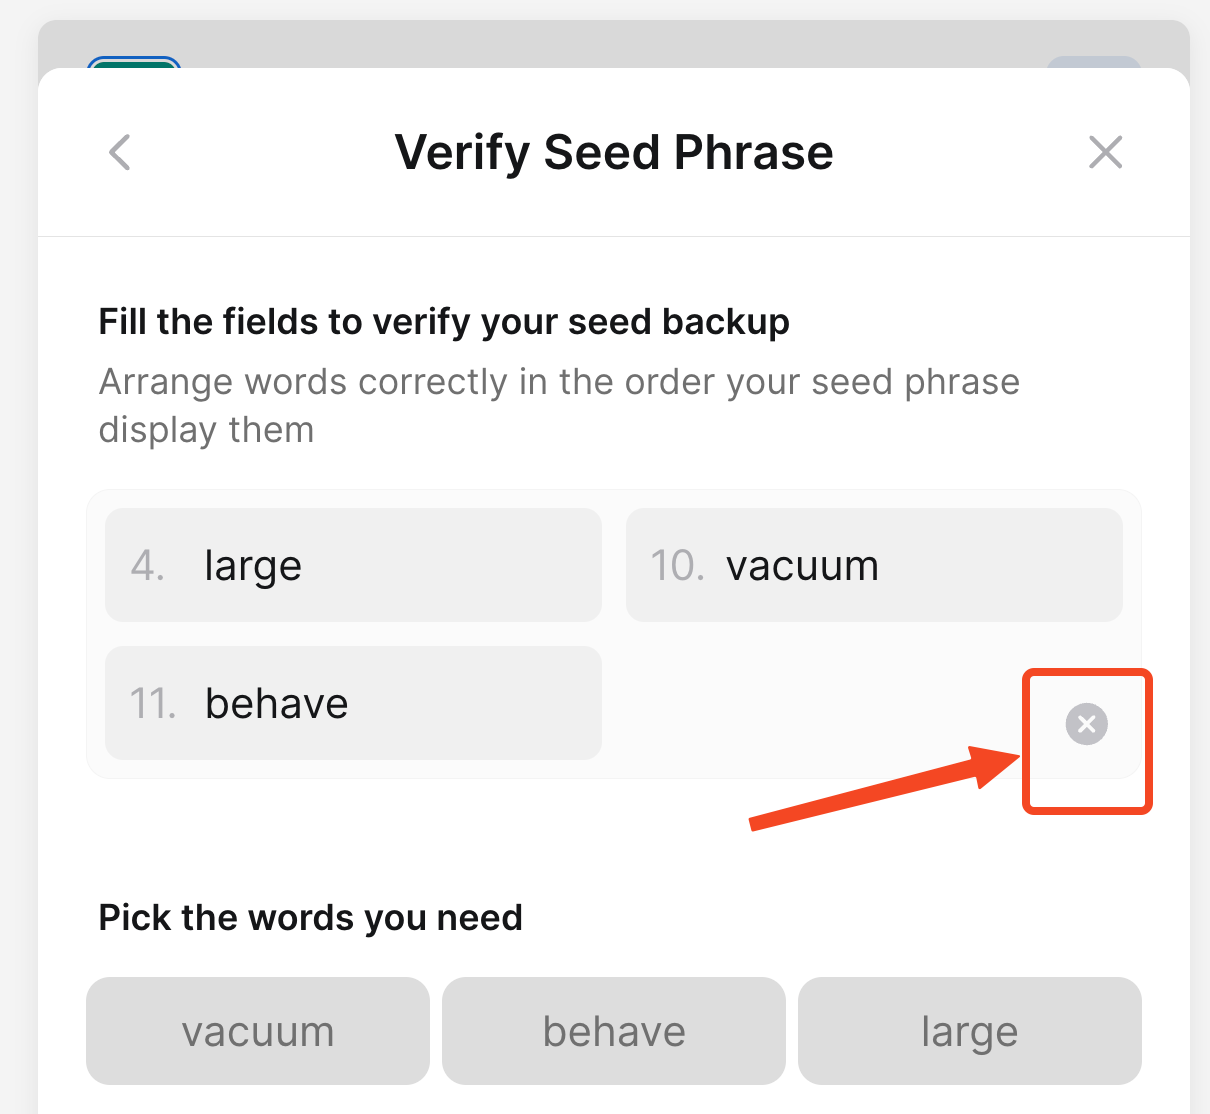
5. Verify your seed phrase
Next, you need to verify that you have saved your seed phrase. Please click on the words in the blue buttons.
For example, we need to verify the 4th, 10th, and 11th words.
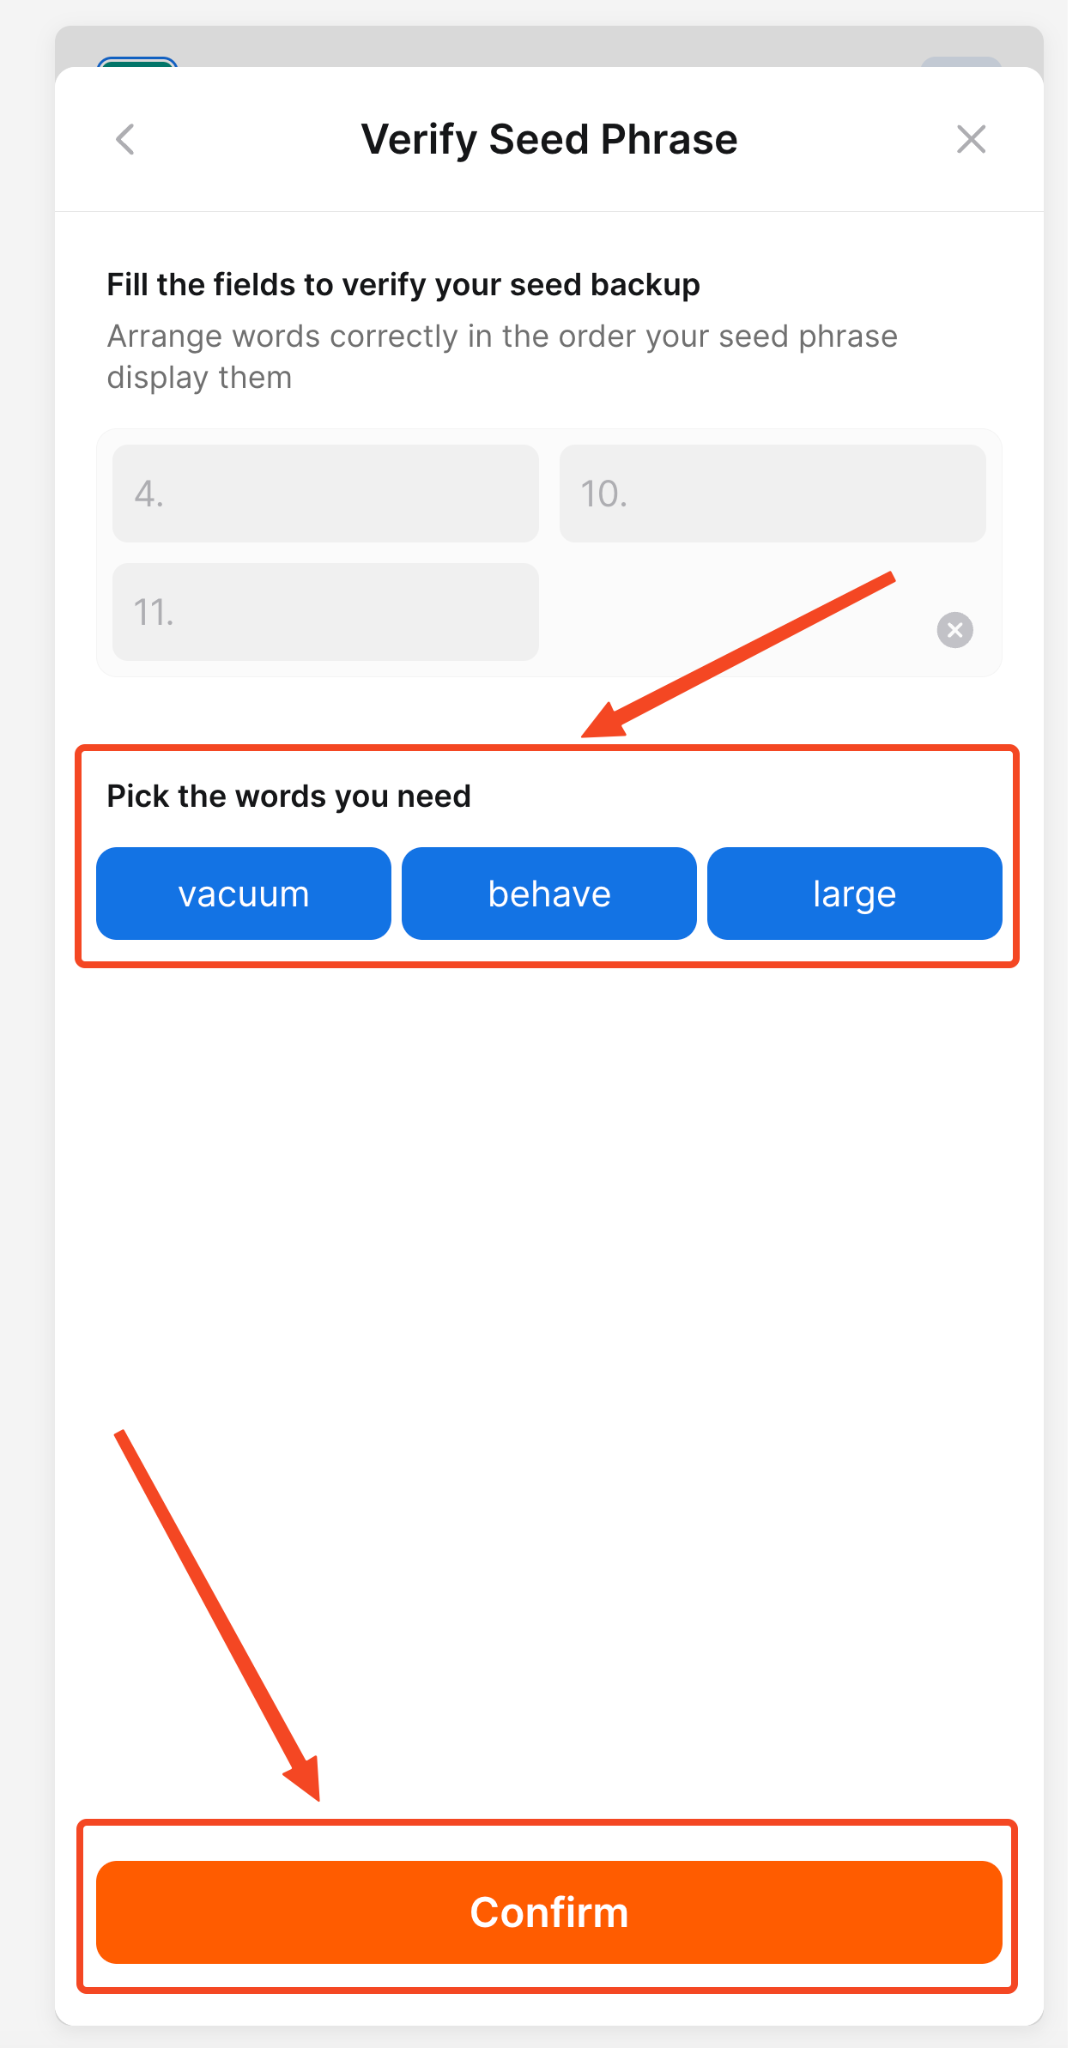
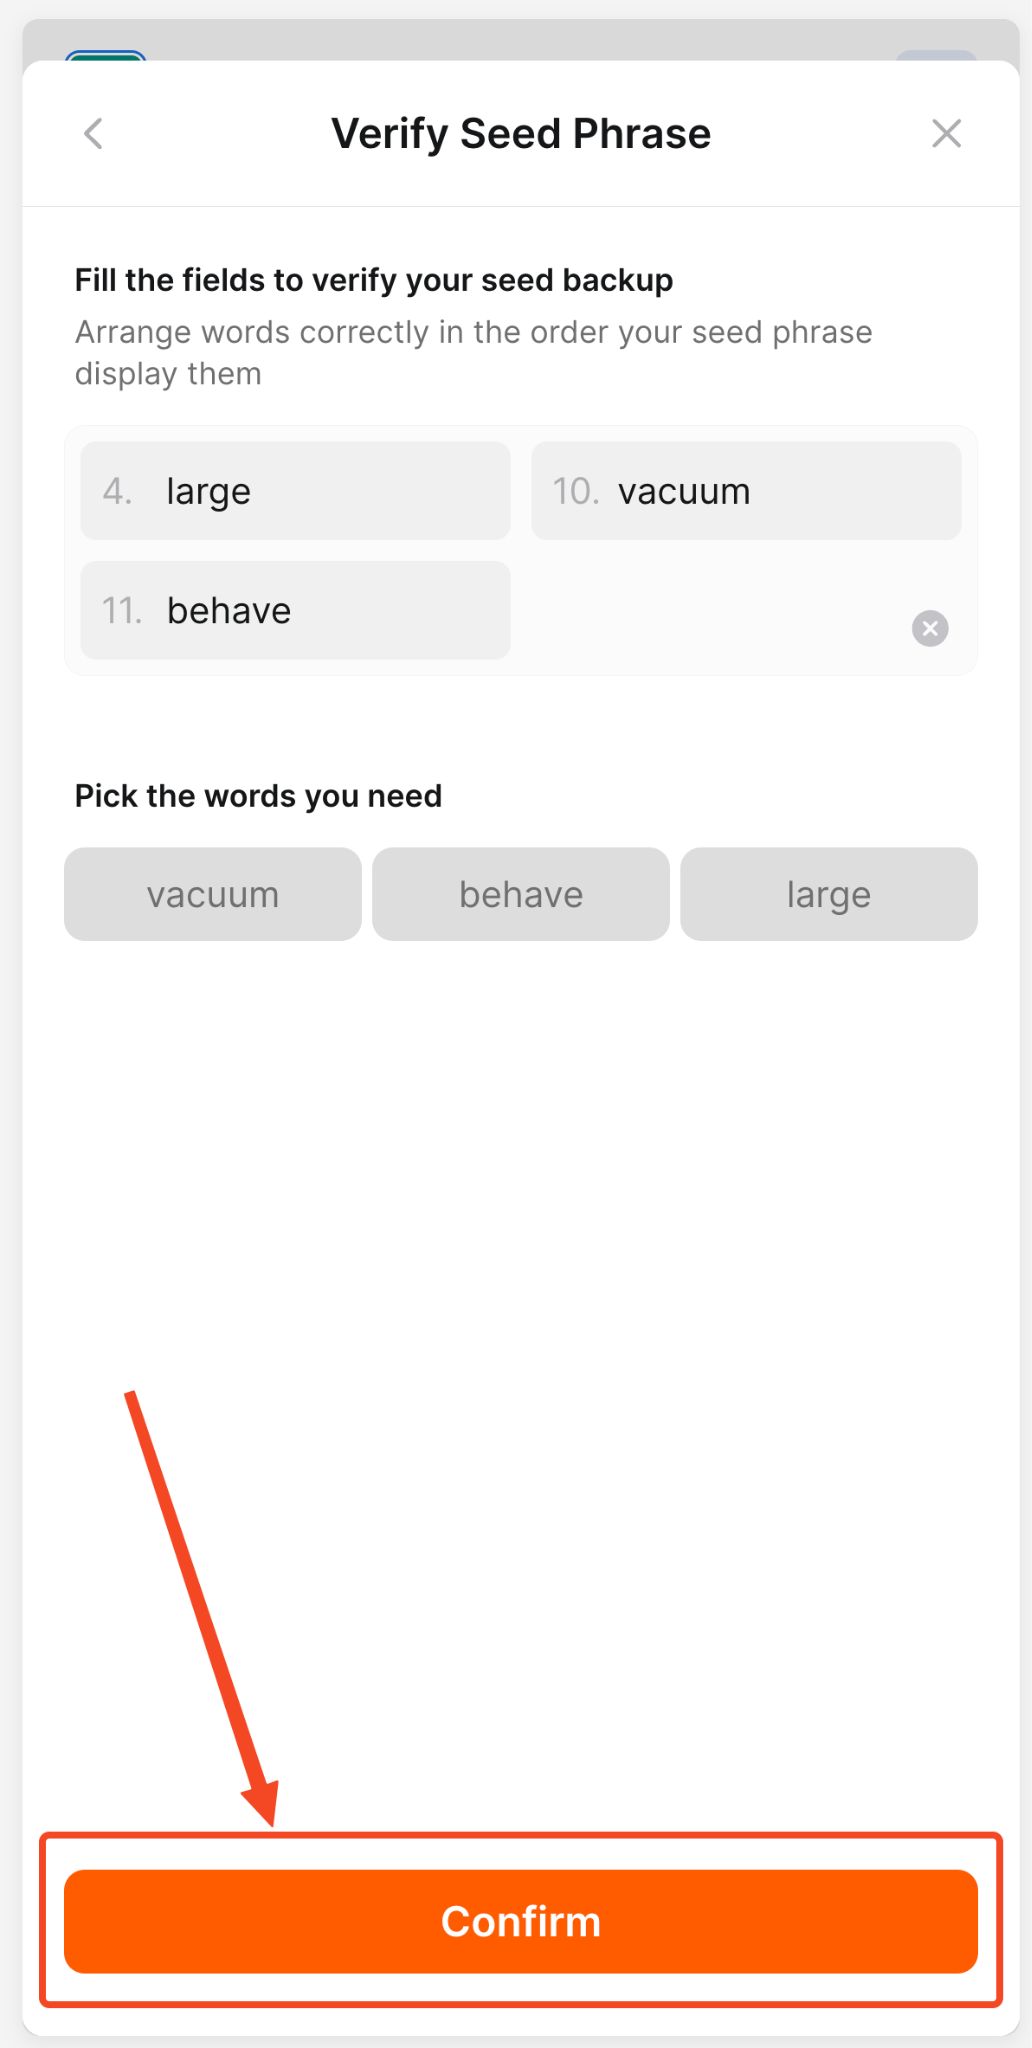
6. Click the Confirm button
Confirm the selected sequence of the words by clicking on the Confirm button.
7. Verify the successful creation of the Wallet
Now, you will see the Wallet has been created successfully notification at the bottom of the page, and you will be automatically switched to the first account in the new wallet.
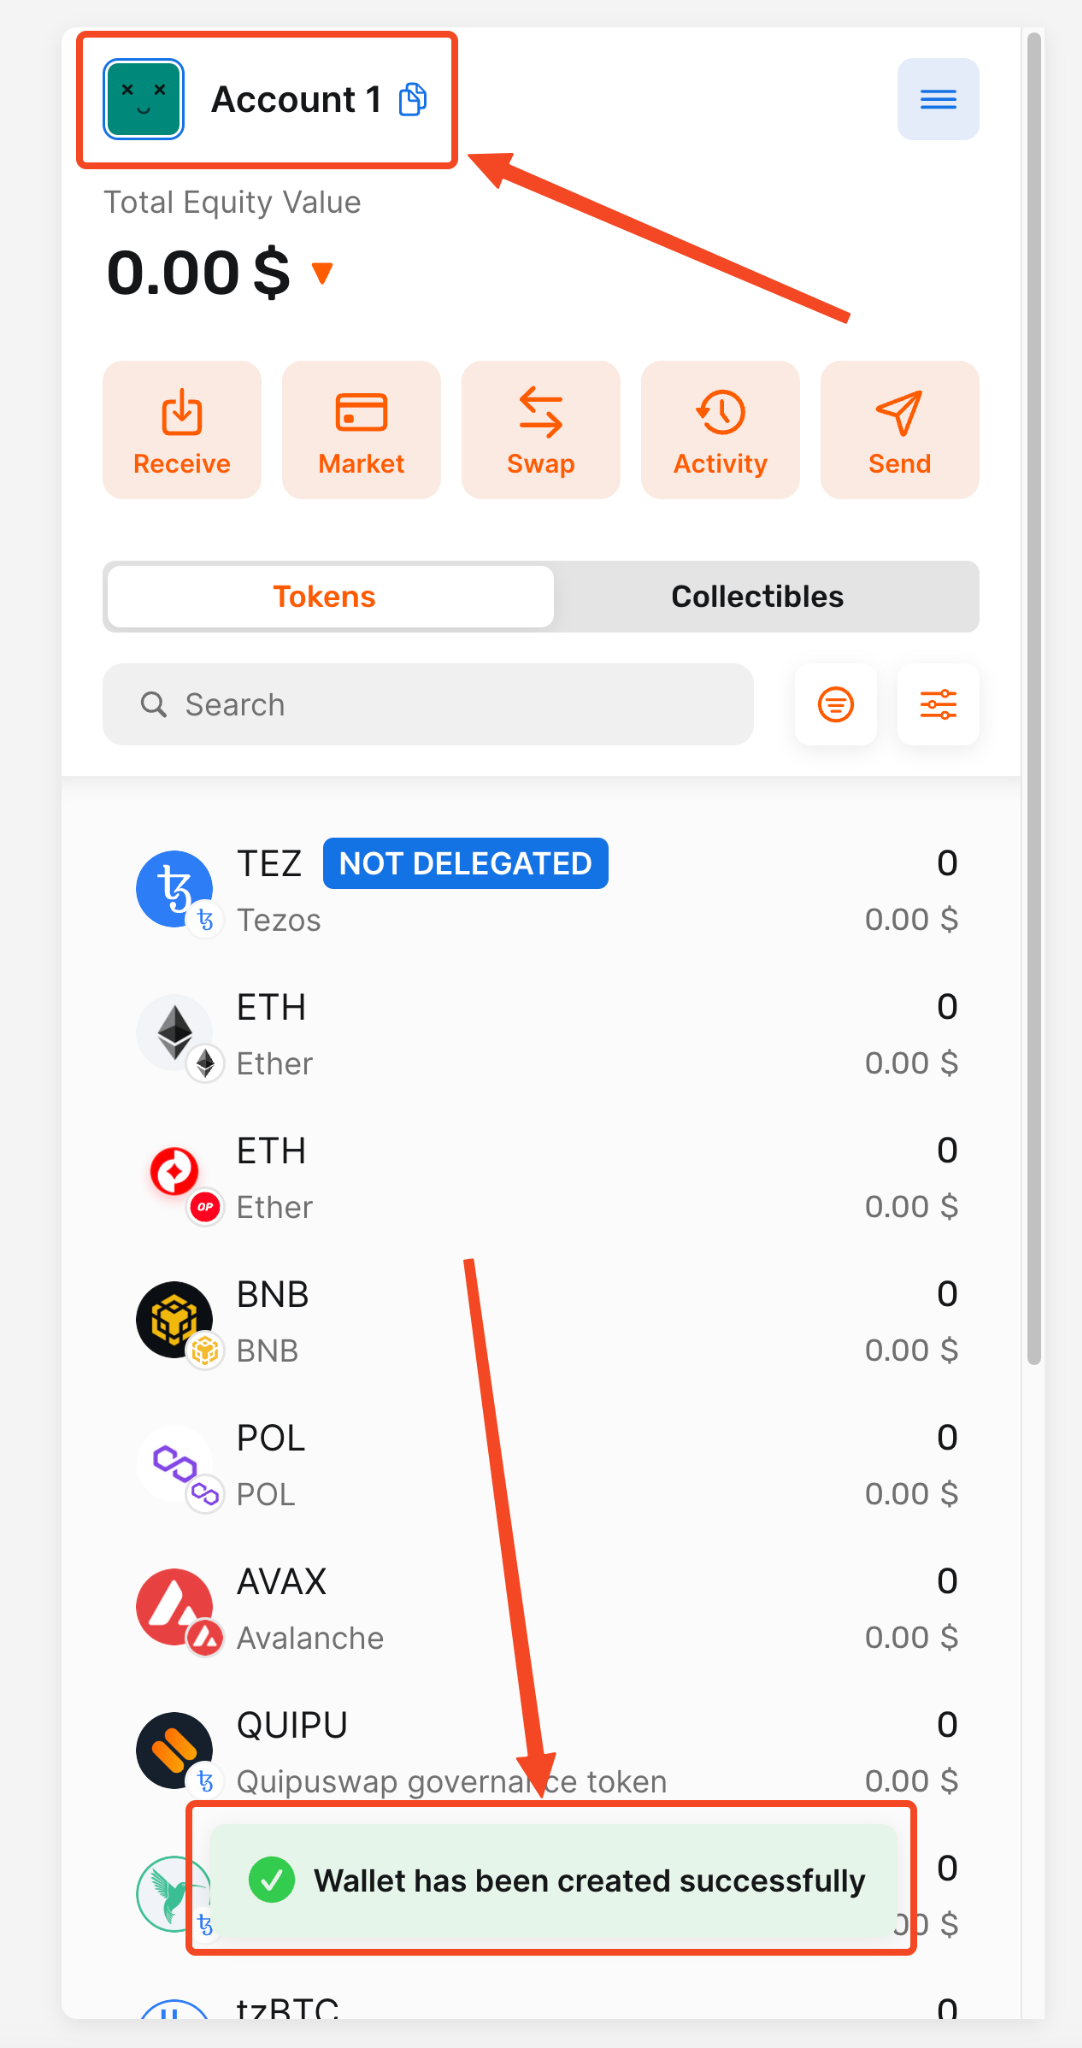
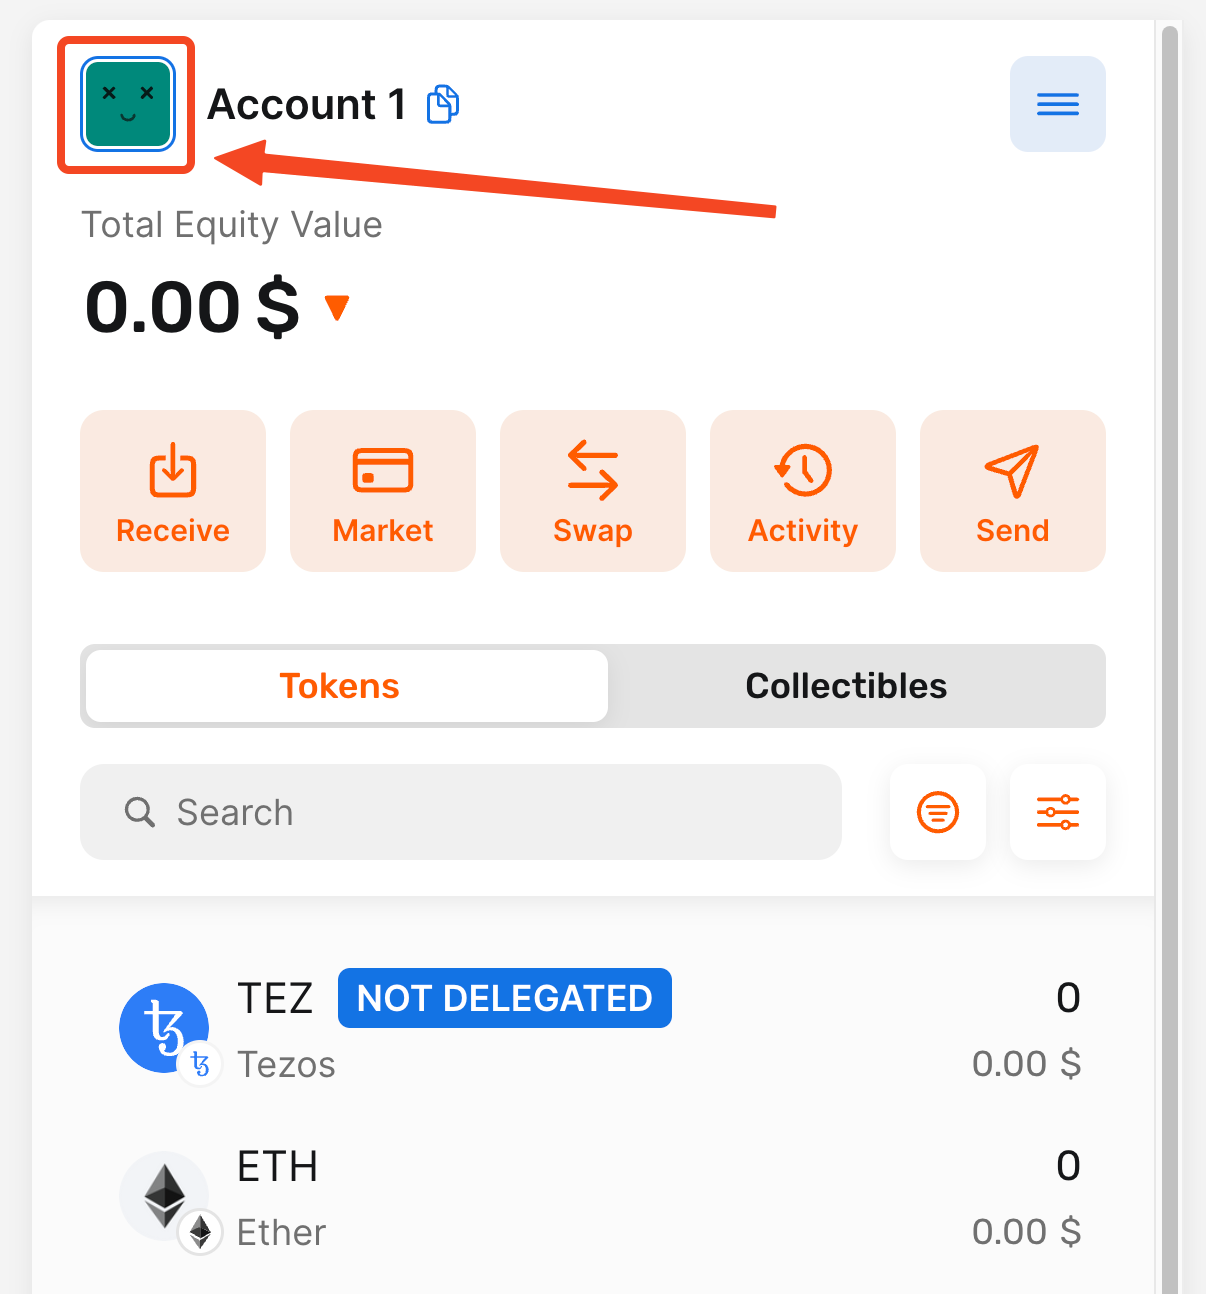
8. Click on your account icon (PFP)
Click on your account icon (PFP) to open the My Accounts menu
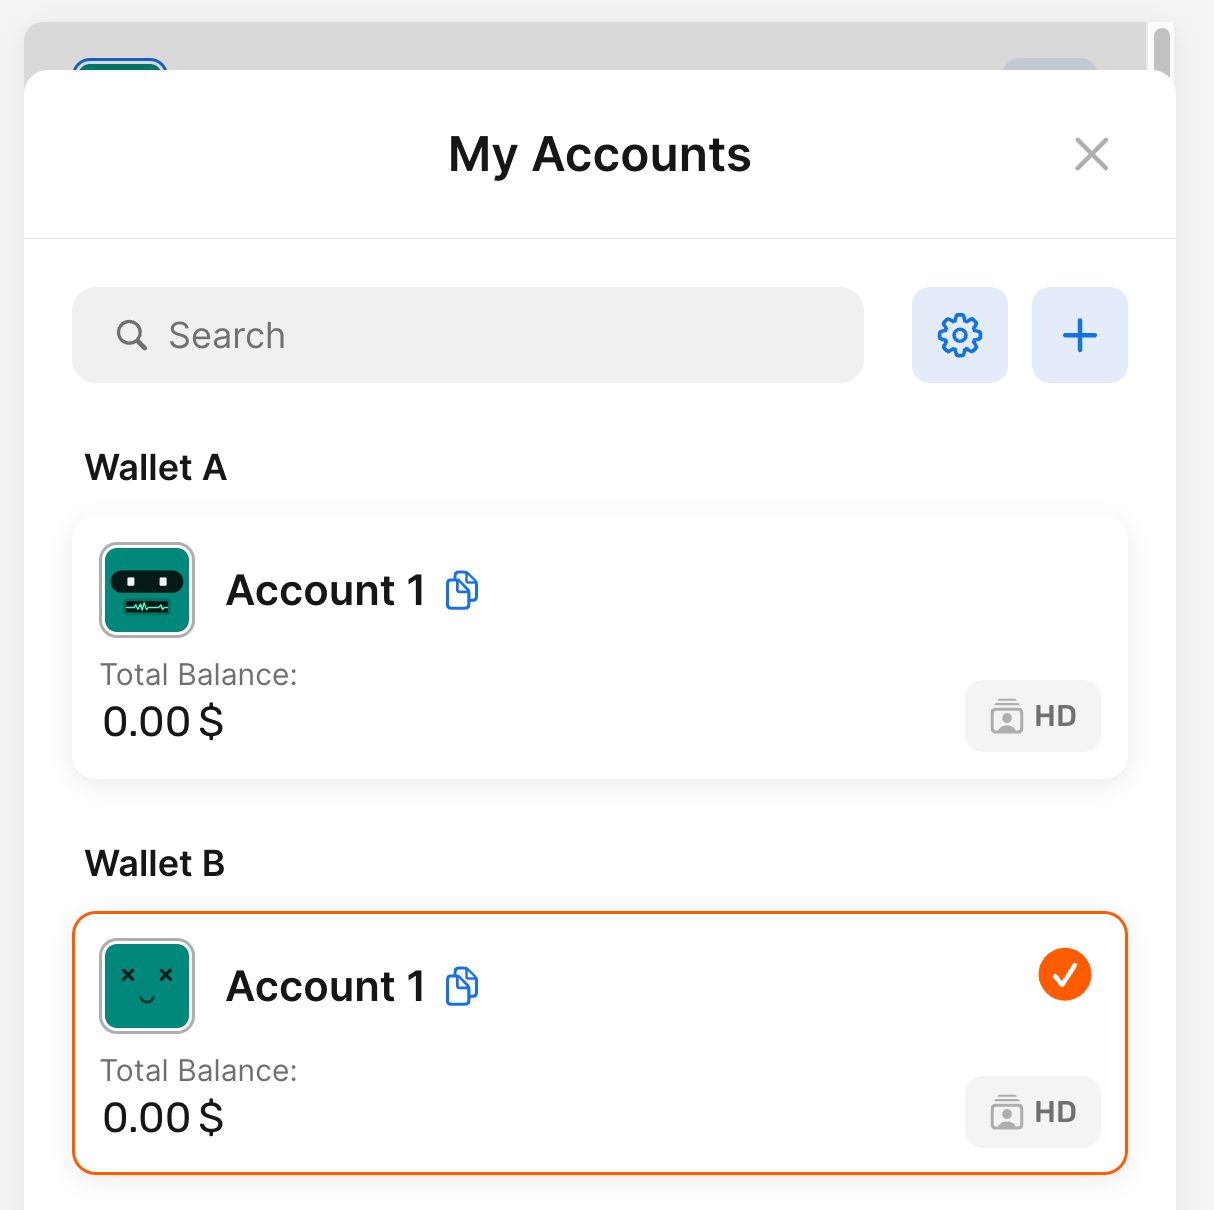
9. Verify the existence of the new wallet
You can see below that now you have TWO wallets: the previous one and the newly created one.
Conclusion
Congratulations! By following this step-by-step guide, you have successfully learned how to create a new wallet in the Temple Wallet browser extension. This process equips you with a fresh, secure address to manage your digital assets and interact with the decentralized web.
The Temple Wallet stands out as a versatile multichain crypto wallet, offering robust support for both the Tezos blockchain and various EVM (Ethereum Virtual Machine) compatible chains, including Ethereum, Binance Smart Chain (BSC), Polygon, Etherlink, and more. Setting up a new wallet is a fundamental step in harnessing the power of Temple's capabilities across these diverse ecosystems. Whether you're diving into Tezos DeFi or exploring EVM-based dApps and NFTs, your new Temple Wallet account serves as your secure gateway.
A critical part of the wallet creation process is the handling of your seed phrase. As emphasized in the guide, writing down your seed phrase correctly, storing it securely offline, and never sharing it is of paramount importance. This phrase is the sole key to accessing your funds; losing it or compromising it means losing access to your assets permanently. The verification step ensures you have correctly recorded this vital piece of information.
With your new wallet created, you'll notice it appears alongside any previous wallets within the Temple Wallet extension's My Accounts menu. This feature allows for easy management of multiple accounts from a single, convenient interface, streamlining your crypto activities. You are now ready to fund your new wallet, connect to dApps, and explore the full potential of the Tezos and EVM blockchains through the secure and user-friendly Temple Wallet. Remember to always practice safe crypto habits as you navigate the exciting world of Web3.