How to Create a New Account in the Temple Wallet
Step-by-step instructions on how to create a new account in Temple Wallet. Add multiple Tezos or EVM accounts easily within the multichain Temple Wallet interface for improved crypto asset management.
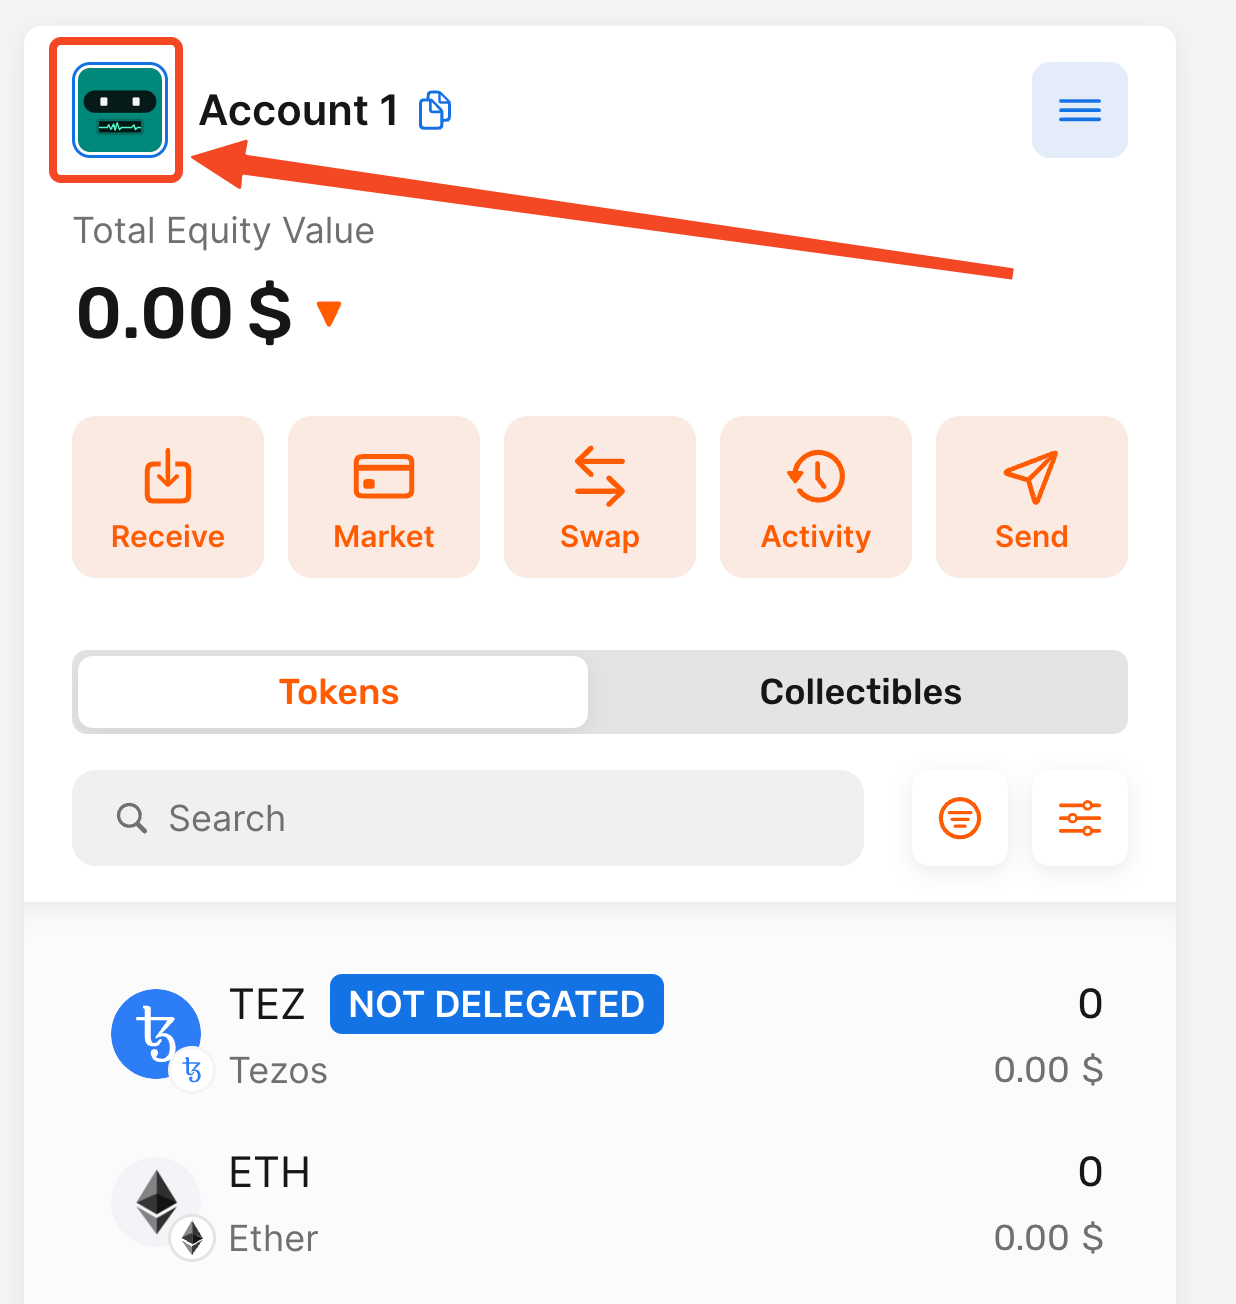
1. Open your Temple Wallet Extension and click on your account icon (PFP)
By clicking on your account icon (PFP), you will open the My Accounts menu in the Temple Wallet Extension.
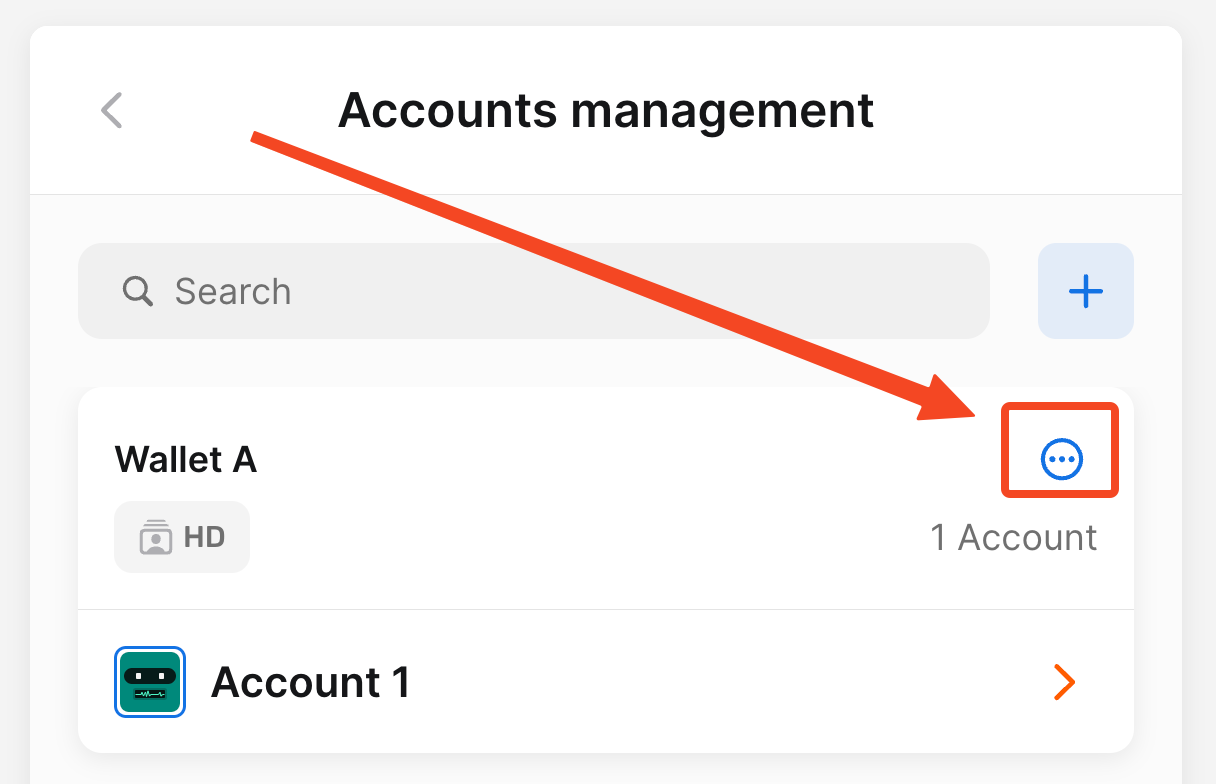
2. Click on the button with the gear icon
Clicking on the button with the gear icon will open the Accounts management page.

3. Click on the three dots
After clicking on the three dots on the wallet to which you want to add a new account, the Wallet Actions drop-down menu will be opened.
For our example, we are choosing Wallet A.
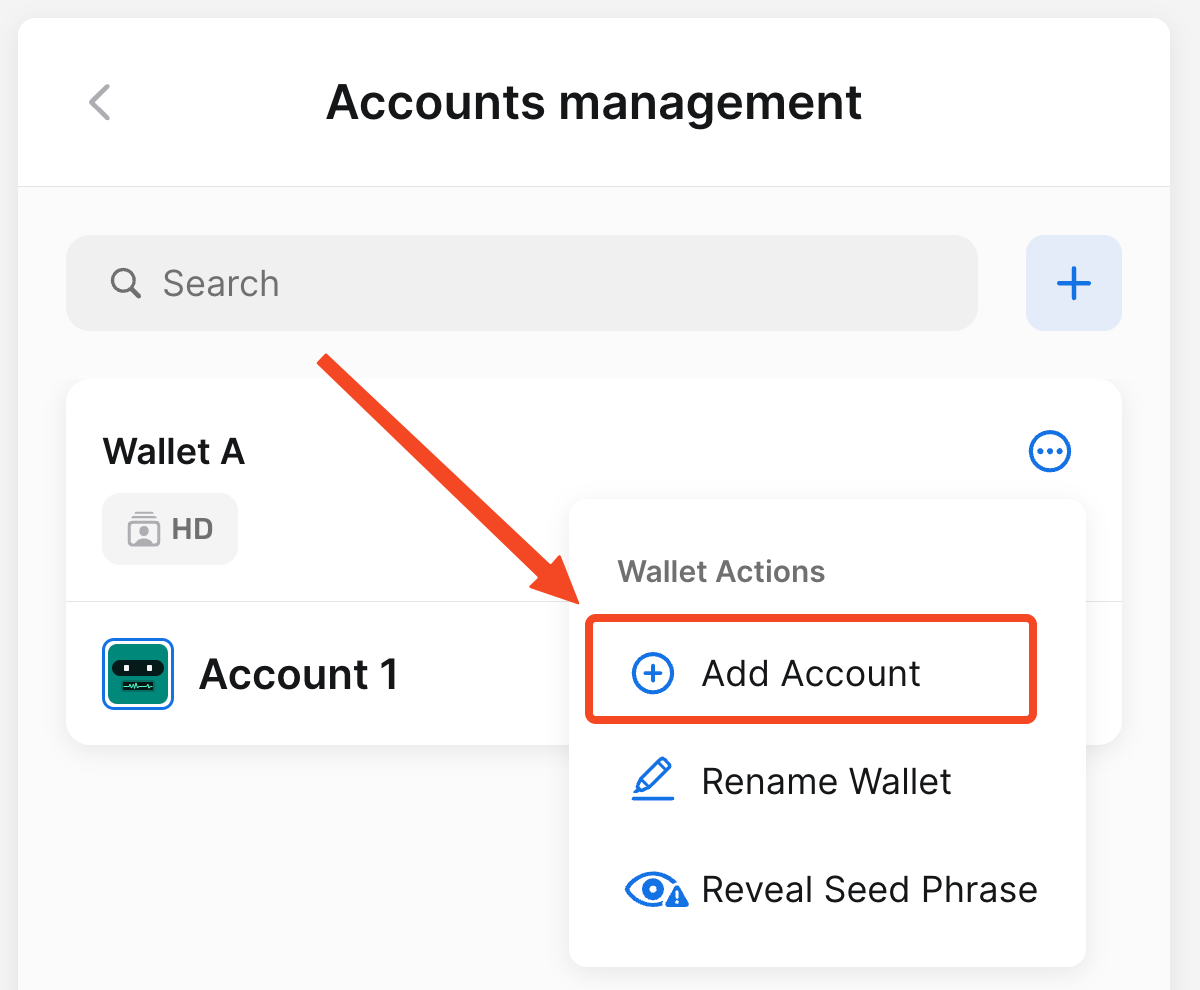
4. Click on the Add Account option
Click on the Add Account option to add a new account to the selected wallet.
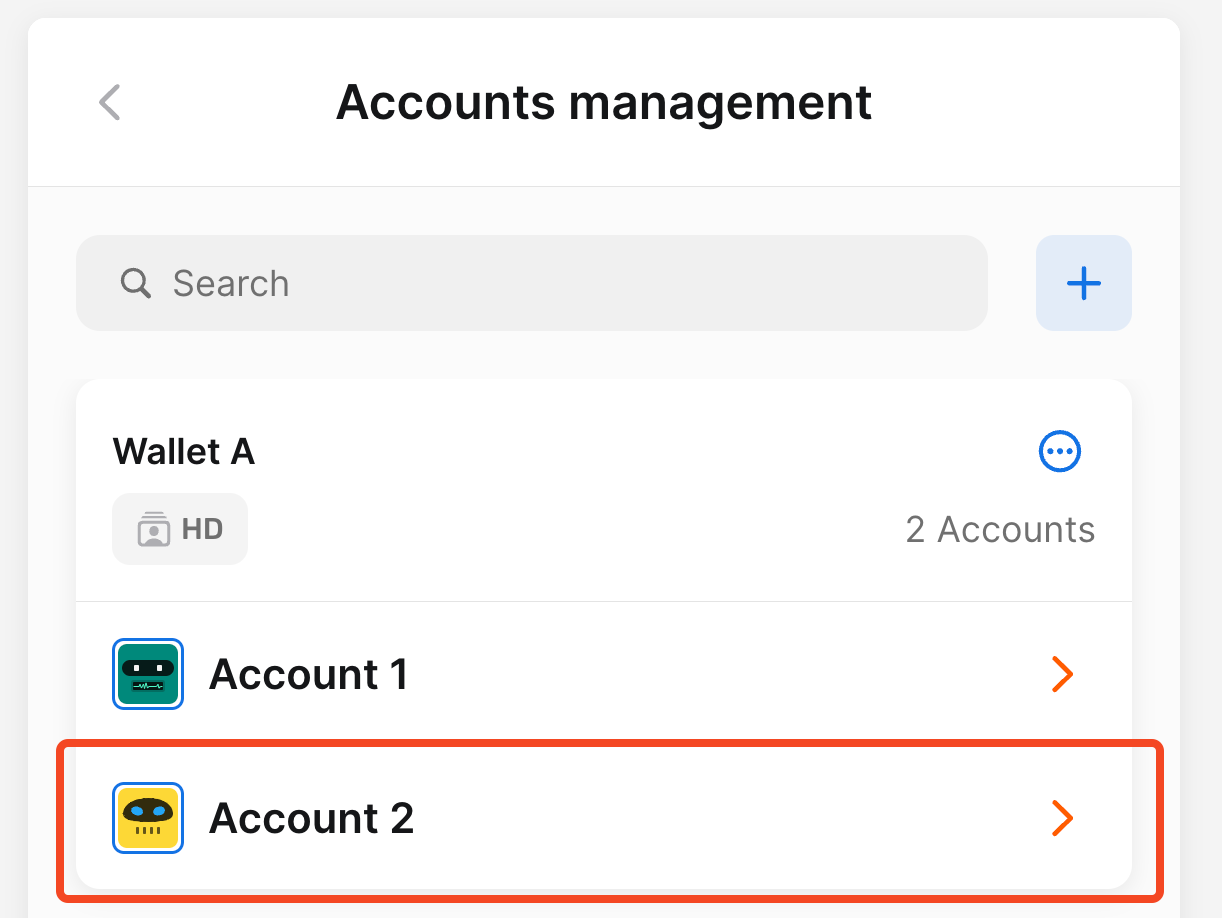
5. Check the account creation
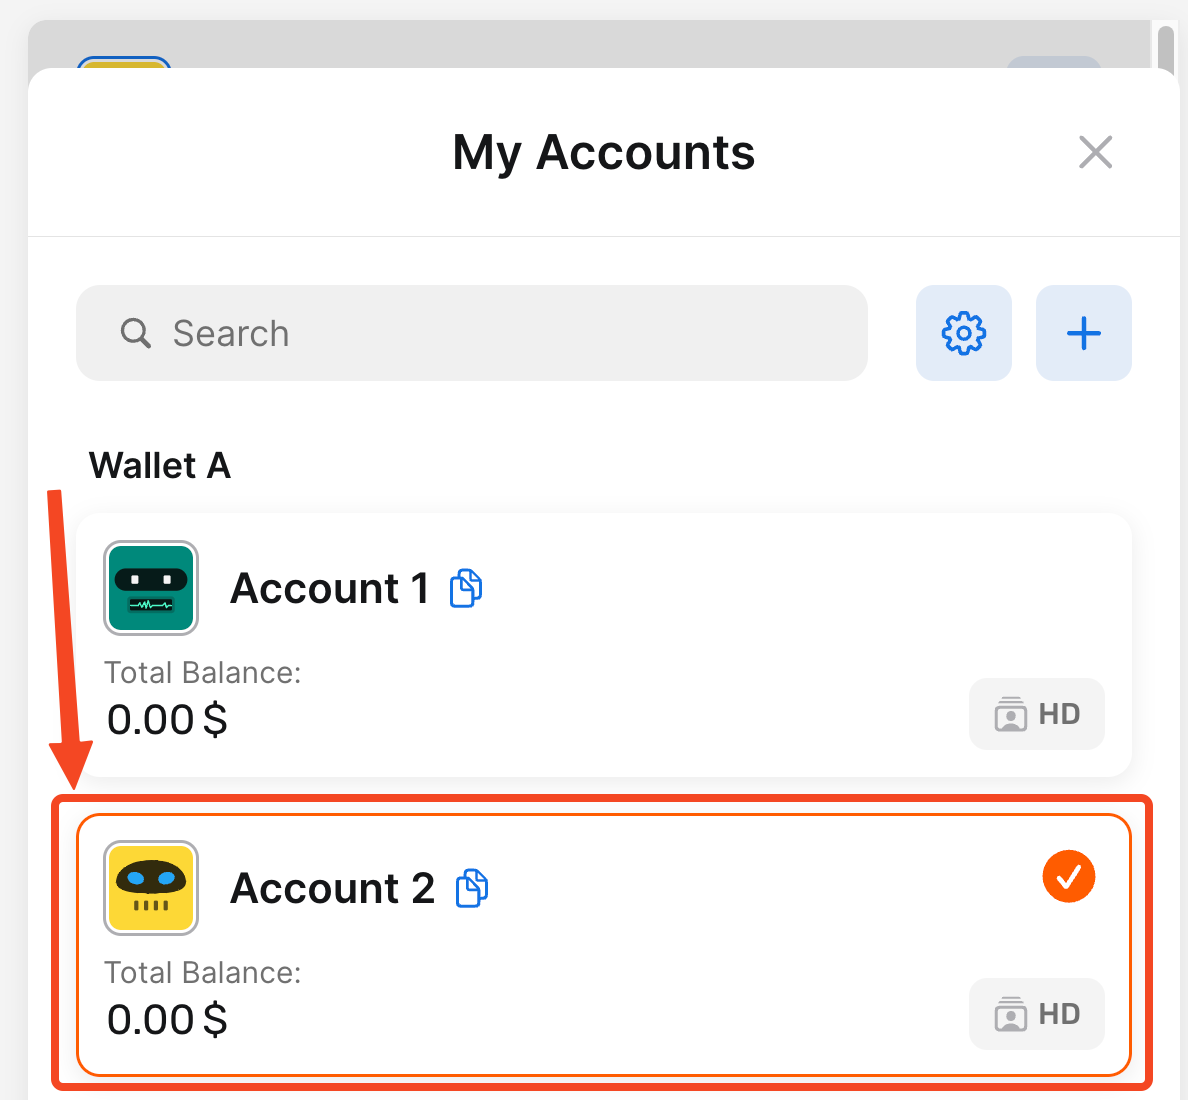
Your new account will immediately appear below your last account.
In our example, Account 2 appeared after the previous Account 1.
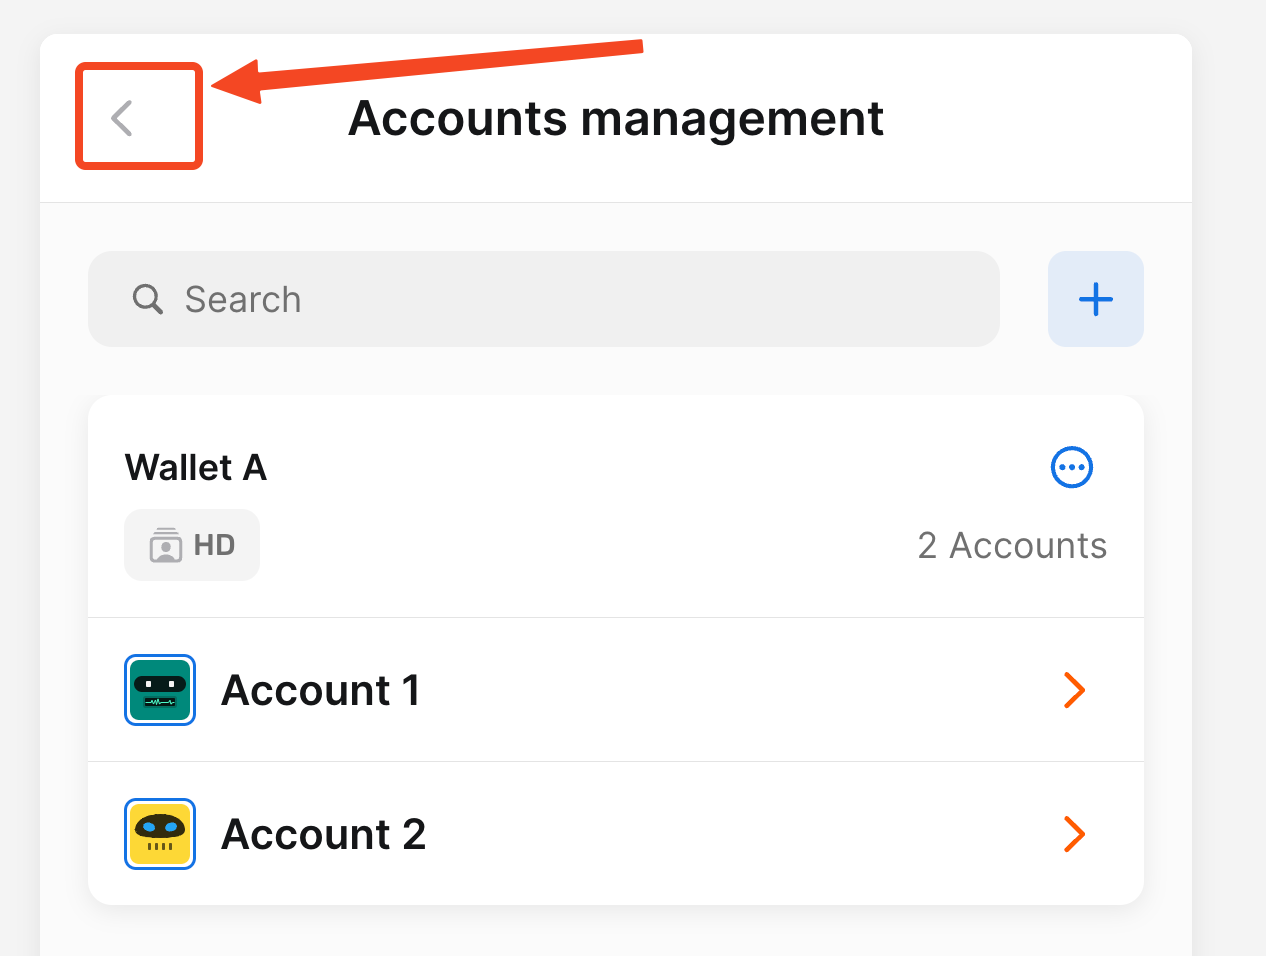
6. Click on the back (<) button
By clicking on the back button in the top left corner, the Accounts management page will close, and you will return to the My Accounts menu.
7. Check your current active account
If you want to change the active account, click on it in the My Accounts menu. Click on the x icon in the top right corner to close the My Accounts menu.
Conclusion
Creating a new account within your Temple Wallet is a straightforward process that significantly enhances your ability to manage your digital assets across multiple blockchain ecosystems. As a versatile multichain wallet, Temple now seamlessly supports both Tezos and a wide range of EVM-compatible blockchains (like Ethereum, Binance Smart Chain, Polygon, Etherlink, and more), making effective account management crucial for navigating the diverse Web3 landscape.
Following the steps outlined in this guide allows you to easily add multiple accounts under a single Temple Wallet instance. This feature is invaluable for users who wish to organize assets, manage identities, enhance security, and Separate network activities.
By leveraging the simple interface – accessing Accounts management through your PFP and the gear icon, then using the Add Account option for the desired wallet – you gain granular control over your crypto activities. Remember, each new account generated within Temple is distinct but still ultimately derived from your single master seed phrase.
Whether you're a seasoned DeFi user juggling assets across Ethereum and Tezos or a newcomer exploring the possibilities of multichain interaction, knowing how to create and manage multiple accounts in the Temple Wallet is a fundamental skill. This capability empowers you to interact securely and efficiently with the ever-expanding world of decentralized applications and digital finance. Utilize this feature to maintain a clear, organized, and flexible approach to your multichain crypto management within the powerful Temple Wallet environment.