How to Connect the Temple Wallet to the dApp
Step-by-step guide on how to connect Temple Wallet to dApps. Learn to link your multichain Temple Wallet extension supporting Tezos and EVM blockchains (like Ethereum, Polygon, Etherlink) to access DeFi, NFTs, DAOs, and other decentralized services securely.
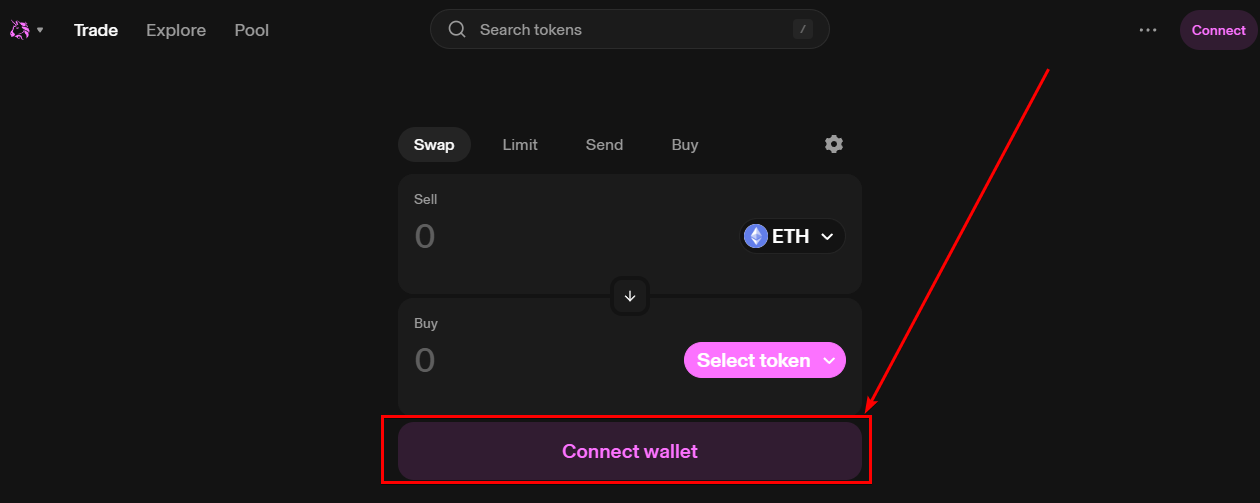
1. Open the dApp and click on the Connect wallet button
Open the dApp that you want to use with the Temple Wallet Extension and click on the Connect wallet button or a similar one.
For our example, we will use the Uniswap app.
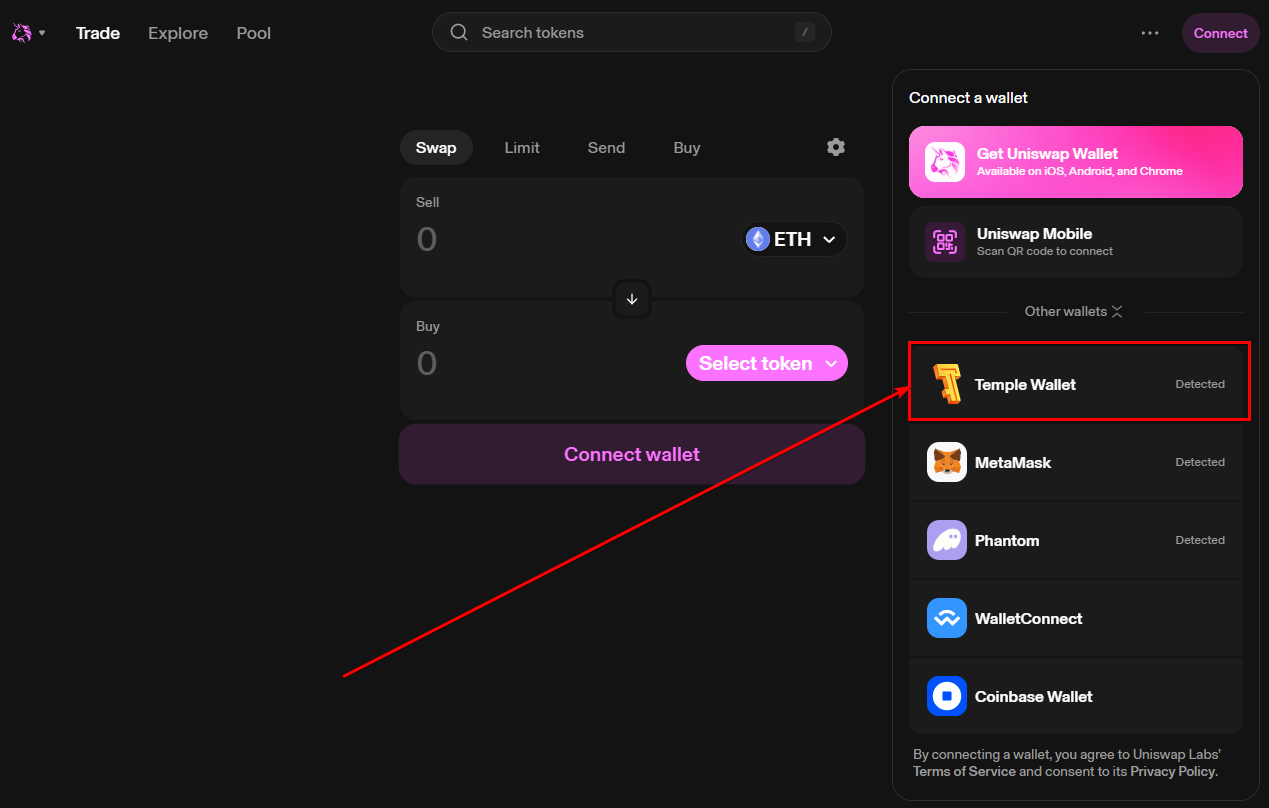
2. Click on the Tempe Wallet option
In the opened window or menu, choose the Temple Wallet as a wallet that can be connected to the dApp.
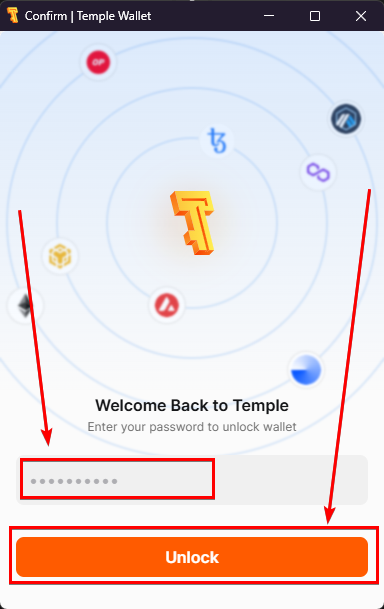
3a. Enter your wallet password
You need to enter your current wallet password to unlock your Temple Wallet to proceed.
3b. Click on the Unlock button
After you have entered your current wallet password, click on the Unlock button to unlock your wallet and proceed to connect it to the dApp.
4. Click on the Account
Click on the account to open the Account management menu that will allow you to choose which account from which wallet you want to connect.
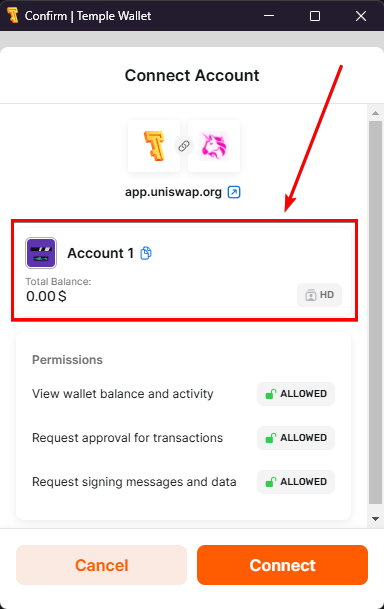
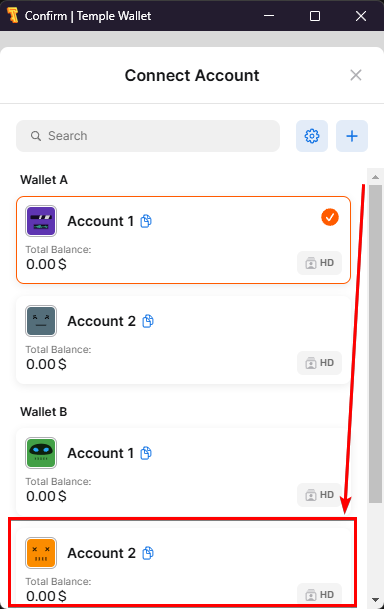
5. Click on the desired Account
In the Account management menu, click on the account that you want to choose. You can select any account from any wallet that you previously have imported.
For our example, we will use Account 2 from Wallet B.
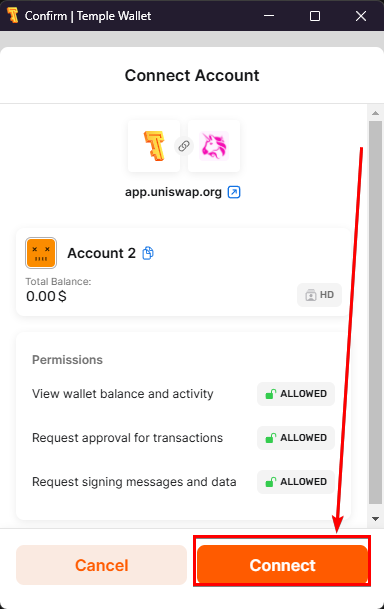
6. Click on the Connect button
Click on the Connect button to finish the connection to the dApp process and connect the chosen account to the dApp.
7. Verify the successful connection of the Wallet
Verify in the dApp page that your Temple Wallet was successfully connected to the dApp.
In our example, you can see that our address appeared in the top right corner of the Uniswap app interface.

Conclusions
Successfully connecting your Temple Wallet to a decentralized application (dApp) is a fundamental step toward interacting with the vibrant world of Web3. By following the steps outlined in this guide—from opening your chosen dApp and selecting Temple Wallet to unlocking your wallet and authorizing the connection—you can seamlessly bridge your assets and identity to a vast array of online platforms.
Temple Wallet's robust multichain capabilities mean this process grants you access not only to the innovative dApps on the Tezos blockchain but also to the extensive ecosystems built on EVM-compatible chains like Ethereum, Polygon, BNB Smart Chain, Etherlink, and others. Whether you're looking to engage with DeFi protocols like Uniswap, explore NFT marketplaces, participate in DAOs, or utilize other decentralized services, establishing this secure connection via your Temple Wallet extension is your gateway.
Remember to always verify the connection status within the dApp interface, often indicated by your wallet address appearing, typically in the top corner. This confirms that your Temple Wallet is successfully linked and ready for transactions or interactions. Mastering this connection process empowers you to fully leverage the versatility of your multichain Temple Wallet across the diverse landscape of the decentralized web. Keep exploring, stay secure, and enjoy the power of seamless dApp interaction with Temple Wallet.