How to Change the Default RPC in the Temple Wallet
Learn how to easily change the default RPC in your multichain Temple Wallet. Follow our step-by-step guide to add custom RPC endpoints for Tezos & EVM networks, enhancing connection speed and reliability.
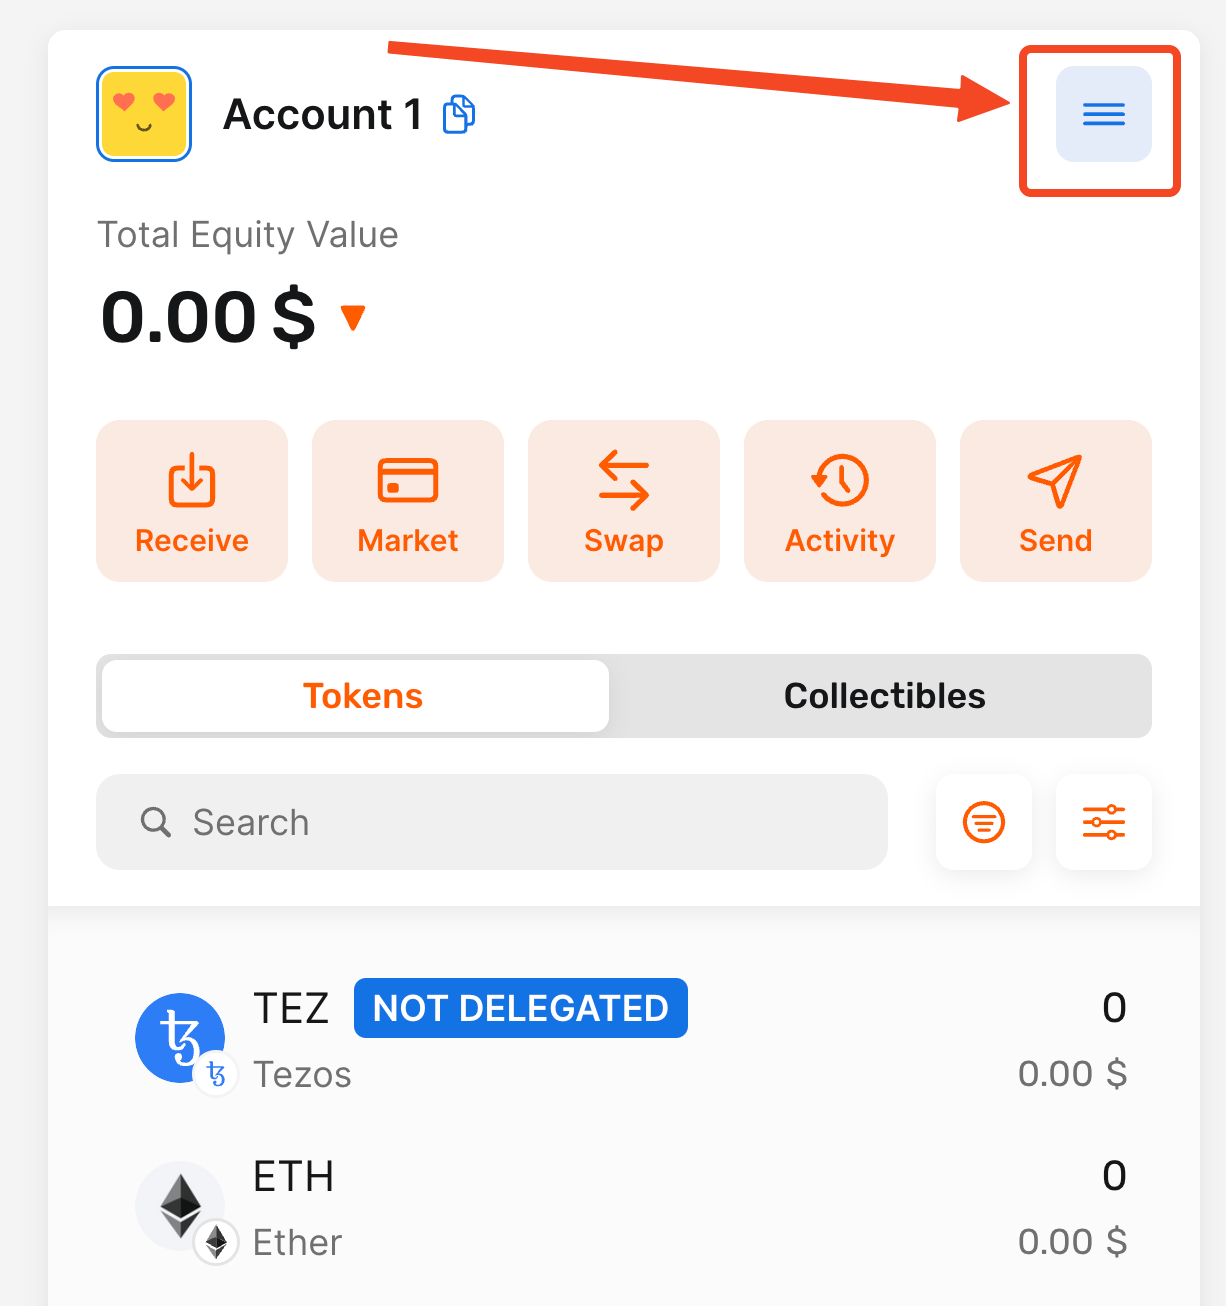
1. Open your Temple Wallet Extension and click on the Menu icon
By clicking on the Menu icon, you will open the Menu dropdown with a lot of necessary options on how to manage your wallet.
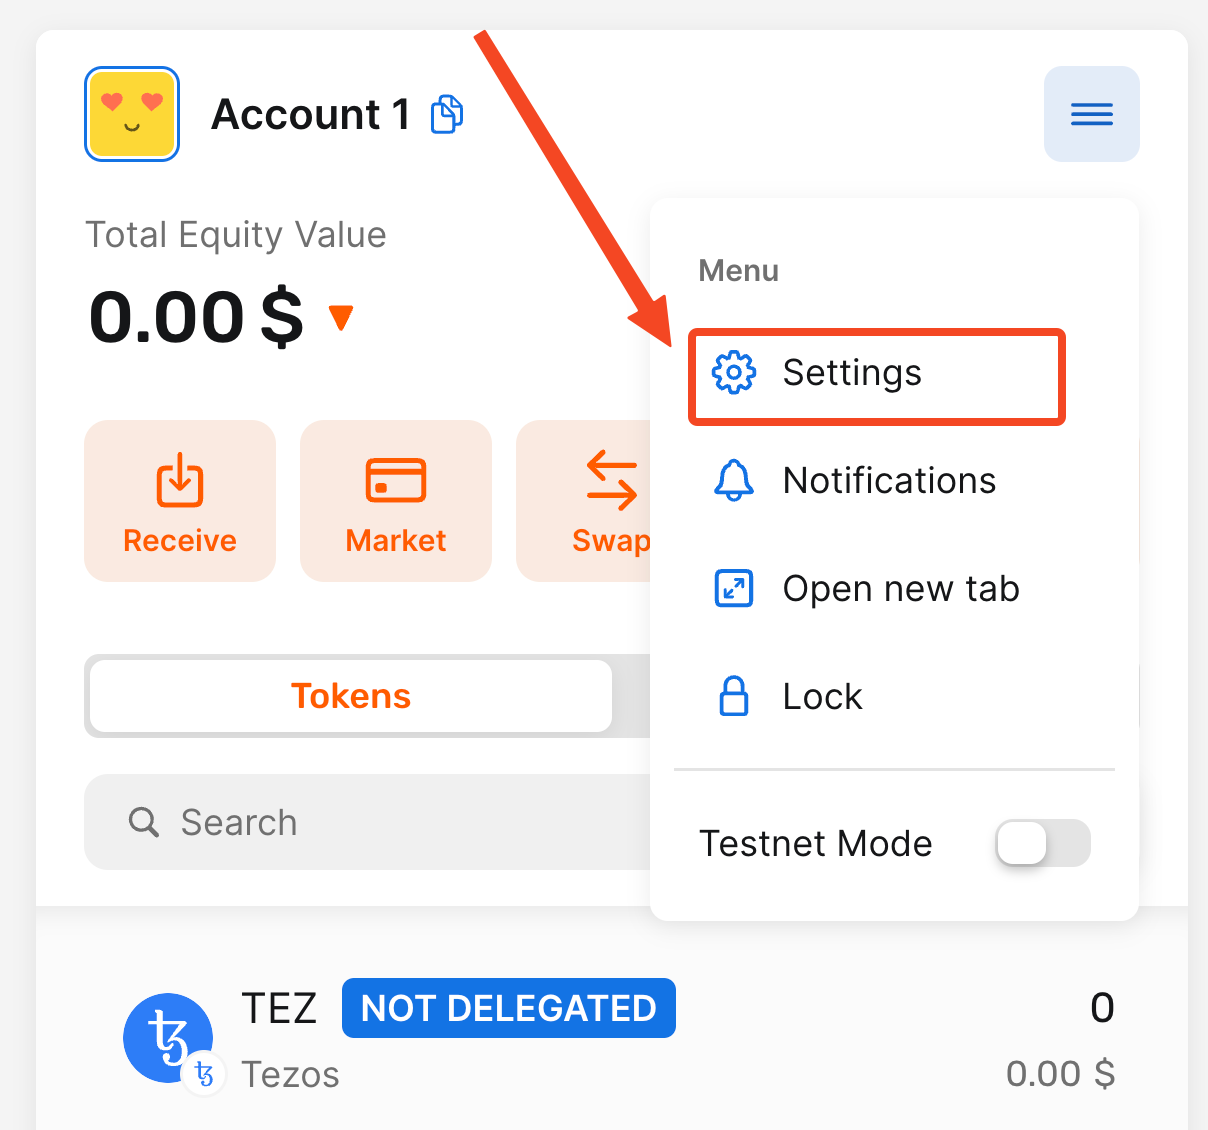
2. Click on the Settings option
Click on the Settings option in the Menu dropdown to open the settings in the Temple Wallet Extension.
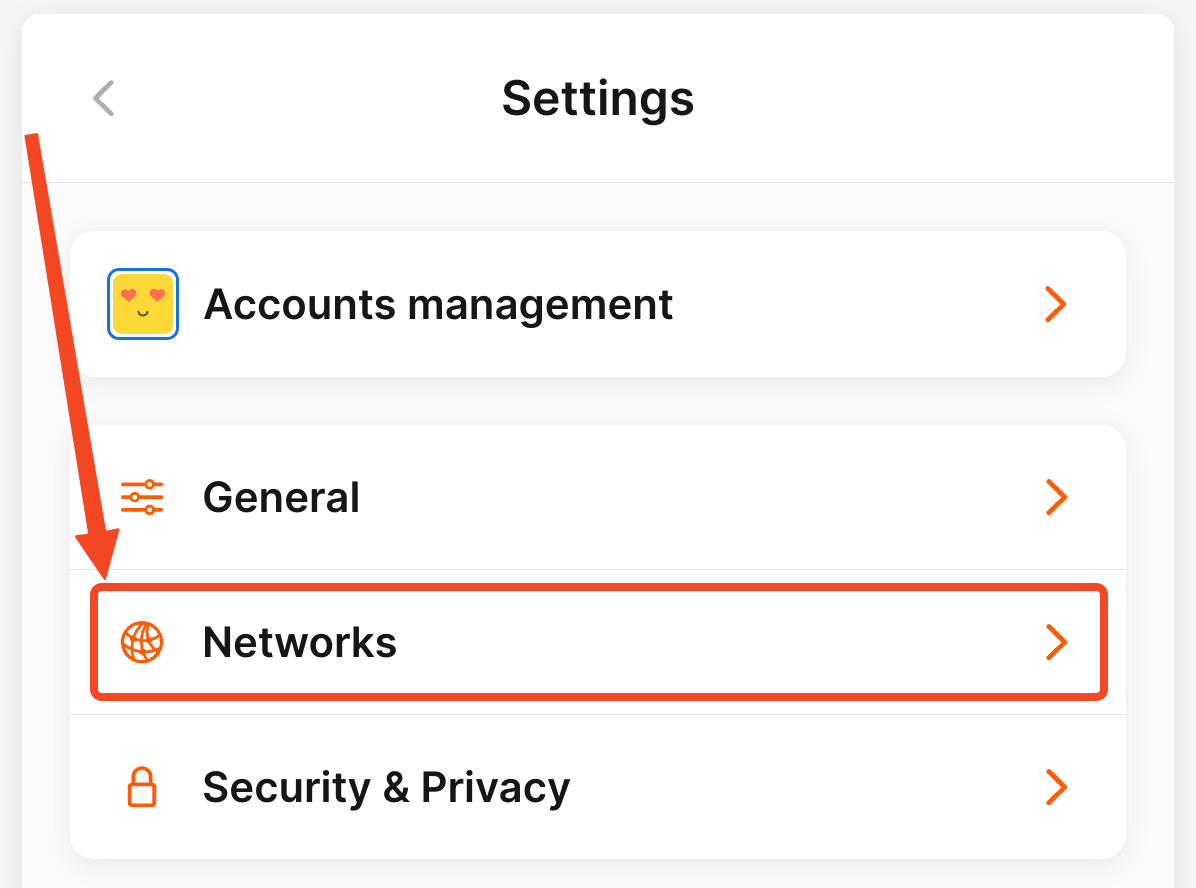
3. Click on the Networks option
Click on the Networks option to open the Networks page.
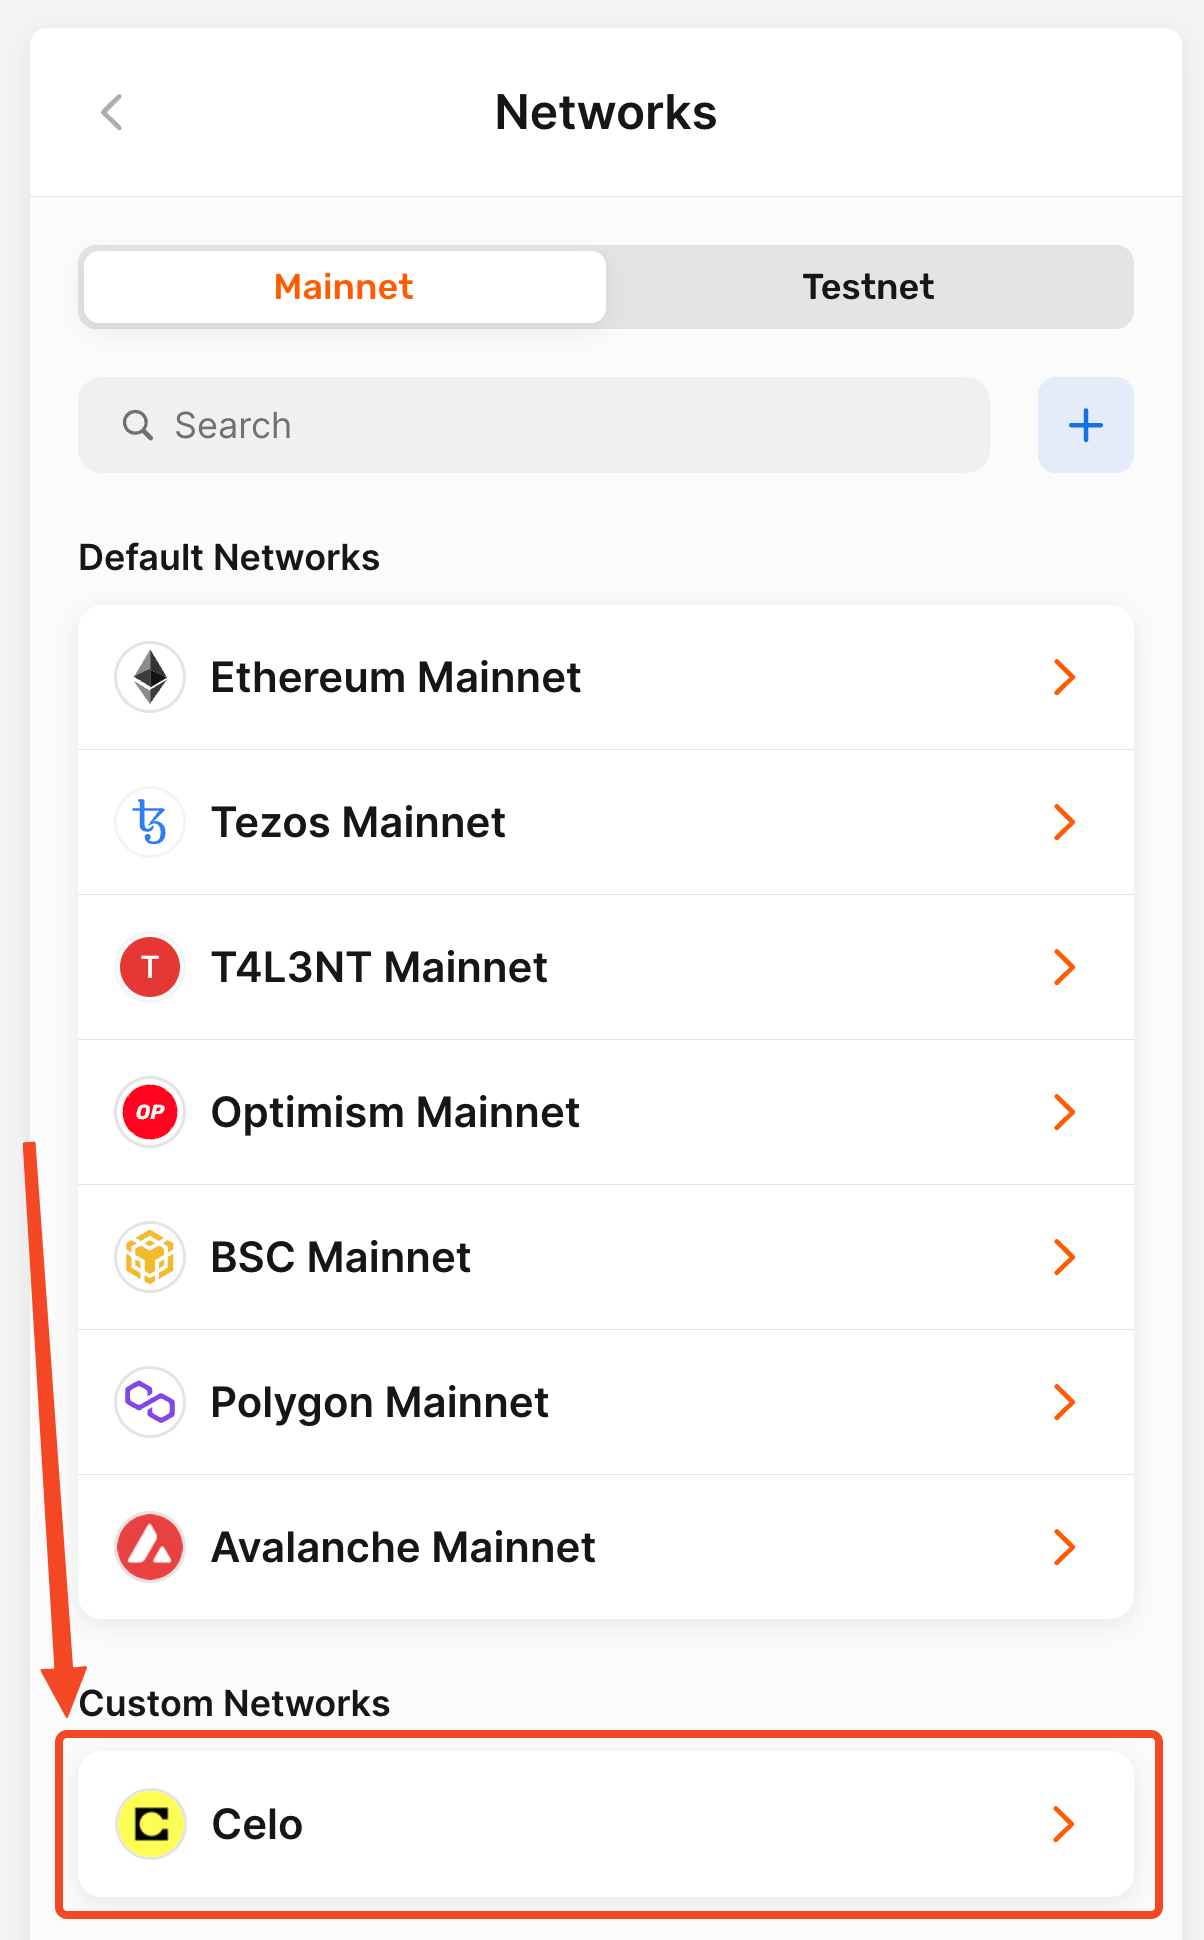
4. Click on the network that you want to change
Click on the network in the Default Networks or Custom Networks section that you want to change.
For our example, we will click on the Celo network that we have added in the guide listed below.
 Temple Wallet
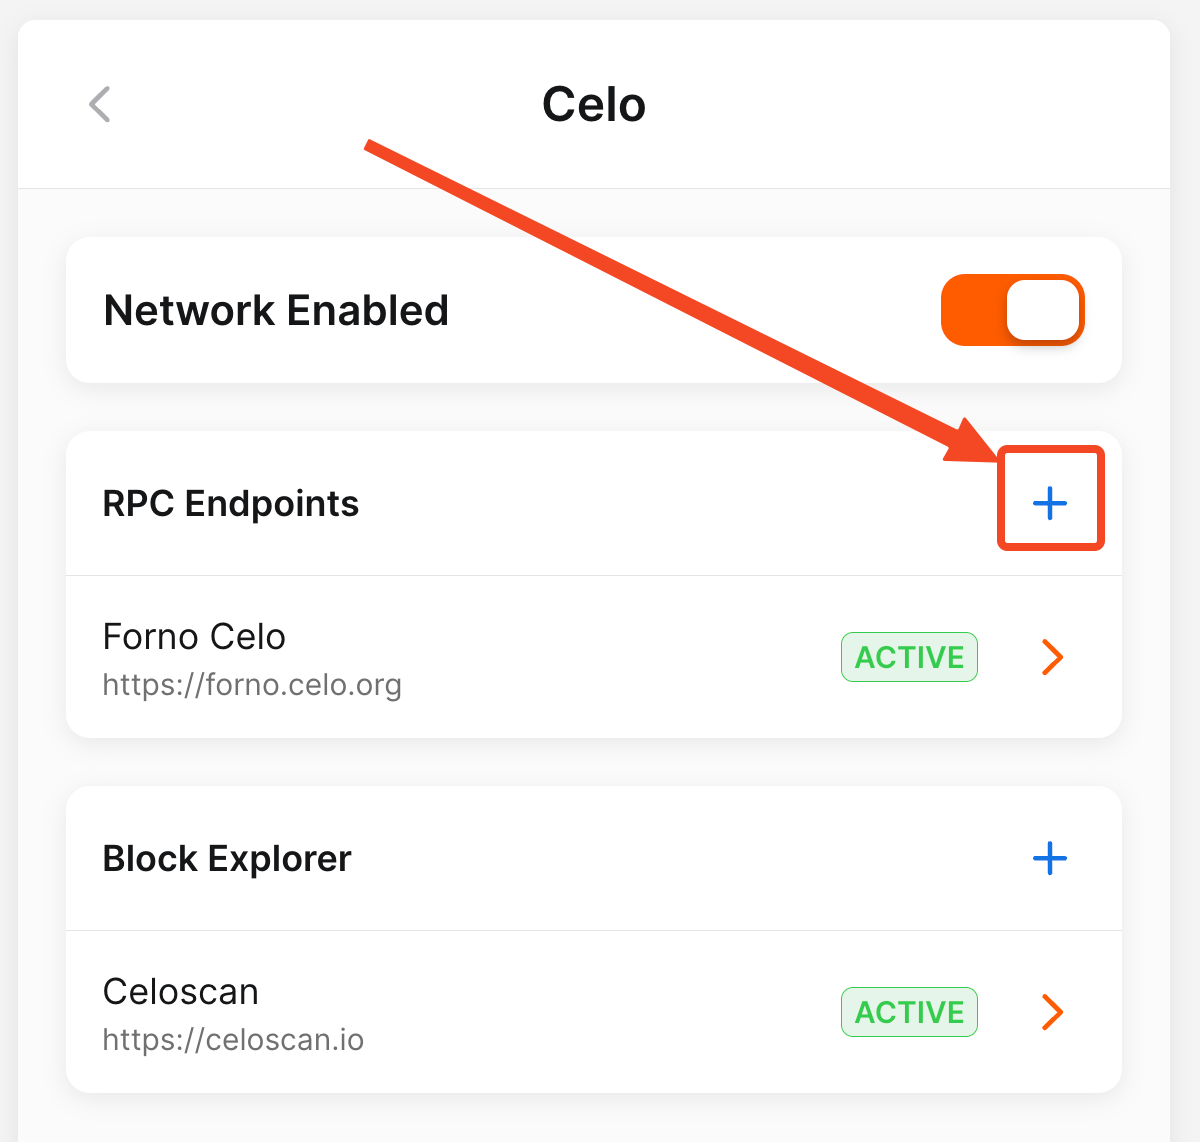
5. Click on the plus (+) button in the RPC Endpoints section
Click on the plus (+) button in the RPC Endpoints section to start the process of adding a new RPC endpoint.
6. Insert the Name and URL of the RPC
Enter (insert or paste) the RPC name in the Name field and the RPC URL in the URL field.
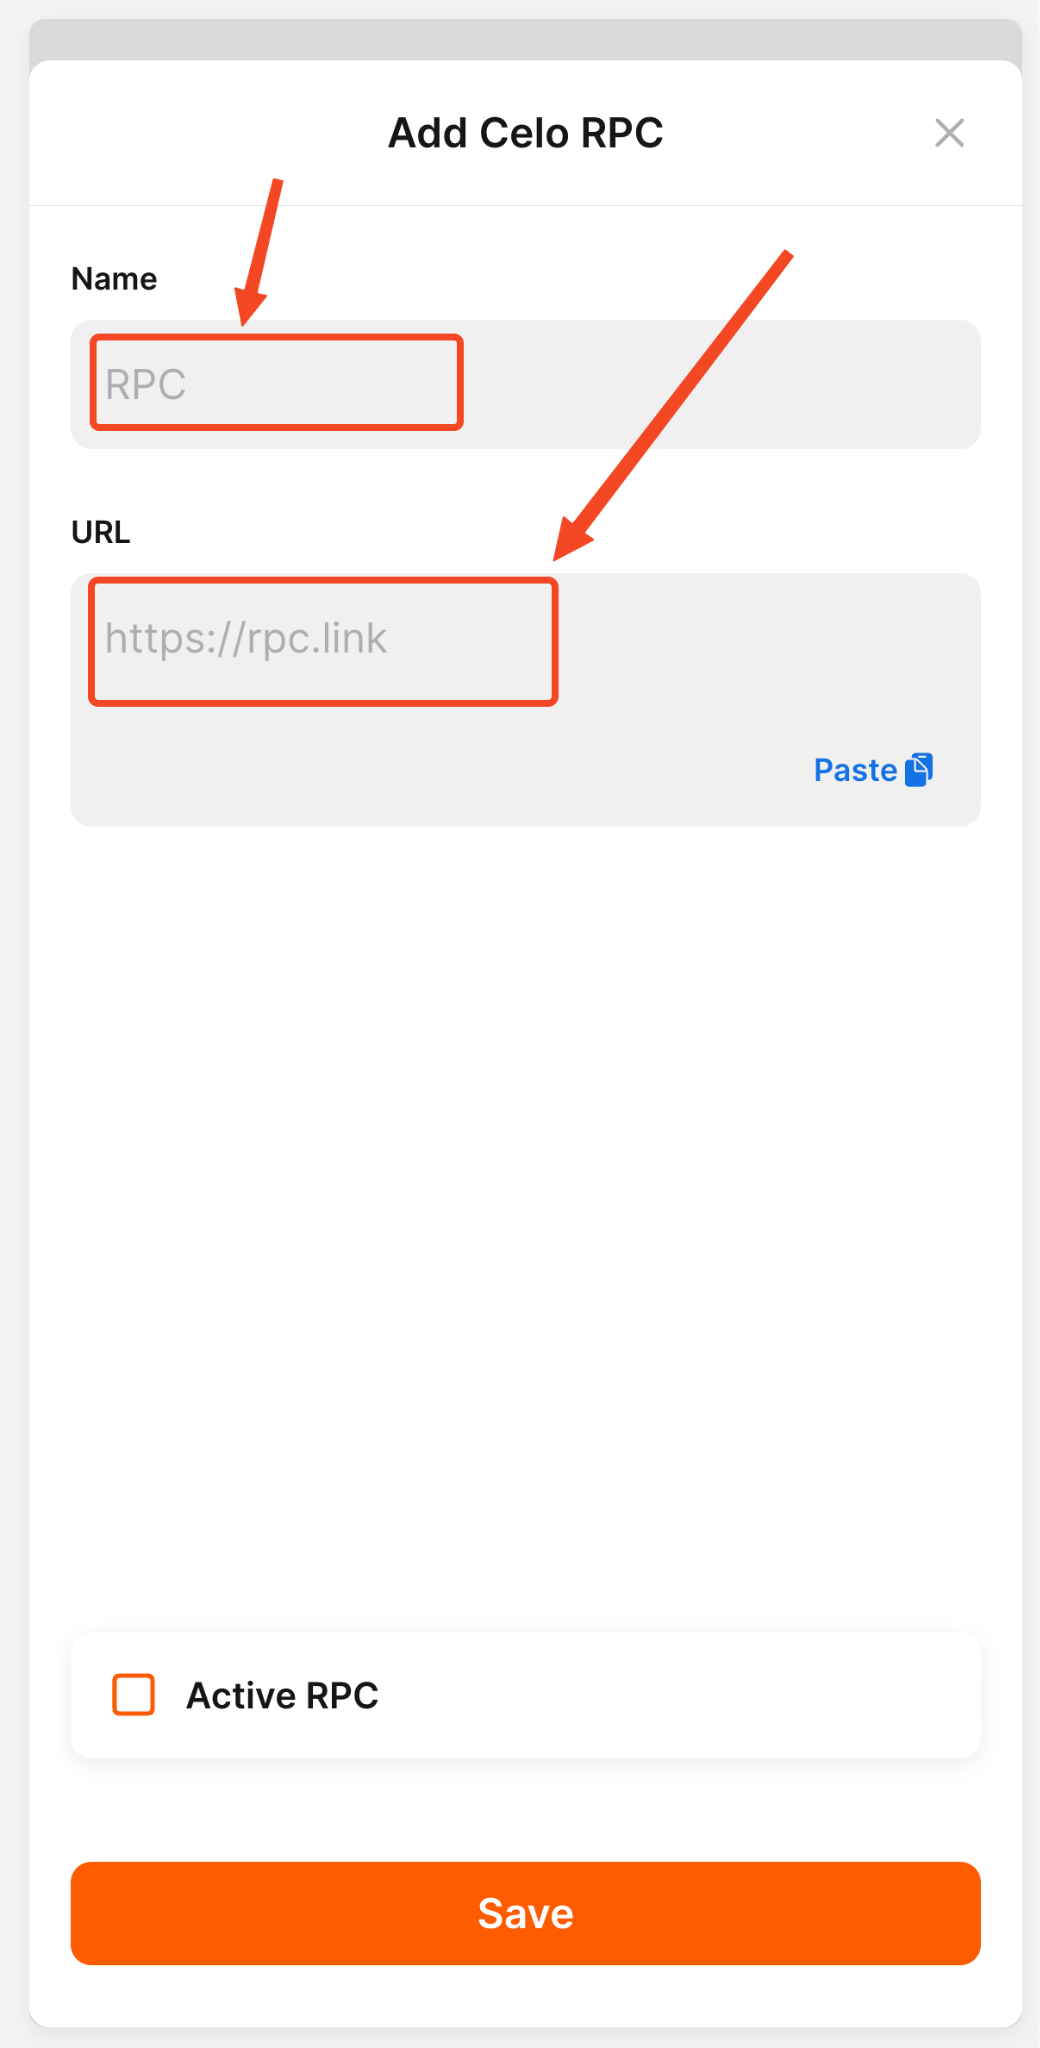
7. Check the Active RPC checkmark and click the Save button
If you want to activate the new RPC instantly, check the Active RPC checkmark at the bottom of the page, and your new RPC will be used as the default RPC in the wallet for that network. Then click the Save button.
For our example, we will use the following configuration of the new RPC:
- Name - 1rpc
- URL - https://1rpc.io/celo

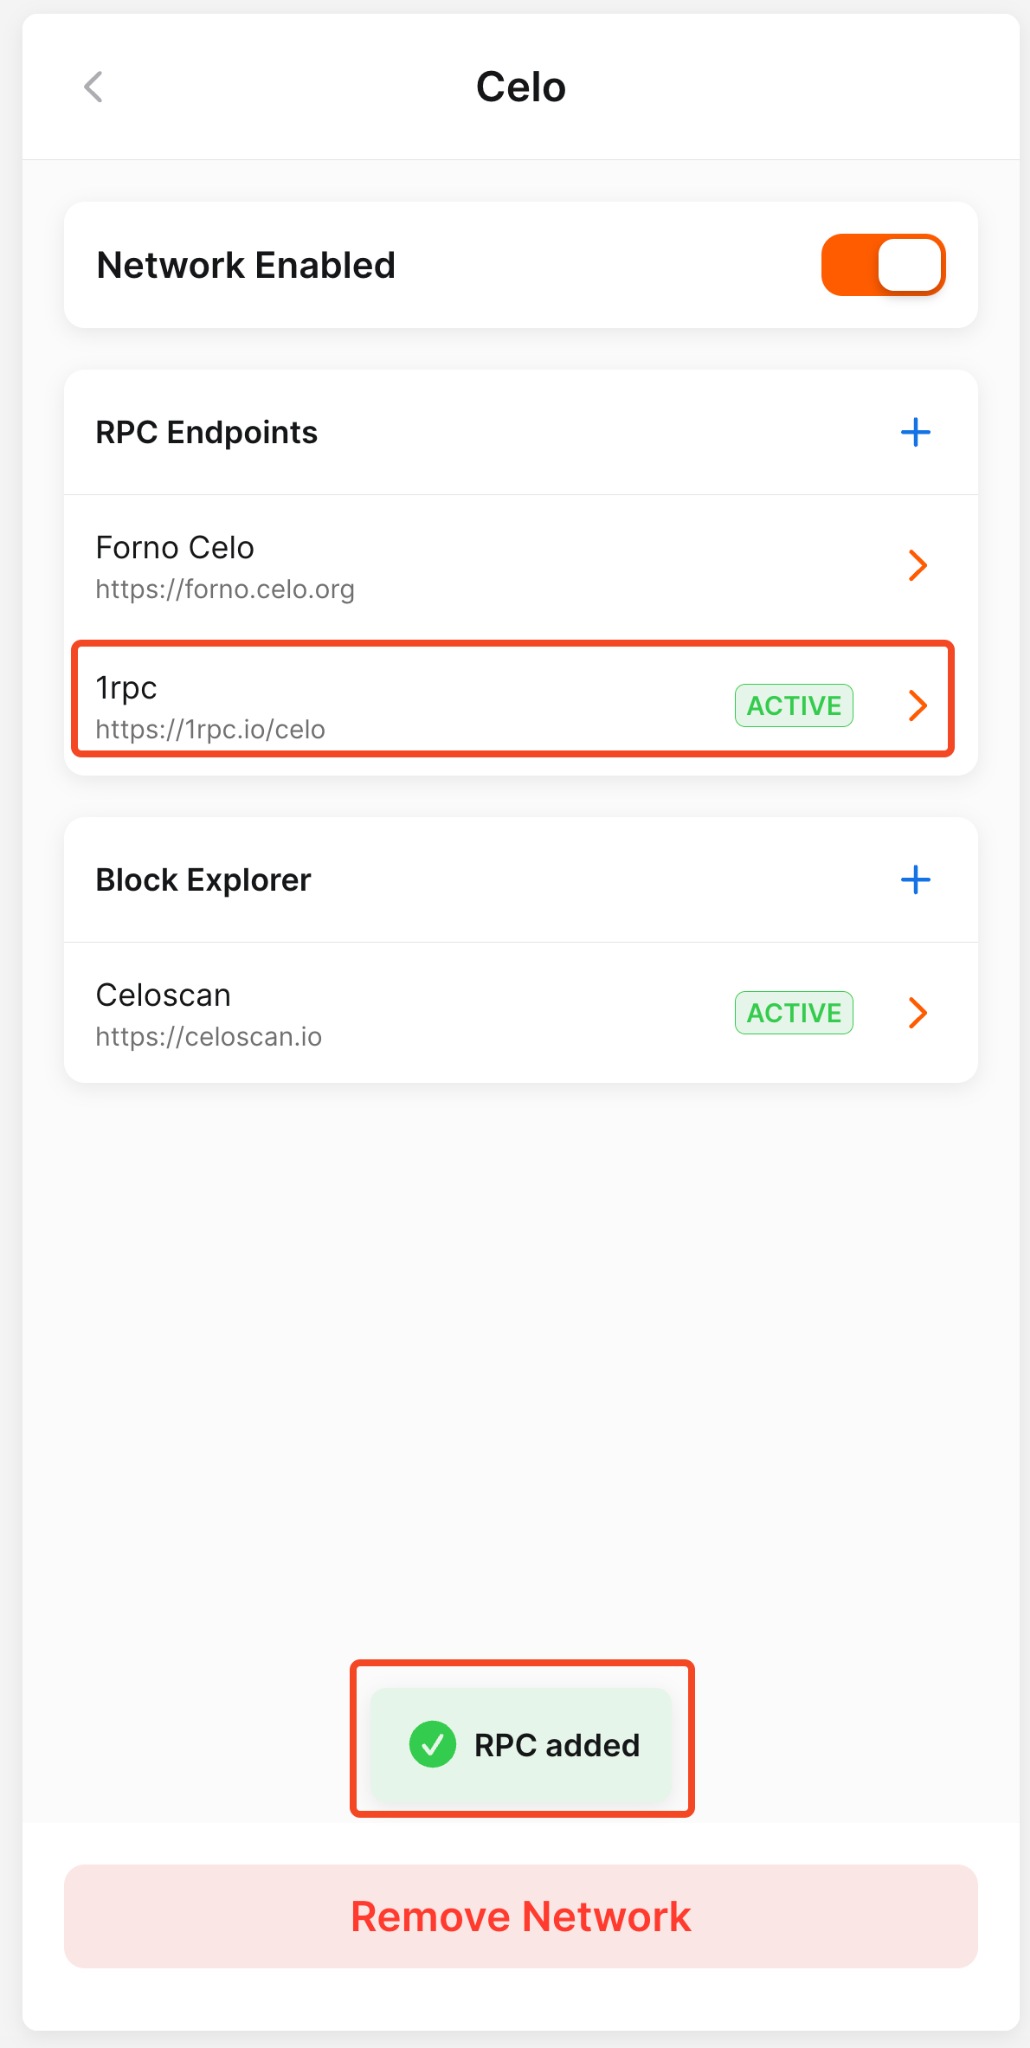
8. Verify the successful addition and activation of the RPC
After saving the new RPC, you will see a green notification with the RPC added text at the bottom of the page, and your new RPC will have a green label with the ACTIVE status.
Conclusion
Mastering your Temple Wallet involves understanding how to optimize your connection to various blockchain networks. This guide has provided a clear, step-by-step process on how to change the default RPC for any network within your wallet. Whether you're interacting with Tezos or one of the many supported EVM blockchains, having the ability to switch to a custom RPC endpoint is a powerful feature.
By following the outlined instructions – navigating through the Menu, accessing Settings, selecting Networks, choosing your target network (from either Default Networks or Custom Networks), and adding a new RPC endpoint with its specific Name and URL (often sourced from reliable providers like ChainList) – you gain greater control over your blockchain interactions.
Changing the default RPC can be crucial for several reasons: performance, reliability, and access.
Temple Wallet's multichain capabilities mean this process is consistent across all supported networks, simplifying wallet management. You have the flexibility to add multiple RPC endpoints per network and choose which one to activate as the default RPC instantly or save it for later use. The green ACTIVE label clearly indicates your current default connection point for that specific network.
Successfully adding and activating a new RPC enhances your Temple Wallet experience, ensuring robust and efficient connectivity across the diverse Tezos and EVM ecosystems (like Ethereum, BSC, Etherlink, etc.). Take control of your network settings today to optimize your interaction with the decentralized web.