How to Change Network on the Connected dApp in the Temple Wallet
Easily switch blockchain networks like Ethereum (ETH), BSC, or Etherlink for your connected dApps directly within the Temple Wallet. Follow our step-by-step guide to change the network setting in the Temple Wallet extension, ensuring seamless interaction across multiple chains.
1. Open the dApp and connect the Temple Wallet
Open the dApp that you want to use with the Temple Wallet Extension and connect your wallet to it. You can use our guide below to learn how to connect your Temple Wallet to the dApp.
 Temple Wallet
For our example, we will use the 1inch app.
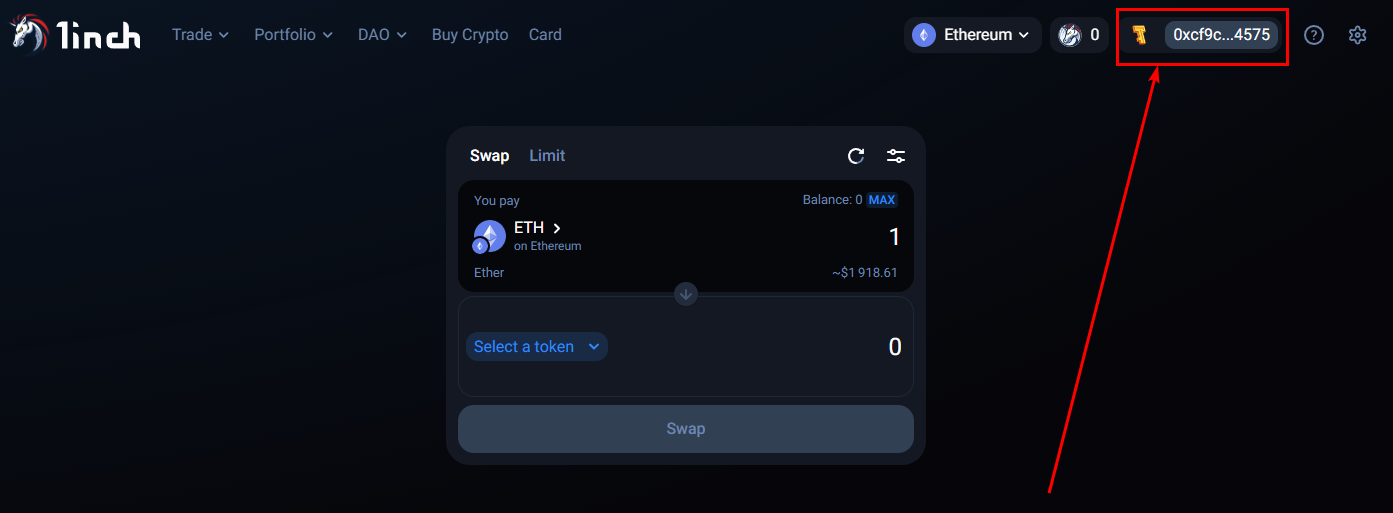
2. Click on the Temple Wallet extension icon
Click on the Temple Wallet extension icon in your browser to open the Temple Wallet. On the bottom of the opened popup window, you will be able to see the information about the current connection:
- The dApp name
- Manage connections option
- Disconnect option
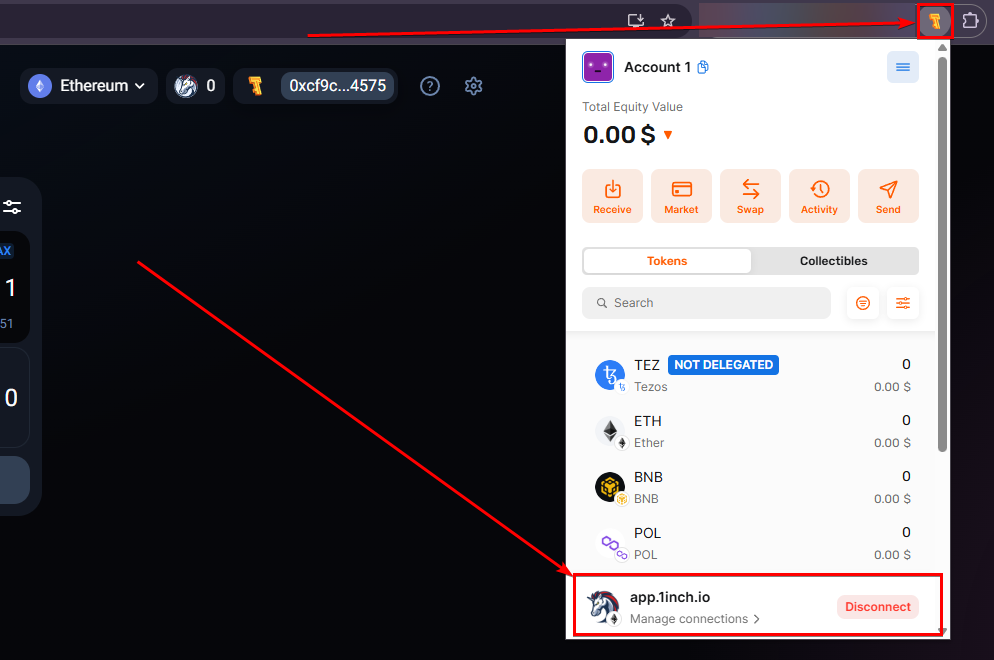
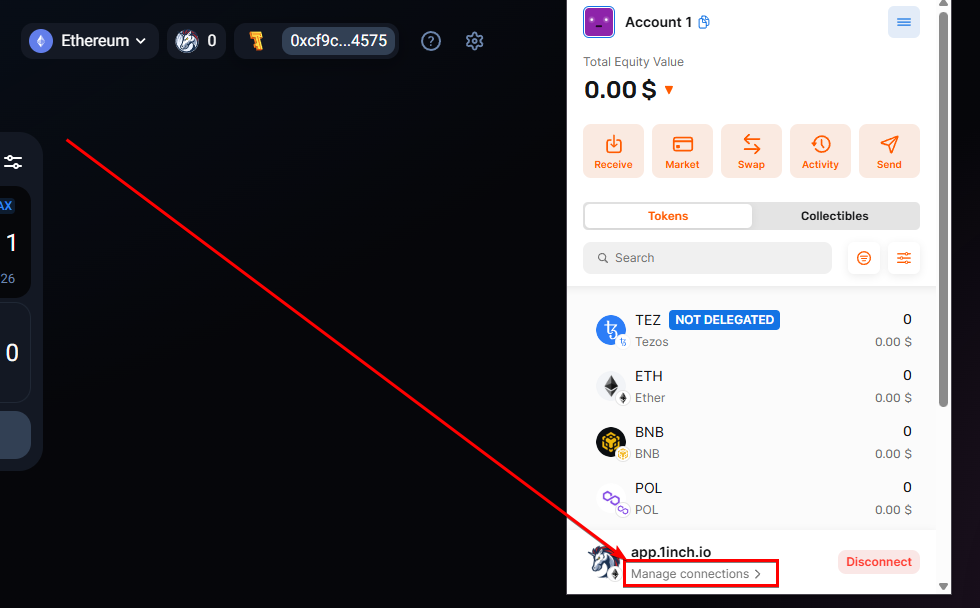
3. Click on the Manage connections option
Click on the Manage connections option in the information block about the current connection to open the Connected dApps page
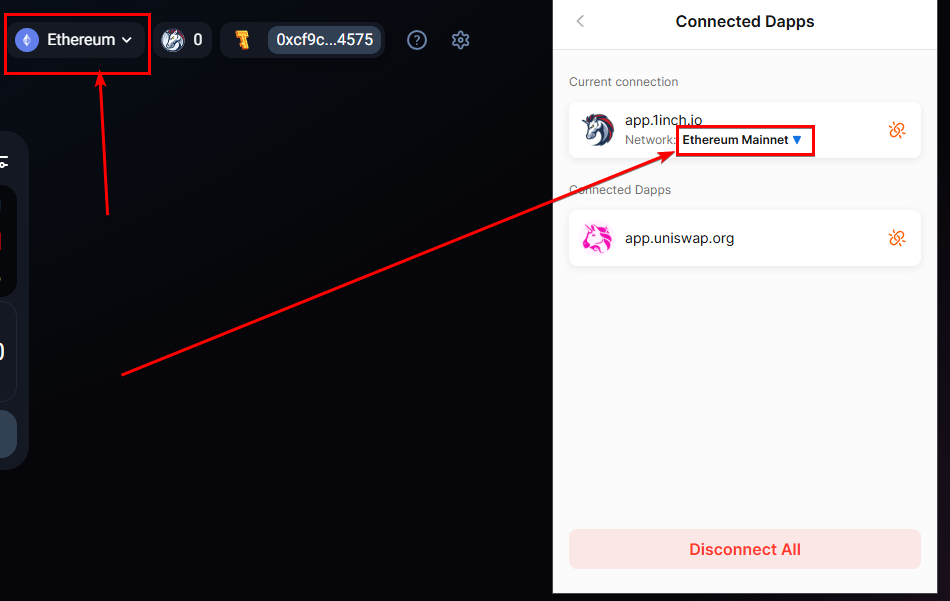
4. Click on the current network
Click on the current Network on the Connected dApps page in the Temple Wallet Extension.
For our example, you can see that the 1inch dApp and the Temple Wallet Extension shows that we are using the same Ethereum network.
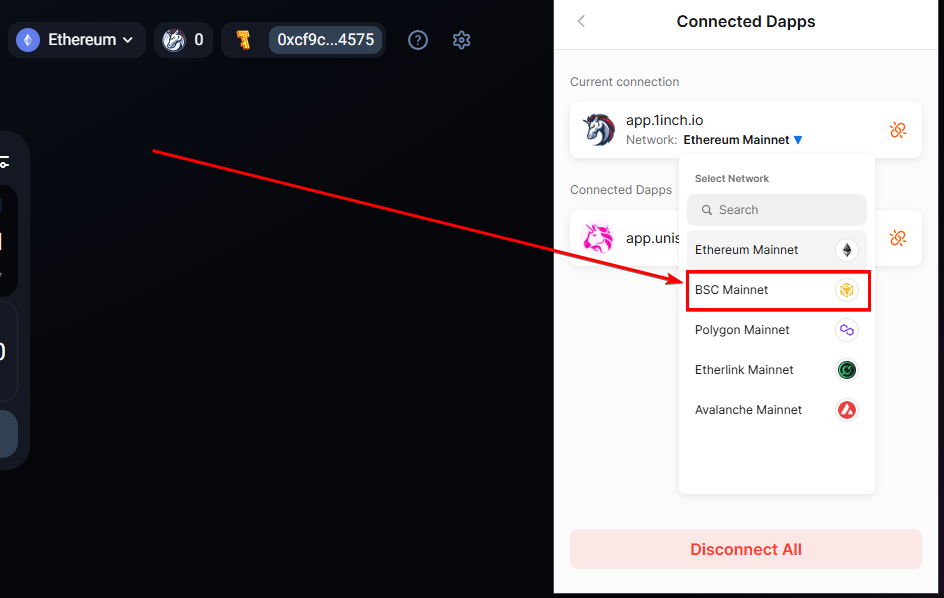
5. Click on the desired network
Click on the desired network in the opened dropdown menu.
For our example, we will click on the BSC Mainnet network to change the current network to it.
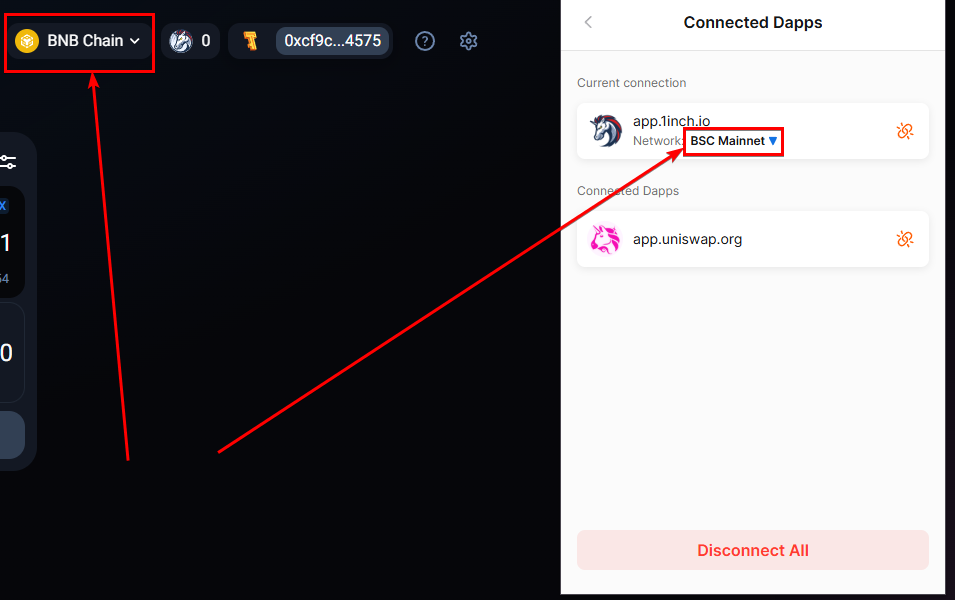
6. Confirm the successful change
After clicking on the new desired network, check that the network was successfully changed on the dApp.
For our example, the Ethereum network successfully changed to the BSC Mainnet network.
Conclusion
Mastering the ability to change the network for a connected dApp within your Temple Wallet is a crucial step toward leveraging its full potential as a versatile multichain wallet. As Temple Wallet now seamlessly supports both its native Tezos blockchain and various EVM-compatible chains like Ethereum (ETH), Binance Smart Chain (BSC), and Etherlink (XTZ), the capability to switch networks directly within the wallet interface is essential for interacting with a vast ecosystem of decentralized applications (dApps).
This guide has outlined the straightforward process required to change the active network for any dApp currently connected to your Temple Wallet extension. By simply accessing the wallet, navigating to the Manage Connections section, clicking on the current network displayed for the specific dApp, and selecting your desired network (for example, switching from Ethereum to BSC Mainnet or vice-versa) from the dropdown menu, you ensure correct blockchain interaction.
Successfully switching the network within Temple Wallet for a connected dApp prevents compatibility issues and ensures your transactions are processed on the intended blockchain. This flexibility is key to exploring diverse Web3 opportunities, whether engaging with DeFi protocols on BSC, interacting with NFT marketplaces on Ethereum, or utilizing services on the Tezos network, all managed conveniently through your Temple Wallet.
Remember always to verify that the network has successfully updated within the dApp interface after making the change in your Temple Wallet. This simple check confirms that you are ready to interact with the newly selected blockchain network. By following these steps, you gain precise control over your multichain activities, making Temple Wallet an even more powerful tool for managing your digital assets and dApp interactions across different blockchains.