How to Add a Token in the Temple Wallet
Learn how to add custom tokens to your multichain Temple Wallet easily. This step-by-step guide walks you through entering the token contract address and selecting the network (Tezos or EVM like Ethereum). Manage your crypto portfolio, including popular ERC20 tokens, all within the Temple Wallet.
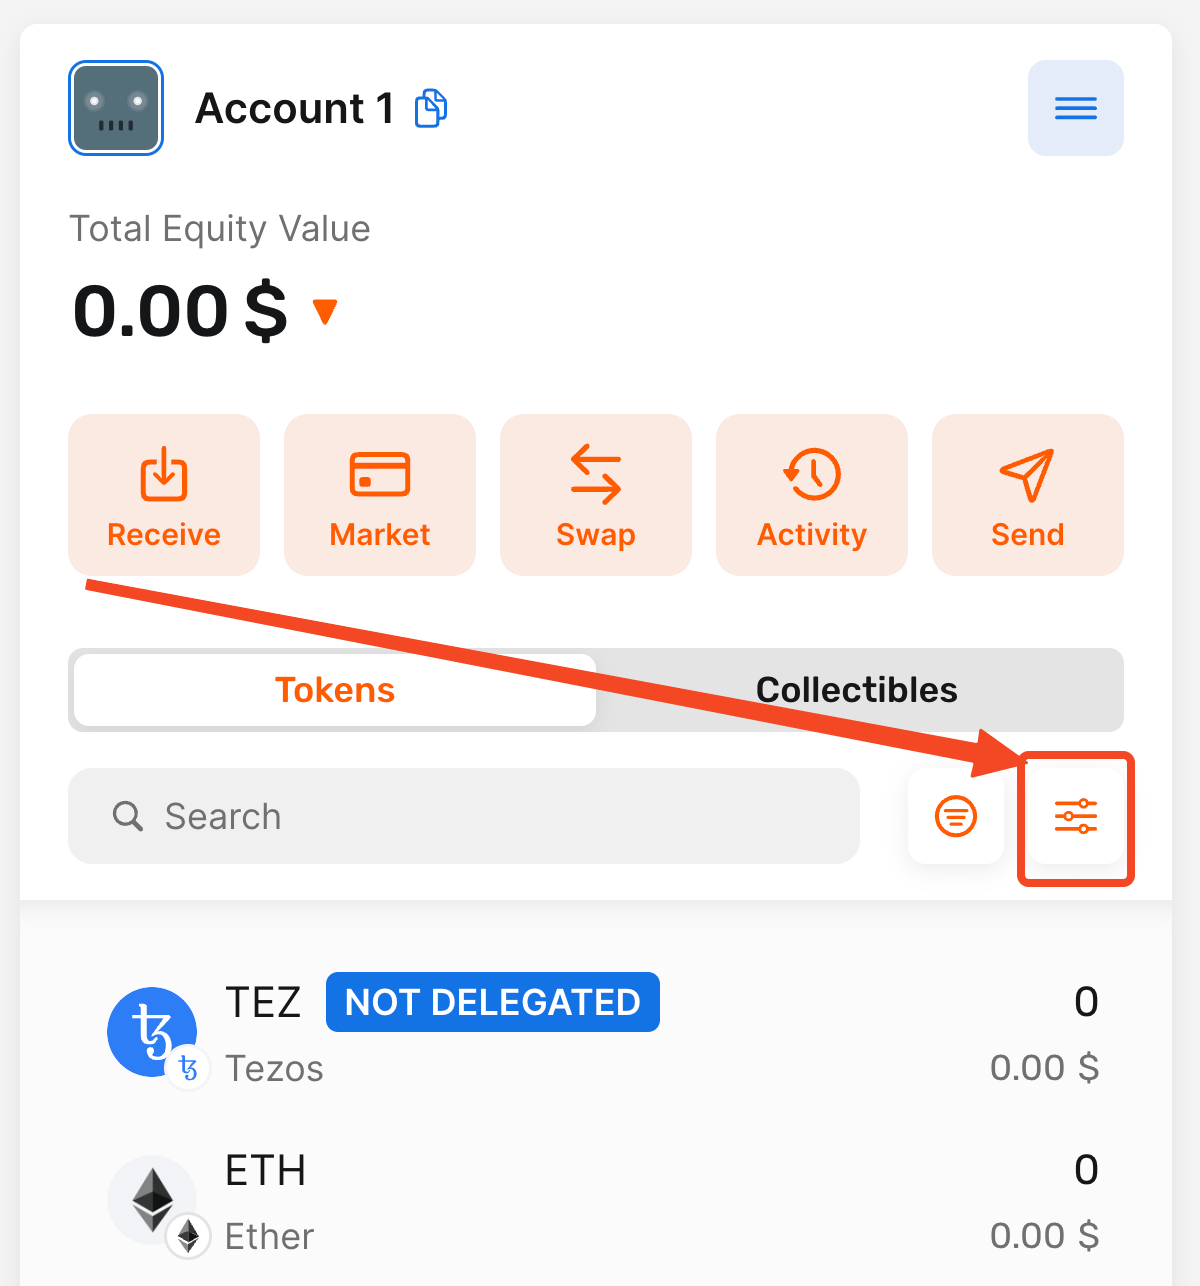
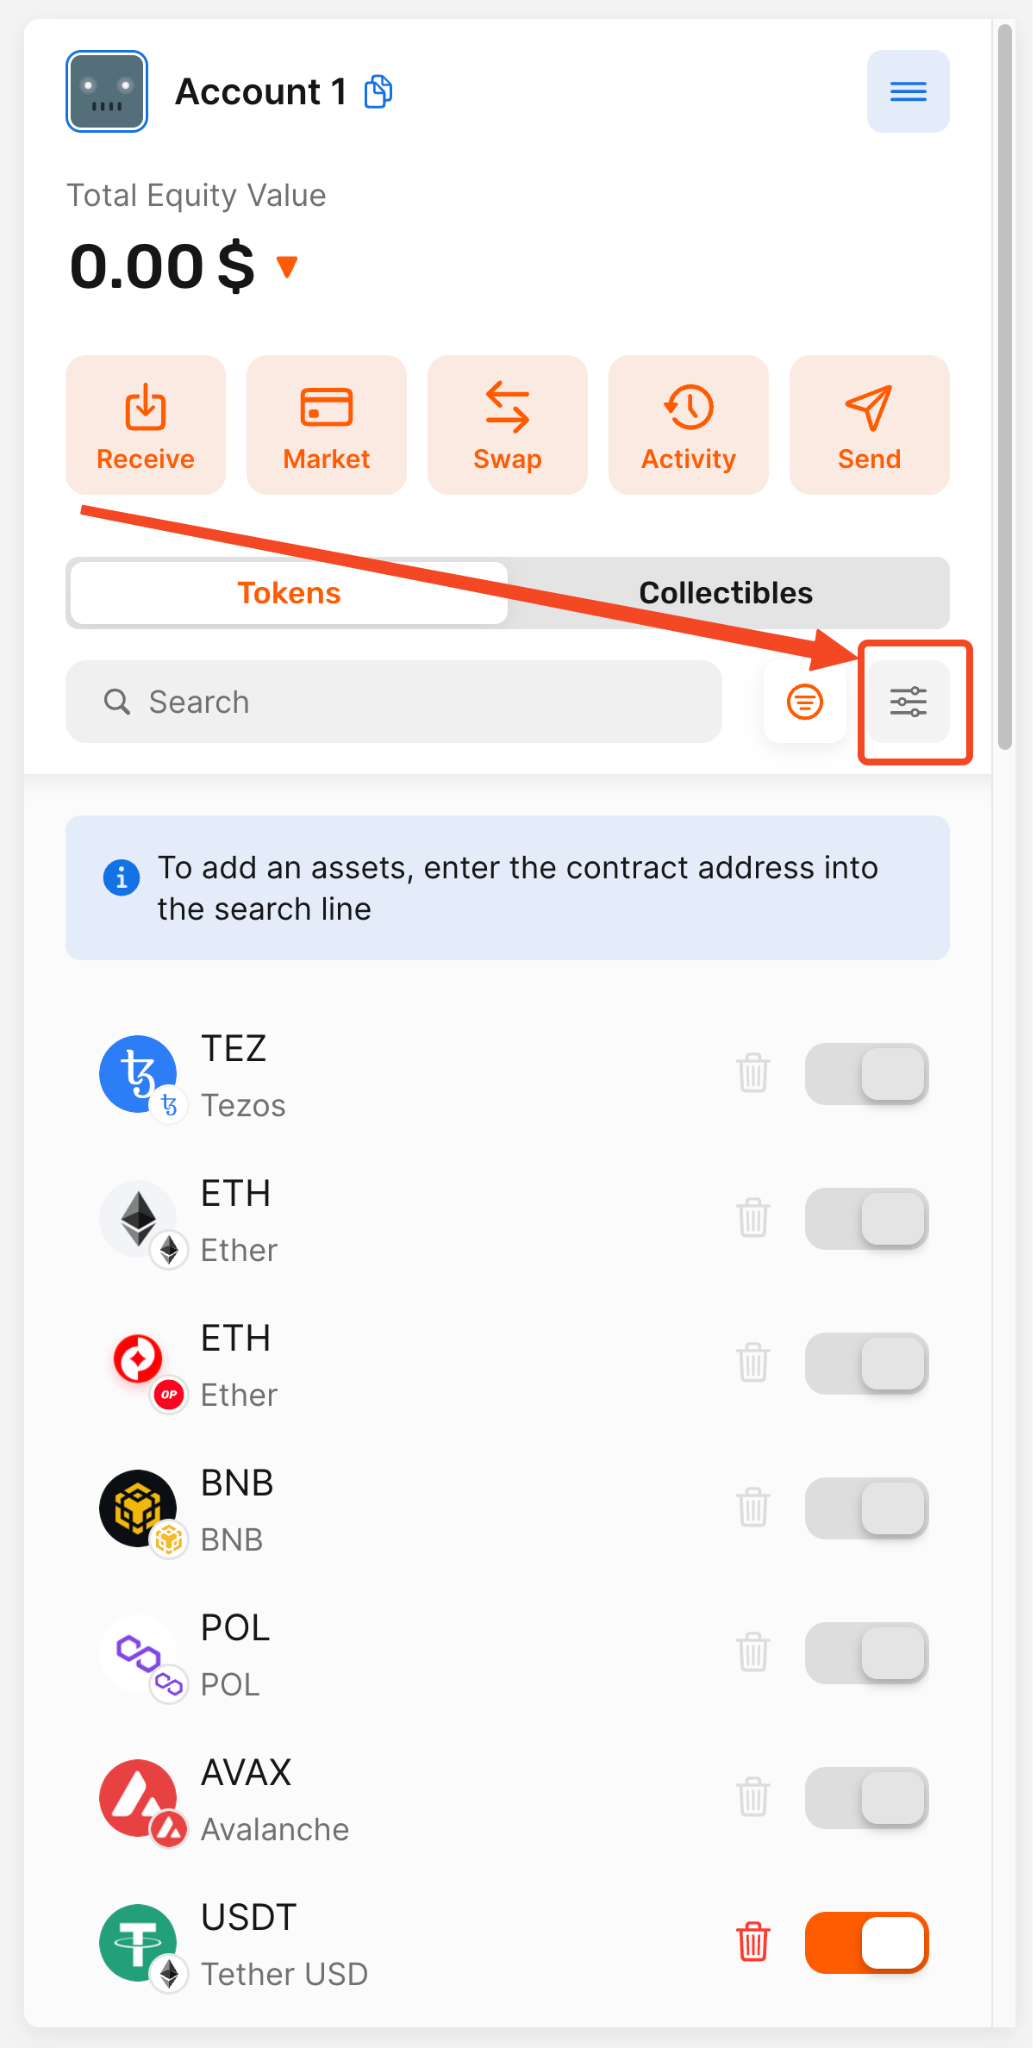
1. Open your Temple Wallet Extension and click on the settings icon
By clicking on the settings icon, you will open the tokens management menu with a lot of different options on how to manage your tokens.
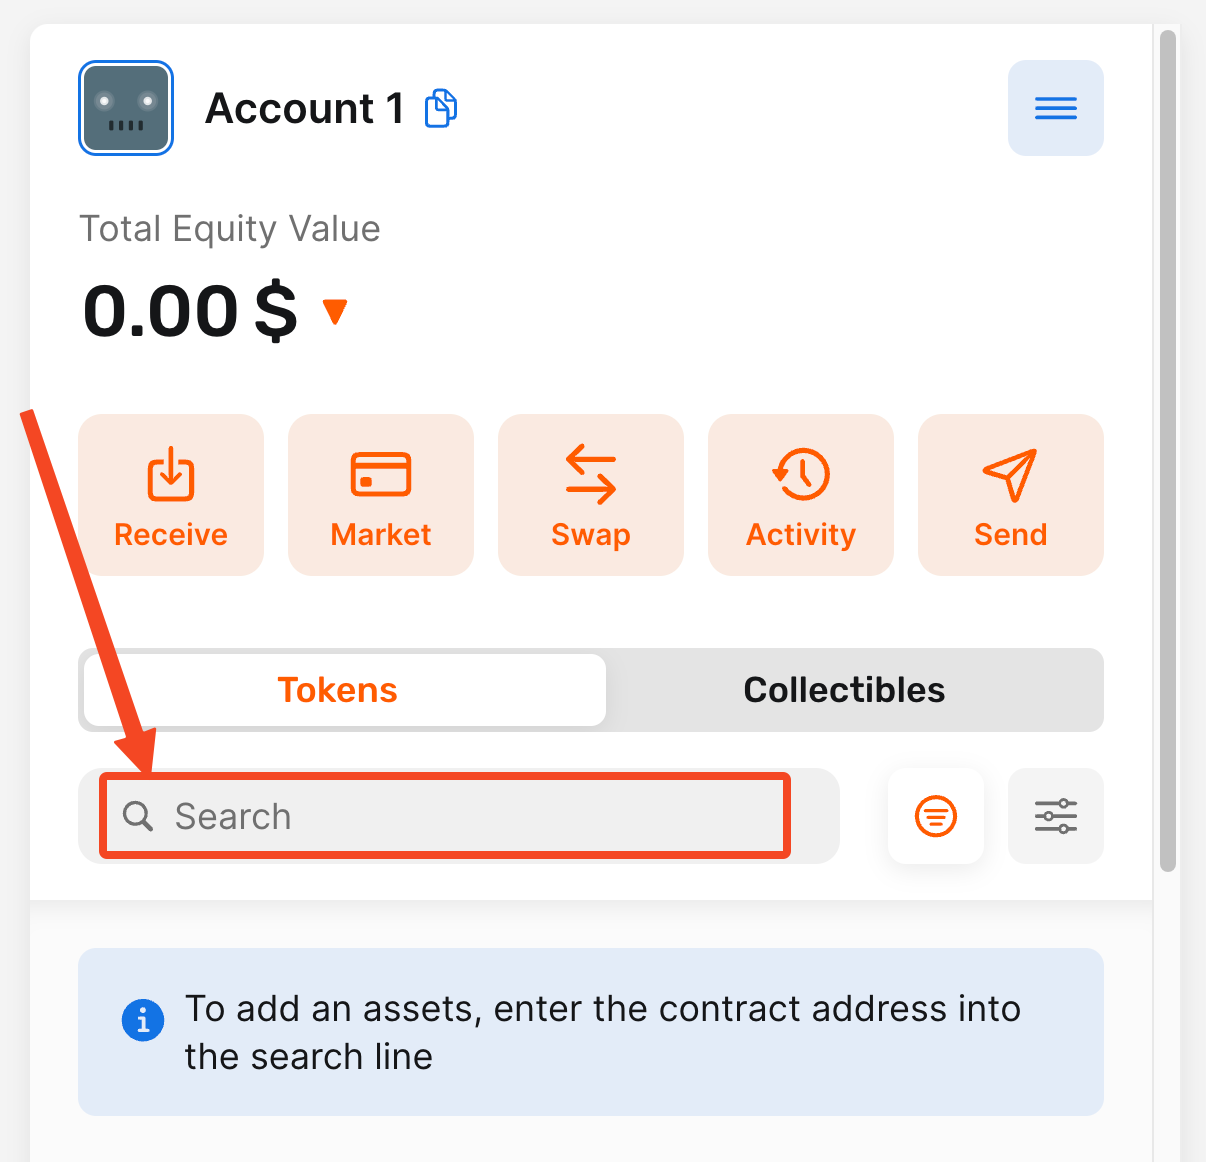
2. Enter the token contract address into the Search field
To add a token to the Temple Wallet Extension, you need to enter (insert or paste) the contract address of the token into the search field.
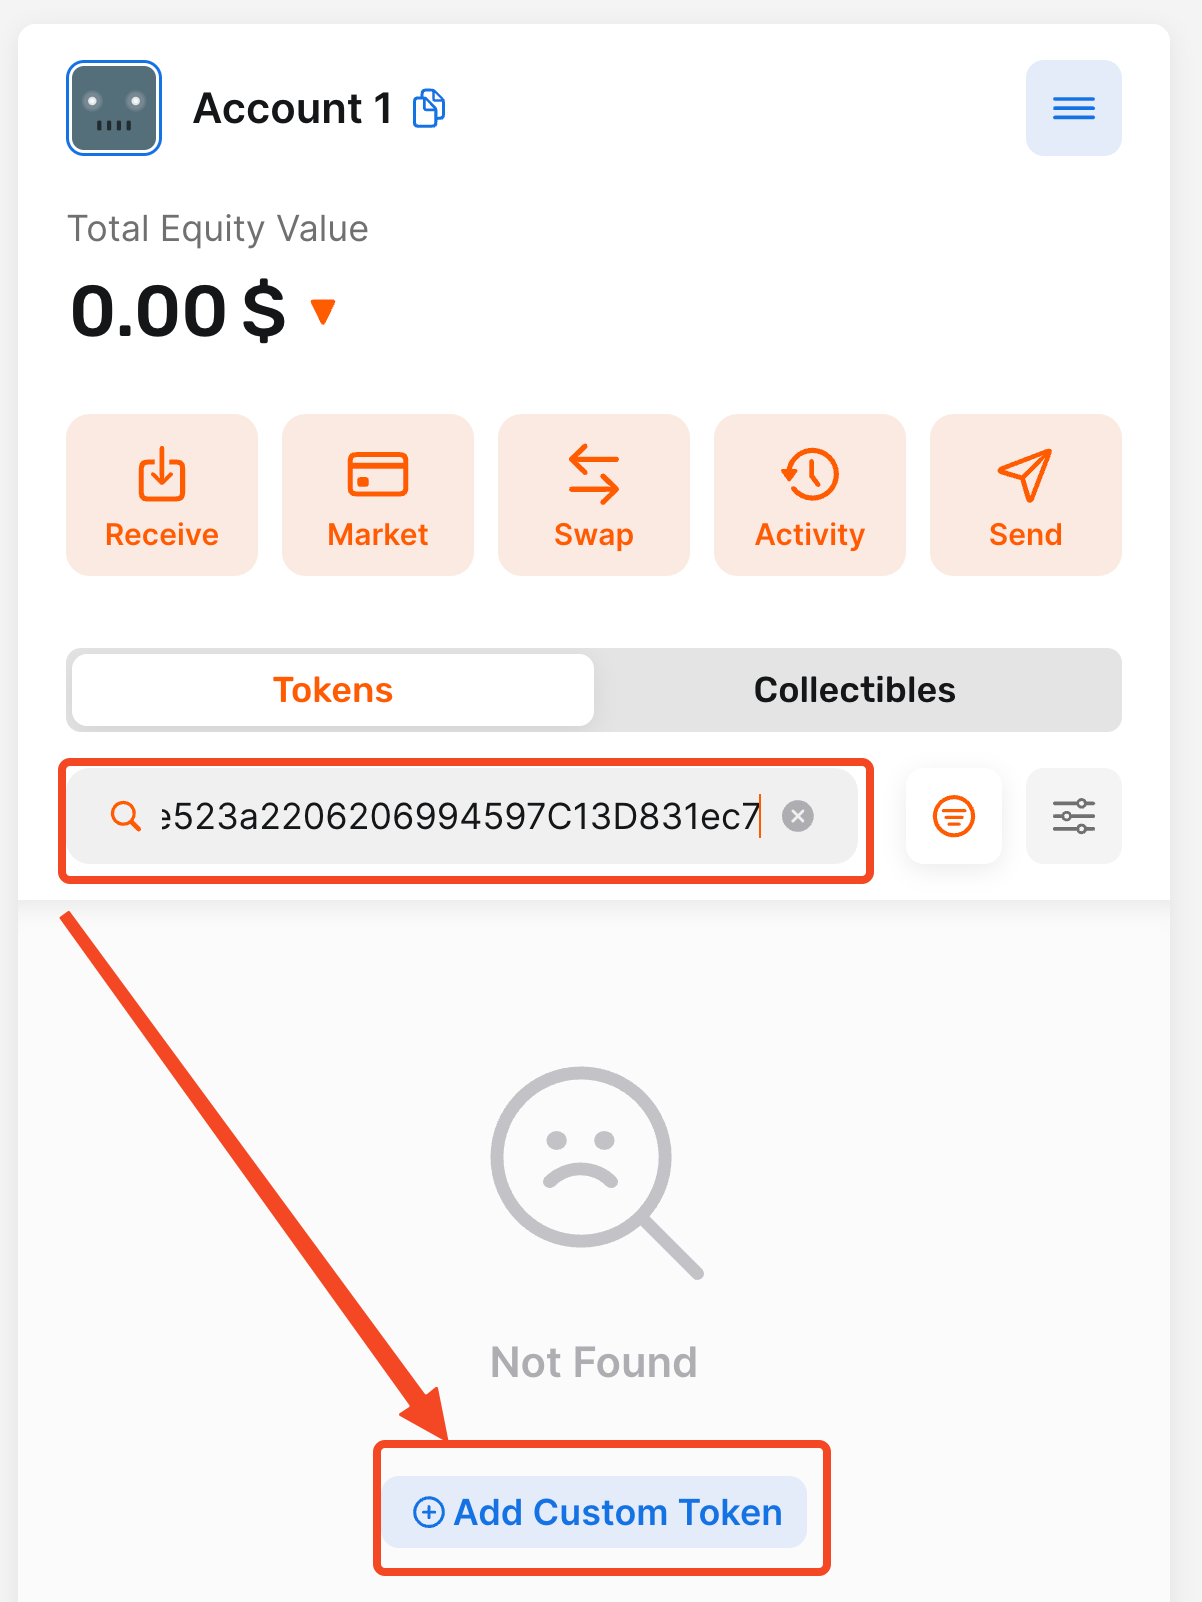
3. Click on the Add Custom Token button
After inputting the token address that you want to add to the Search field, click on the Add Custom Token button to open the Add Custom Token menu.
For our example, we will use the USDT token on the Ethereum network with the contract address: 0xdAC17F958D2ee523a2206206994597C13D831ec7
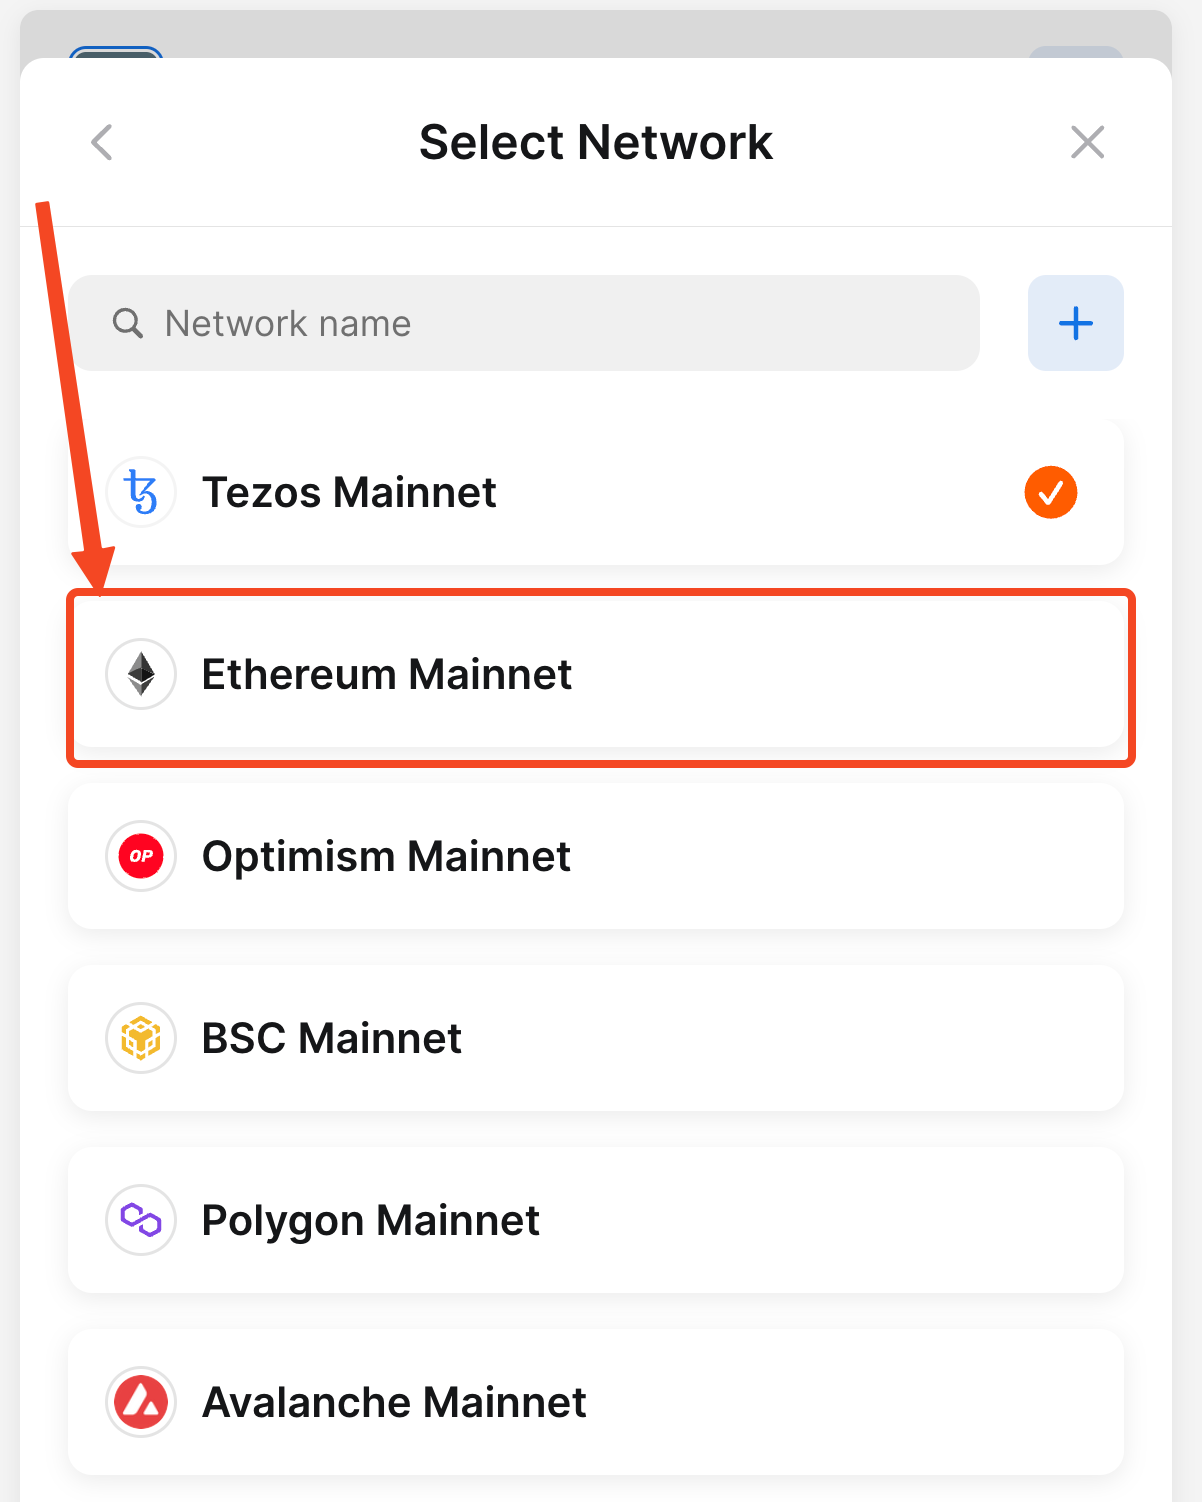
4. Click on the Network section
Click on the Network section to open the drop-down menu with the list of the available networks.
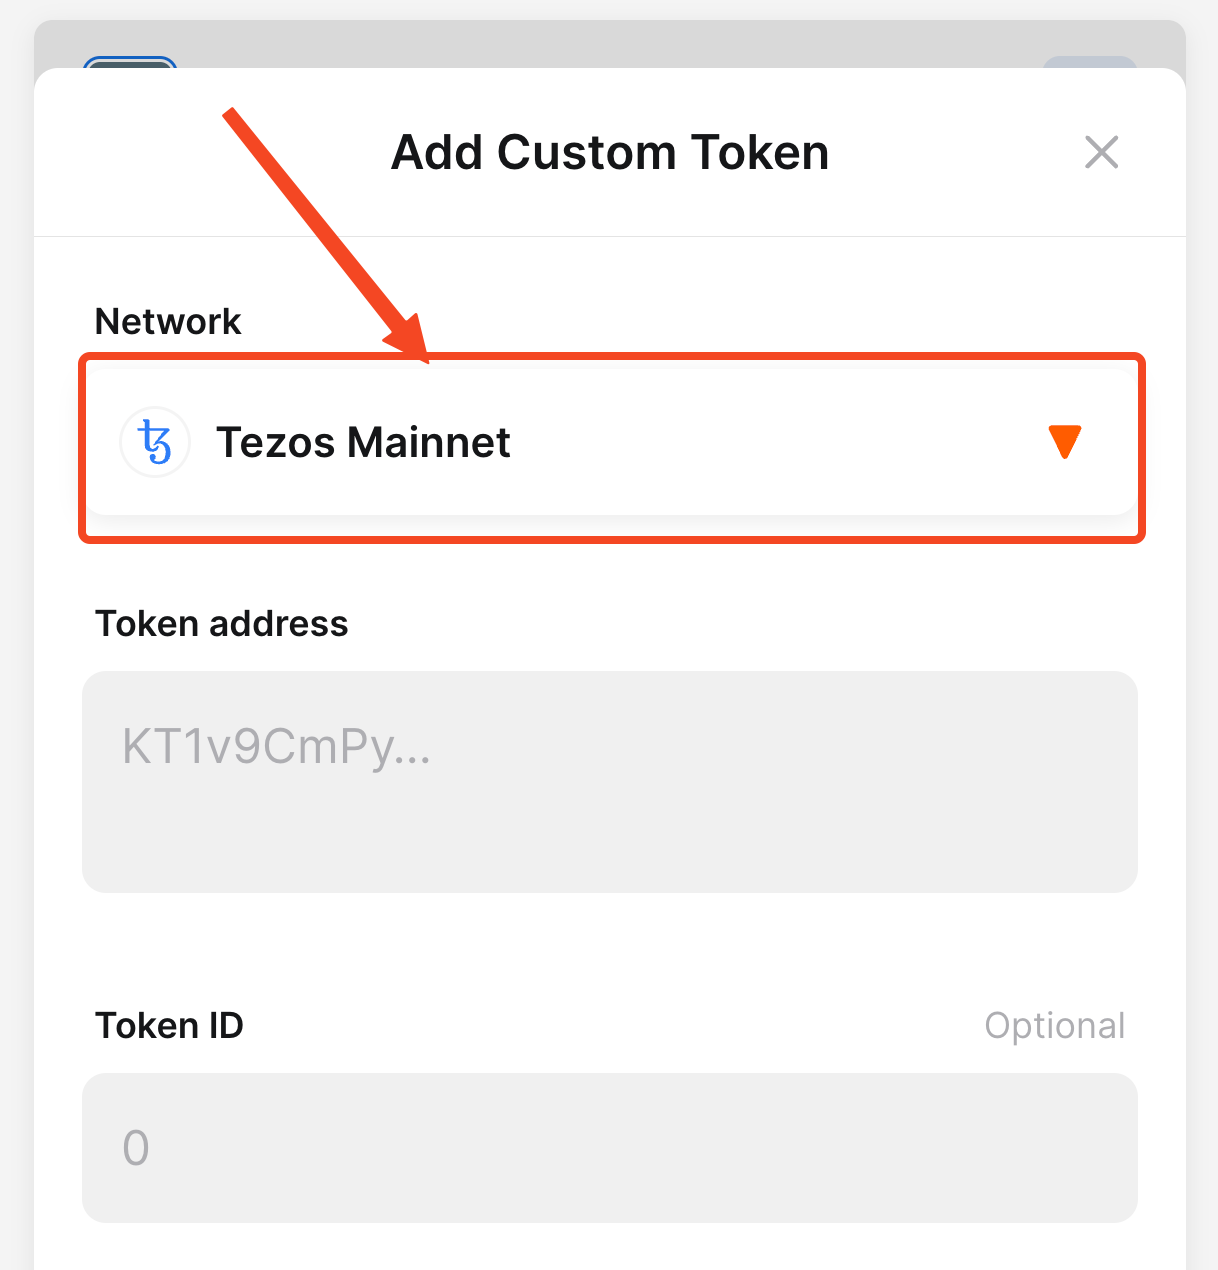
5. Select the network
In the opened dropdown in the Network section, you need to select the network to which your desired token belongs.
In our example, we have chosen the USDT token from the Ethereum network, so we need to select the Ethereum Mainnet network in the dropdown menu in the Network section.
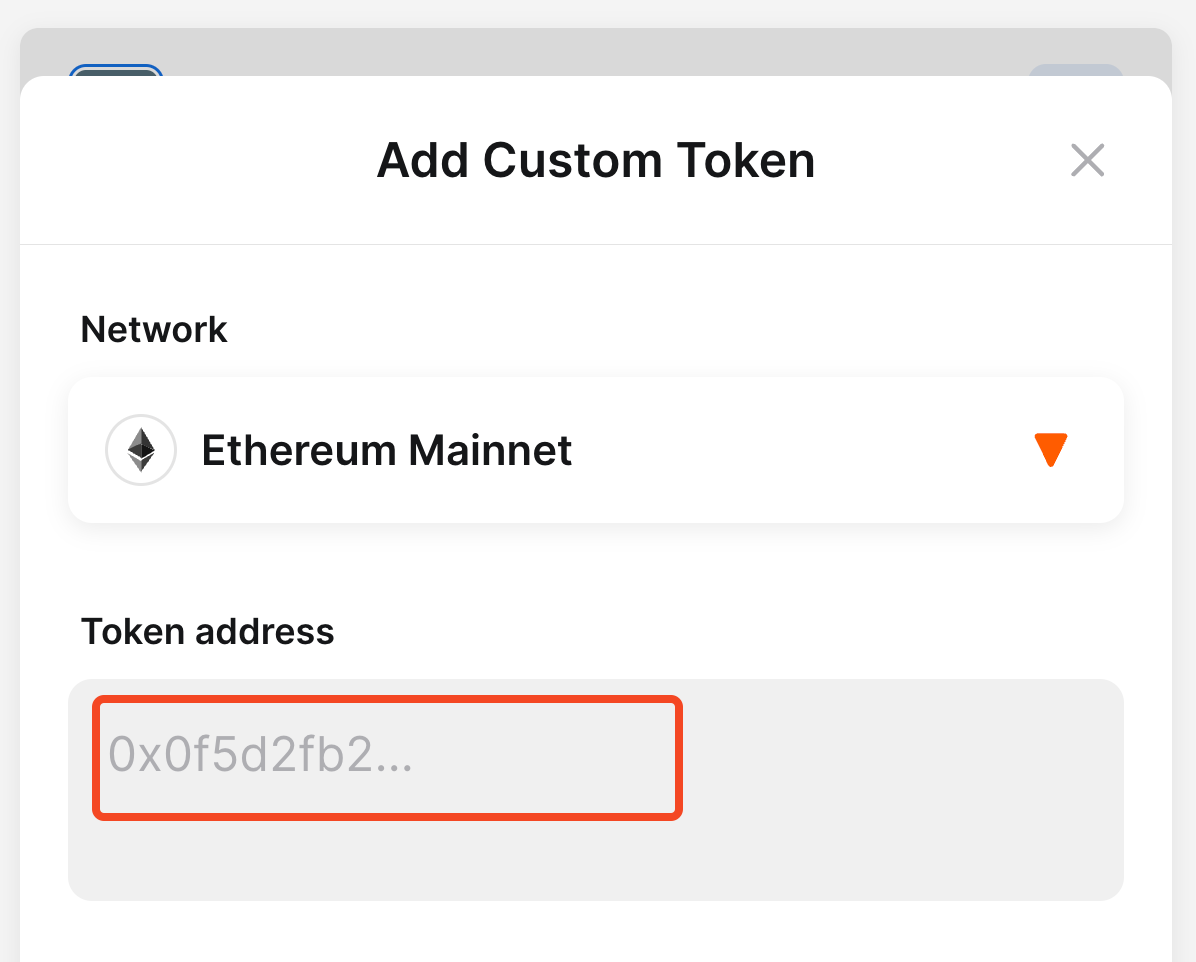
6. Enter the token address
Enter (insert or paste) the token address of the token that you want to add in the Token address field.
For our example, we will insert the USDT token address (0xdAC17F958D2ee523a2206206994597C13D831ec7) into the Token address field.
7. Click on the Add button
After inserting the token address, the Token Info section will appear. Verify the Token Info section and then click on the Add button.

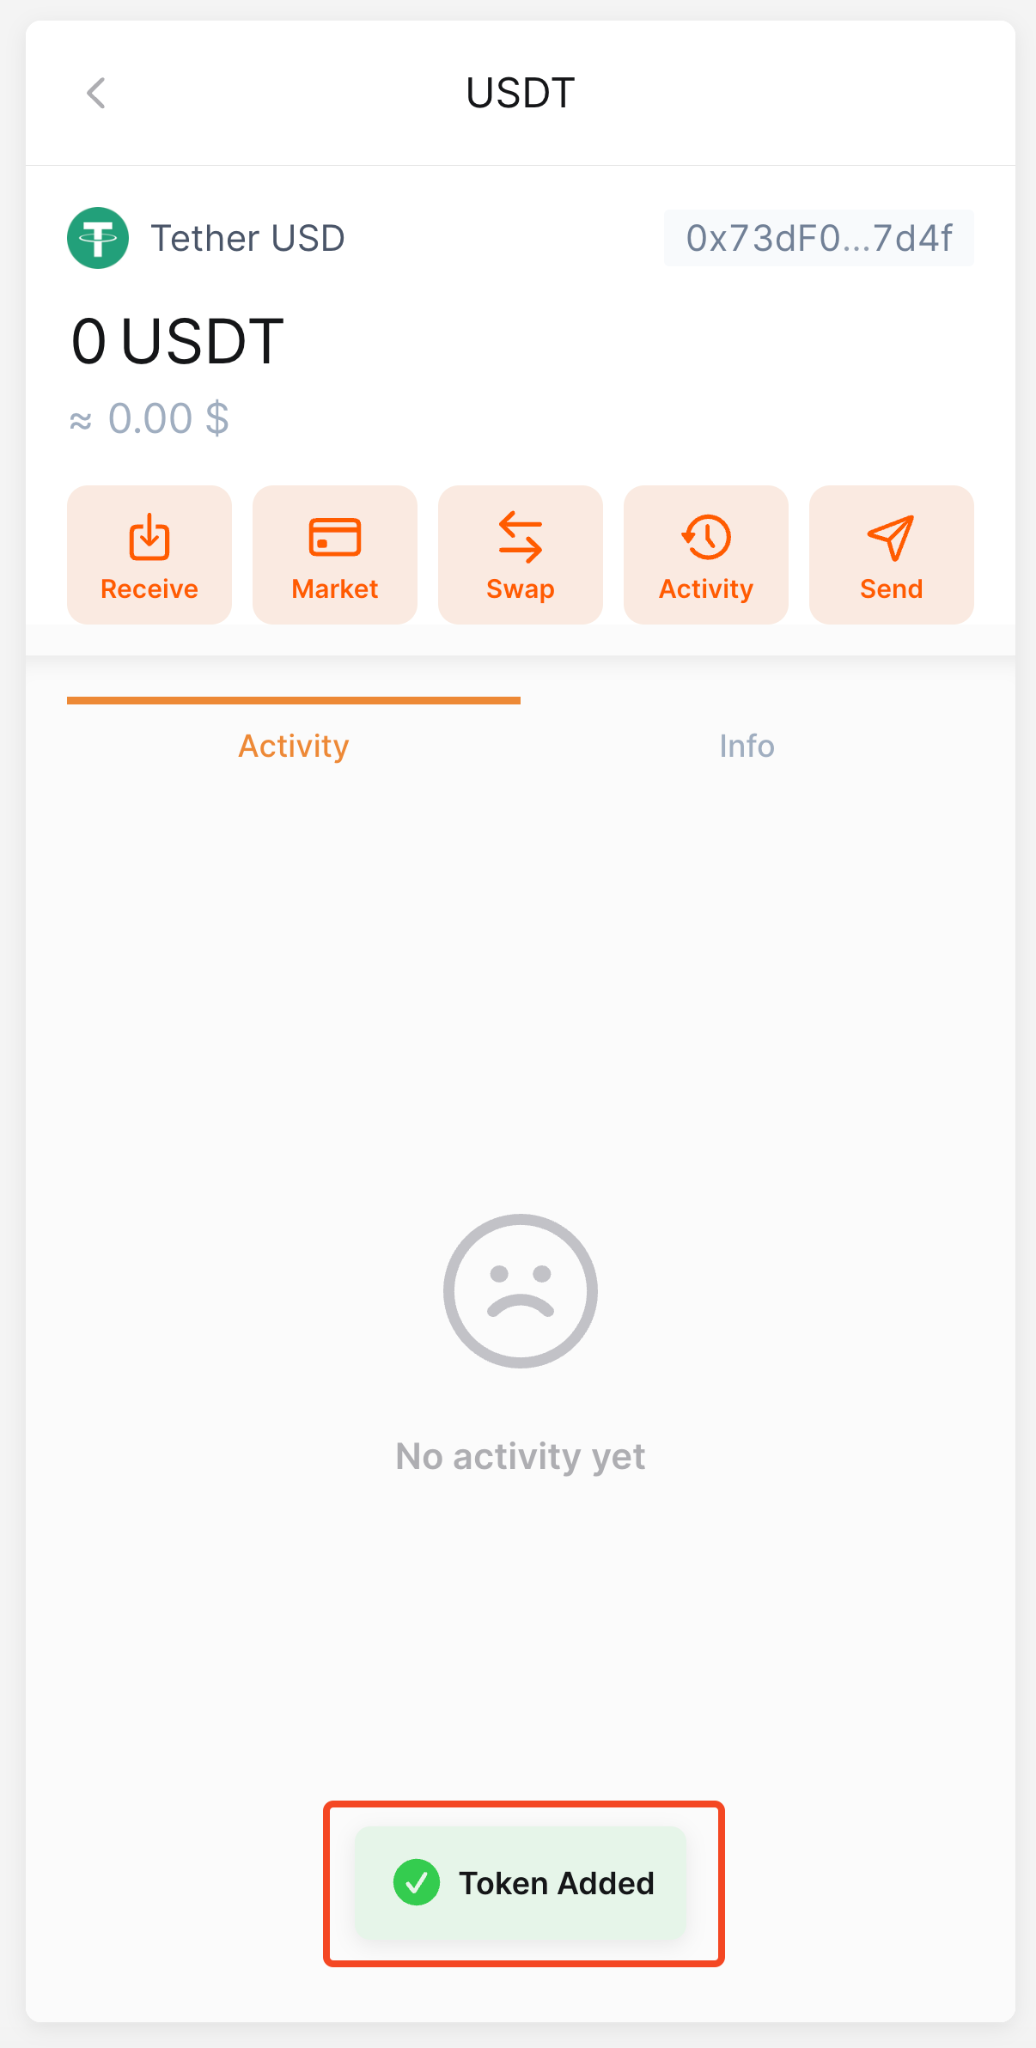
8. Verify the successful token adding
Now, Temple Wallet Extension will open the page with the token information, and a Token Added notification will be shown at the bottom of the screen.
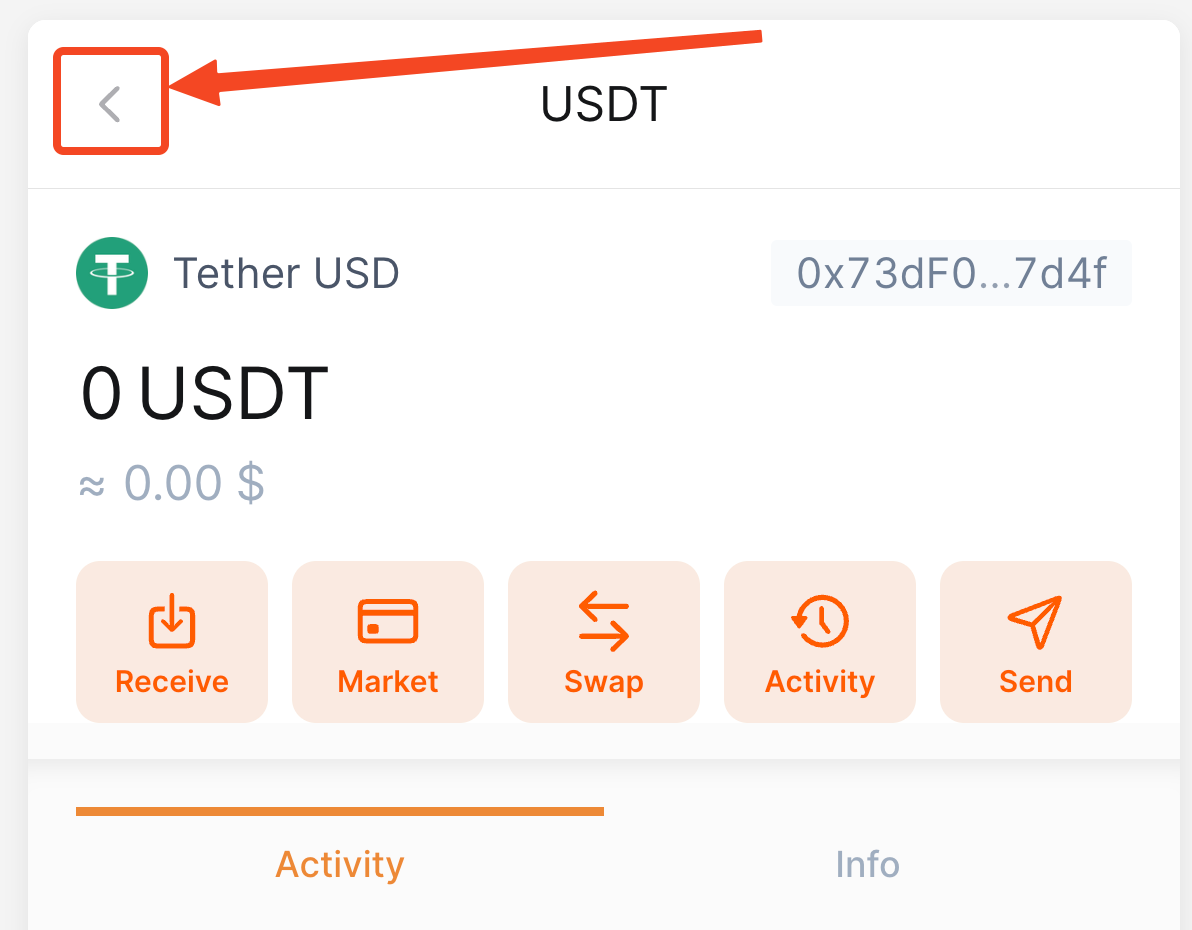
9. Click on the back (<) button
Click on the back (<) button in the top left corner to return to the main page of the wallet.
10. Click on the settings icon
Click on the settings icon to close the tokens management menu.
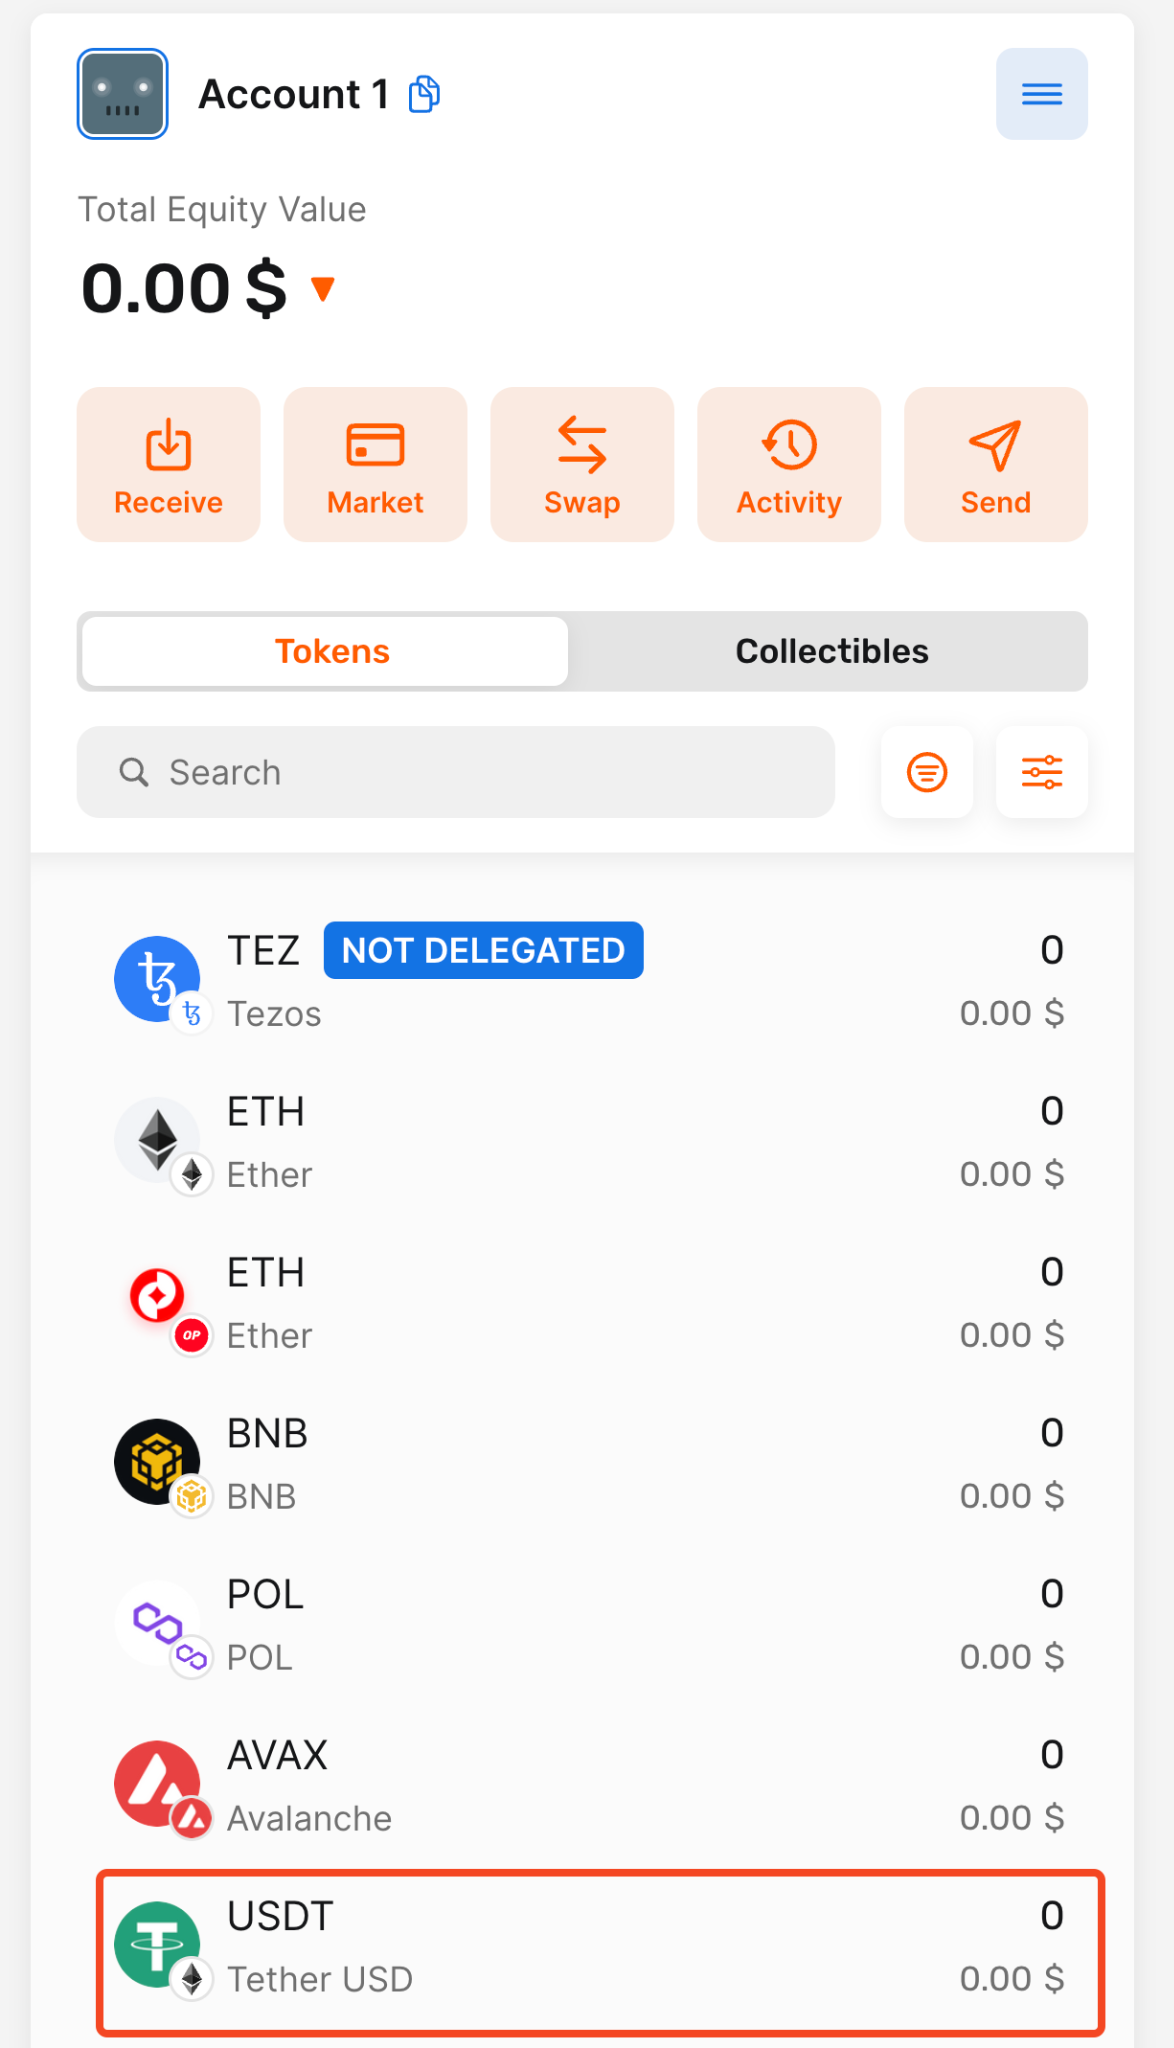
11. Verify the token visibility
Your custom added token will be displayed at the bottom of the main wallet page.
Conclusion
Mastering the process of adding custom tokens to your Temple Wallet unlocks the full potential of this versatile, multichain cryptocurrency management tool. As outlined in this step-by-step guide, importing tokens is a straightforward procedure, primarily requiring the correct token contract address and the selection of the appropriate blockchain network.
Temple Wallet's evolution into a multichain wallet, seamlessly supporting both the Tezos ecosystem and various EVM-compatible blockchains (such as Ethereum, Polygon, Binance Smart Chain, Etherlink, and more), makes token management more crucial than ever. Whether you're adding popular ERC20 tokens like USDT (as demonstrated in our example using the Ethereum Mainnet) or niche assets from emerging projects on supported EVM chains or Tezos FA tokens, the ability to add custom tokens ensures your entire portfolio is visible and accessible directly within the wallet interface.
By following the simple steps of navigating to the tokens management section via the settings icon, pasting the contract address, selecting the network, and confirming the addition, you gain a comprehensive overview of all your digital assets. This customization empowers users to interact with a broader spectrum of decentralized applications (dApps) and investment opportunities across multiple blockchains without needing separate wallets for each network.
Successfully adding and verifying your desired token means it will be displayed clearly on your main wallet page, allowing for easy tracking and management. Keep this guide handy as you continue to explore the expanding world of digital assets, leveraging Temple Wallet as your secure gateway to the multichain future. Remember, accurate contract address entry and correct network selection are key to ensuring your tokens appear correctly in your Temple Wallet.