How to Add a Network in the Temple Wallet
Learn how to easily add custom blockchain networks to your Temple Wallet. Expand your access beyond Tezos by connecting to various EVM-compatible networks. Follow simple steps within the Temple Wallet Extension settings to add networks, unlocking the full multichain potential of your wallet.
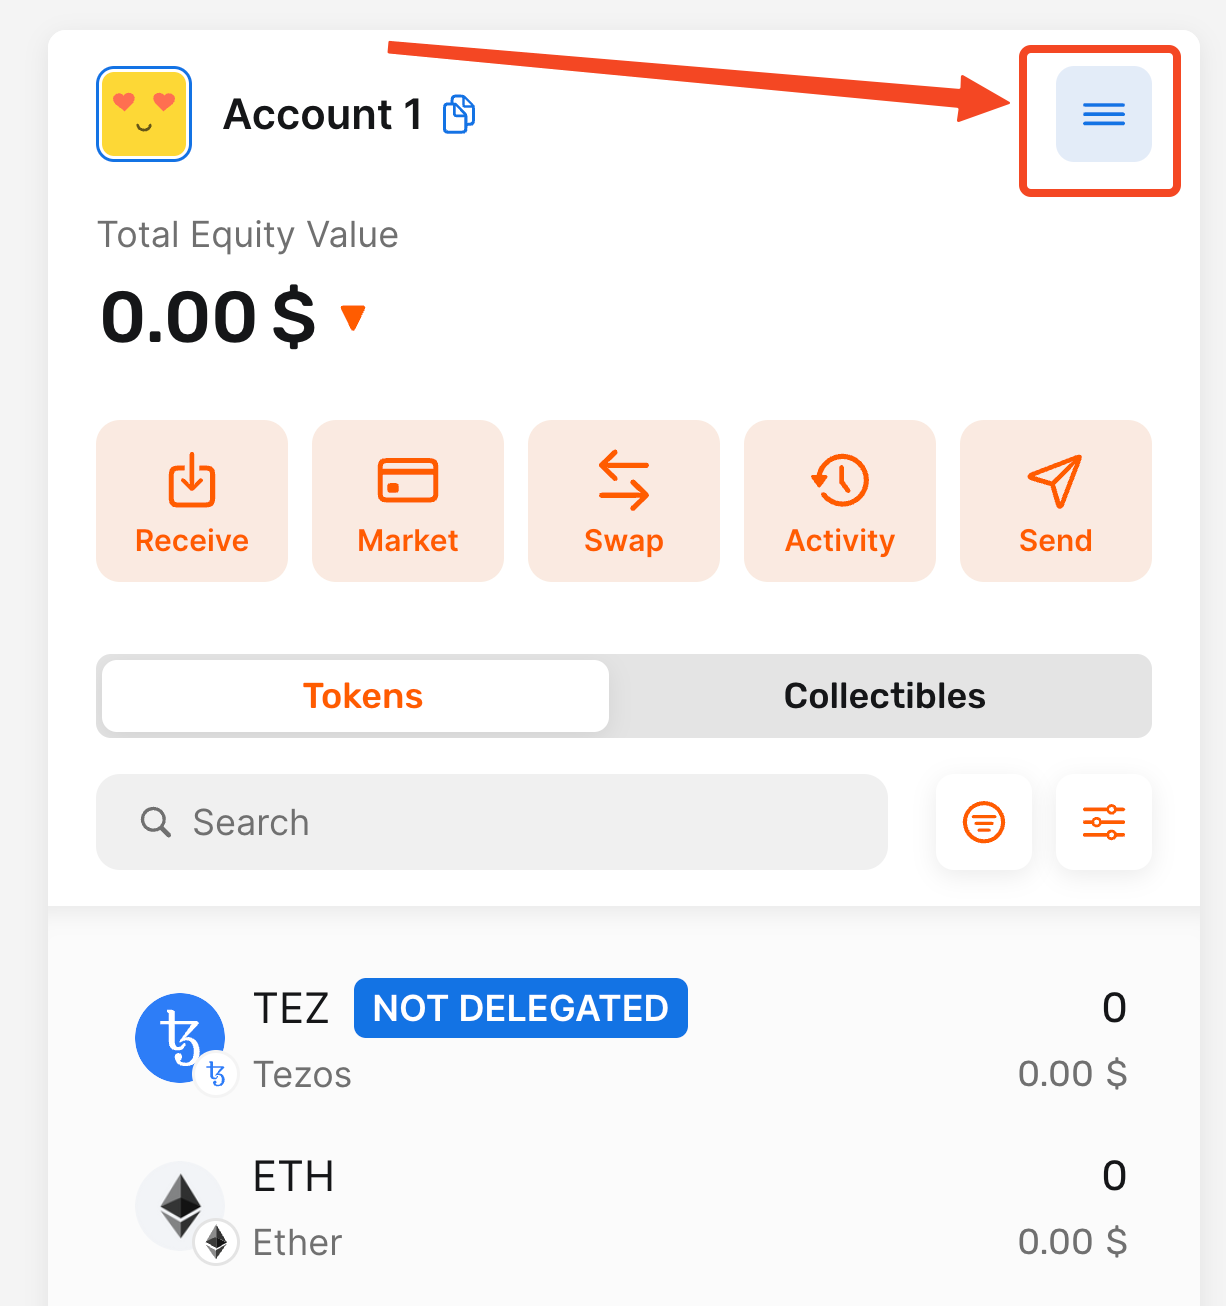
1. Open your Temple Wallet Extension and click on the Menu icon
By clicking on the Menu icon, you will open the Menu dropdown with a lot of necessary options on how to manage your wallet.
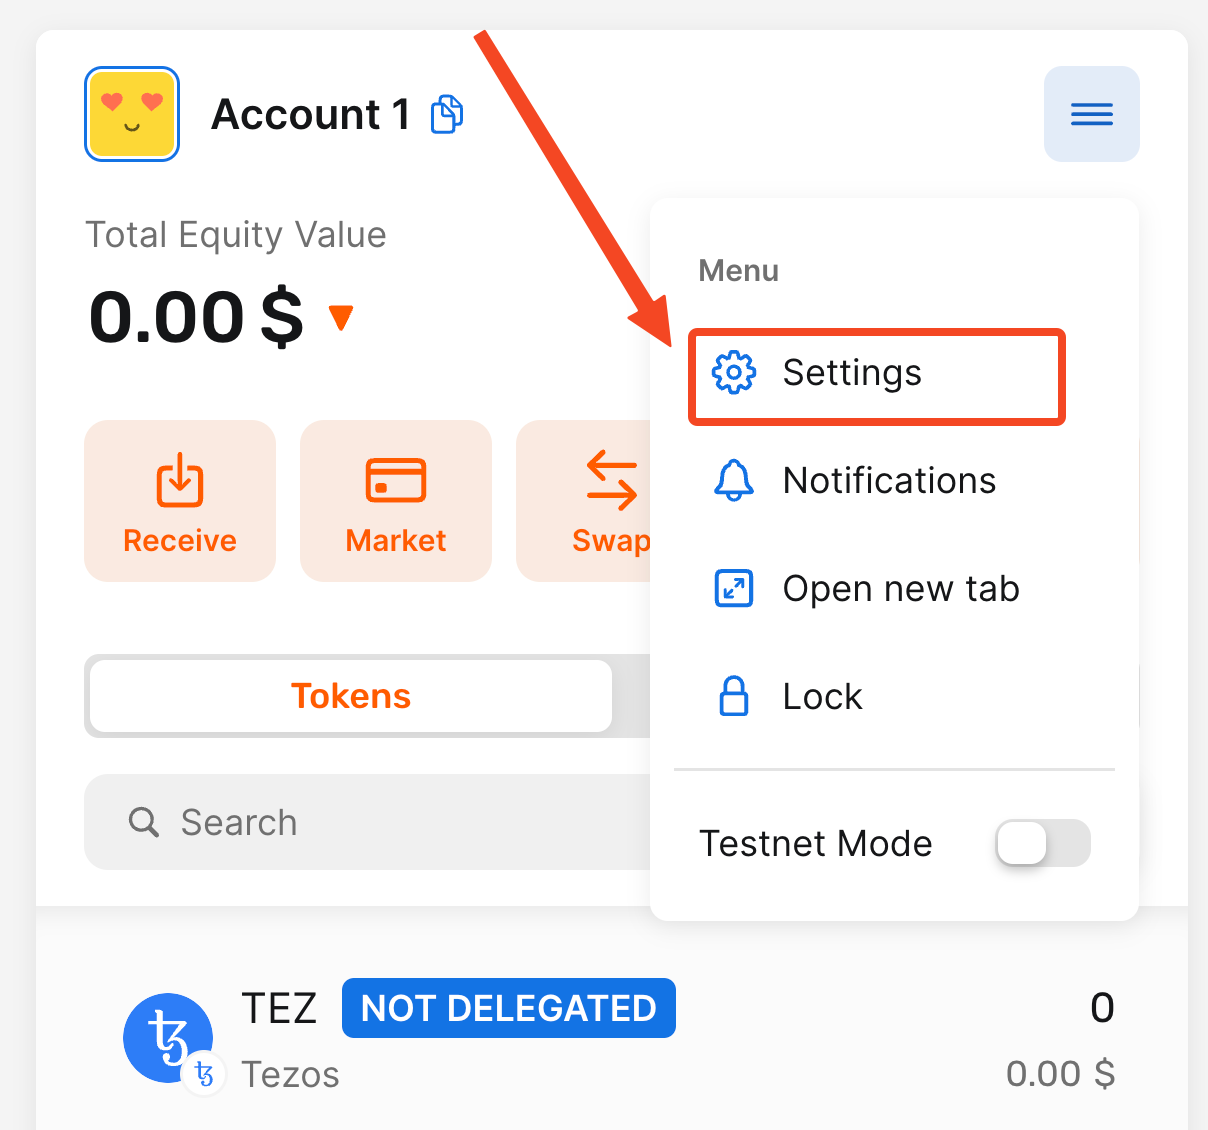
2. Click on the Settings option
Click on the Settings option in the Menu dropdown to open the settings in the Temple Wallet Extension.
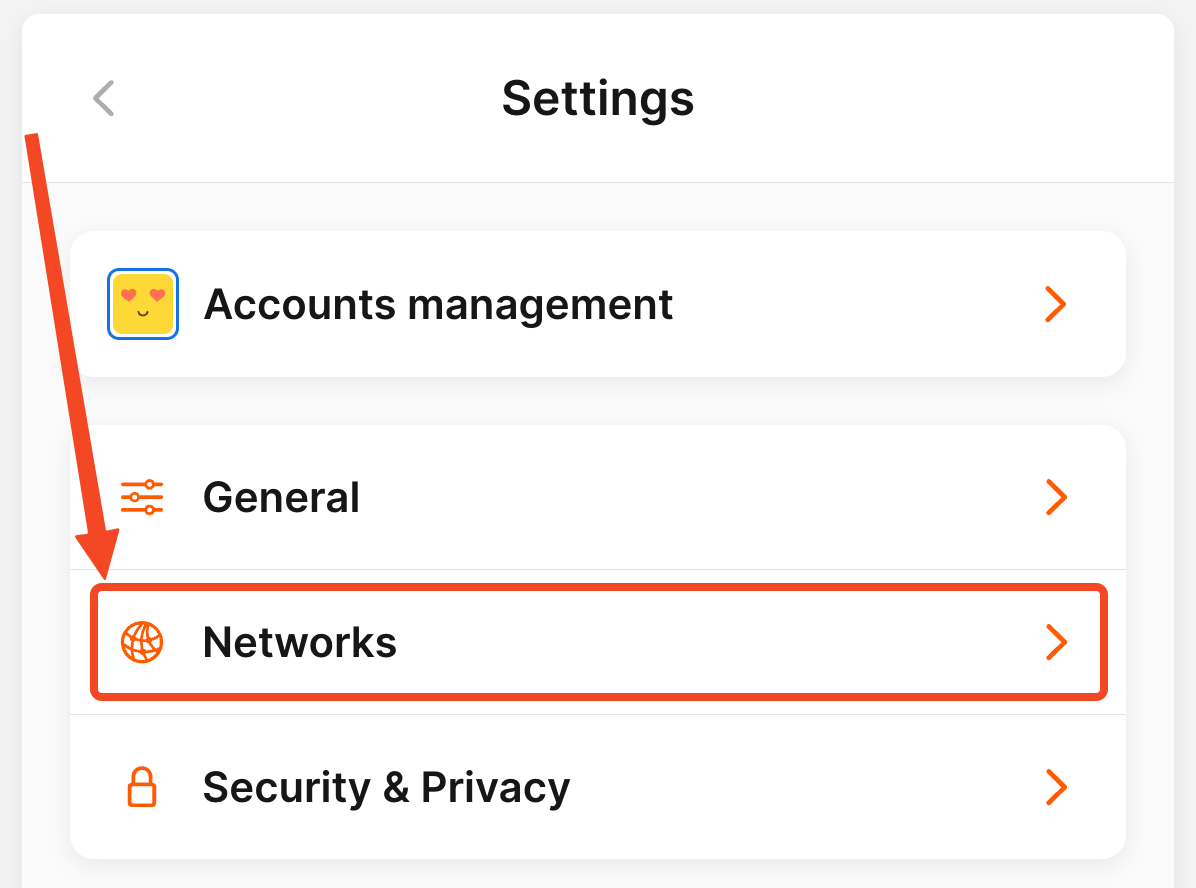
3. Click on the Networks option
Click on the Networks option to open the Networks page.
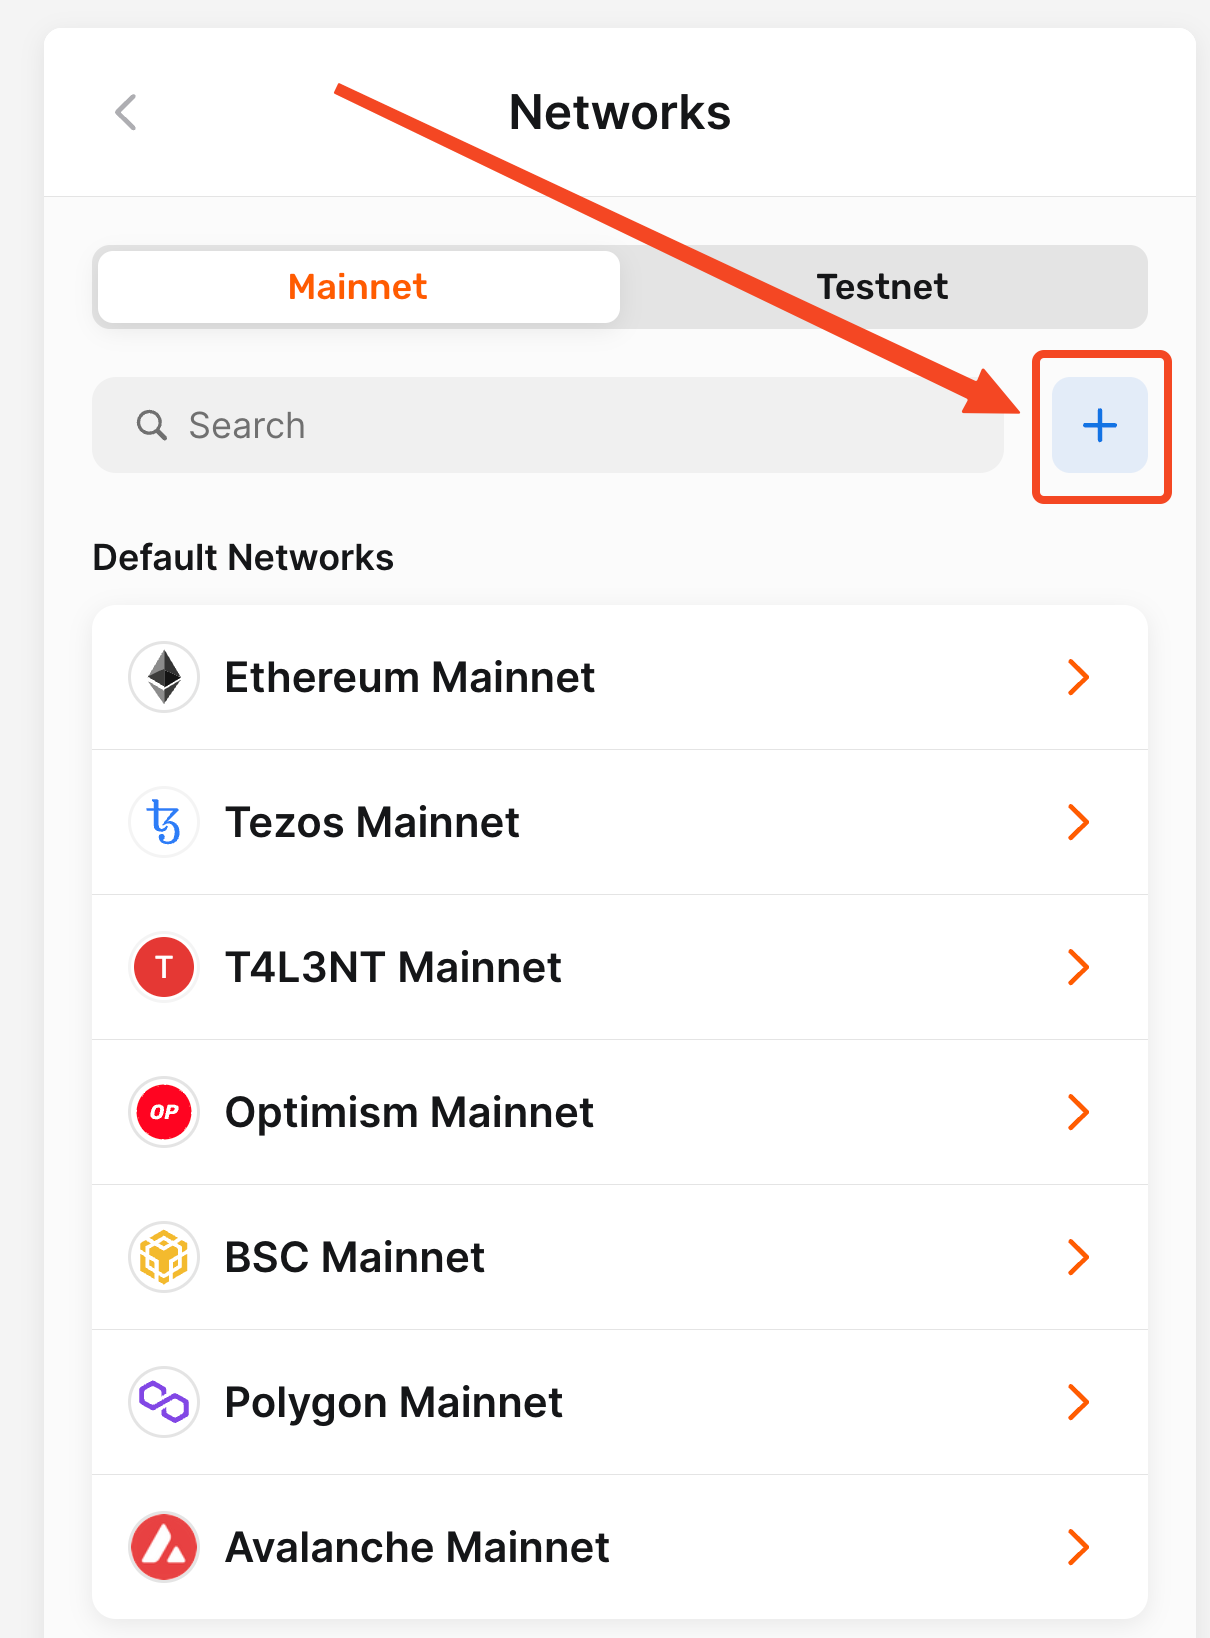
4. Click on the plus (+) button
Click on the plus (+) button to open the Add network menu.
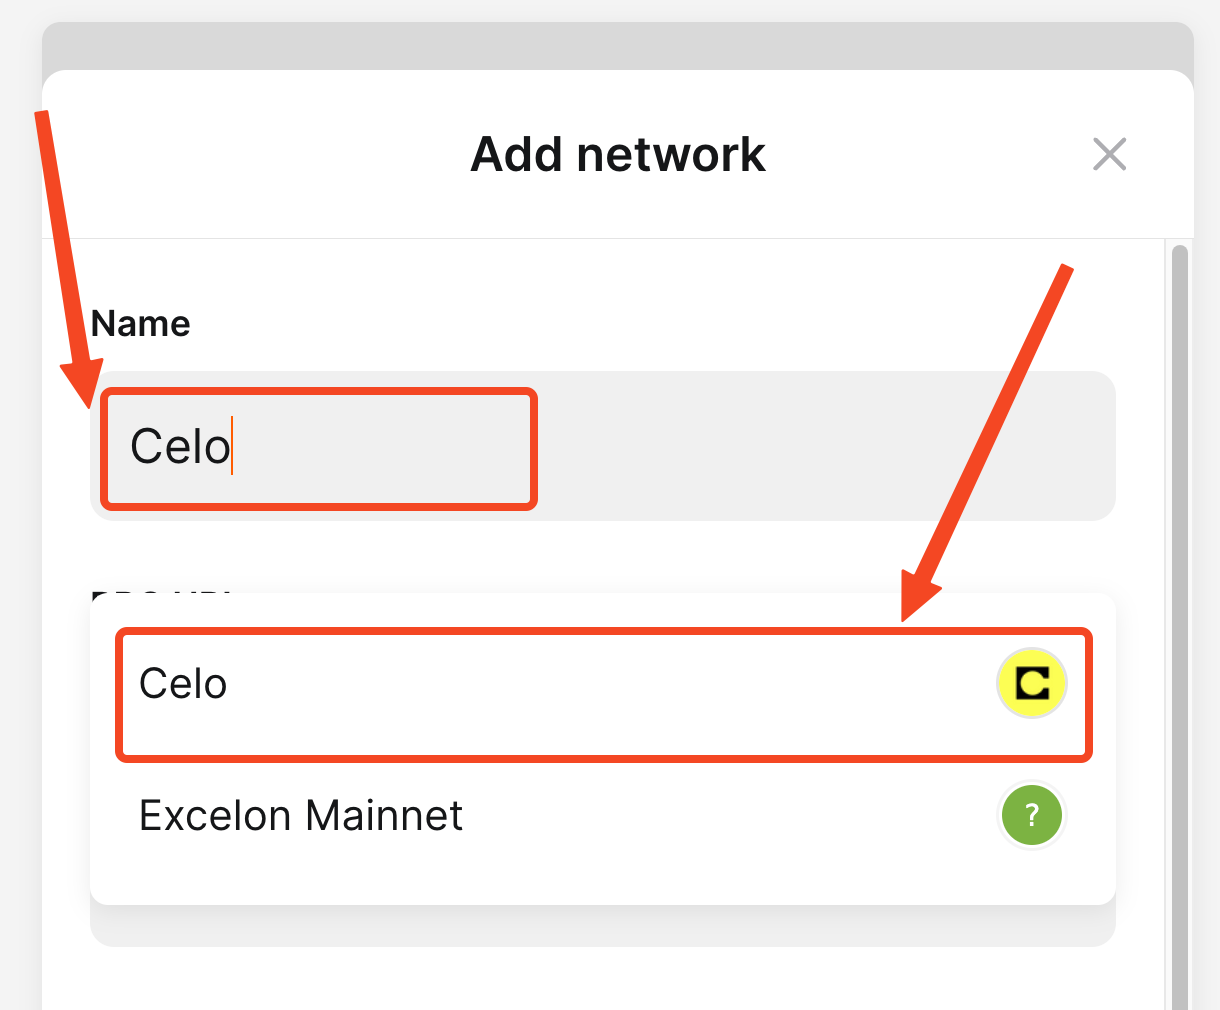
5. Type in the network name
Type in the name of the network that you want to add in the Name field and choose the corresponding network from the drop-down list, which will appear.
For our example, we will use the Celo network, and we will be choosing the first network from the drop-down list.
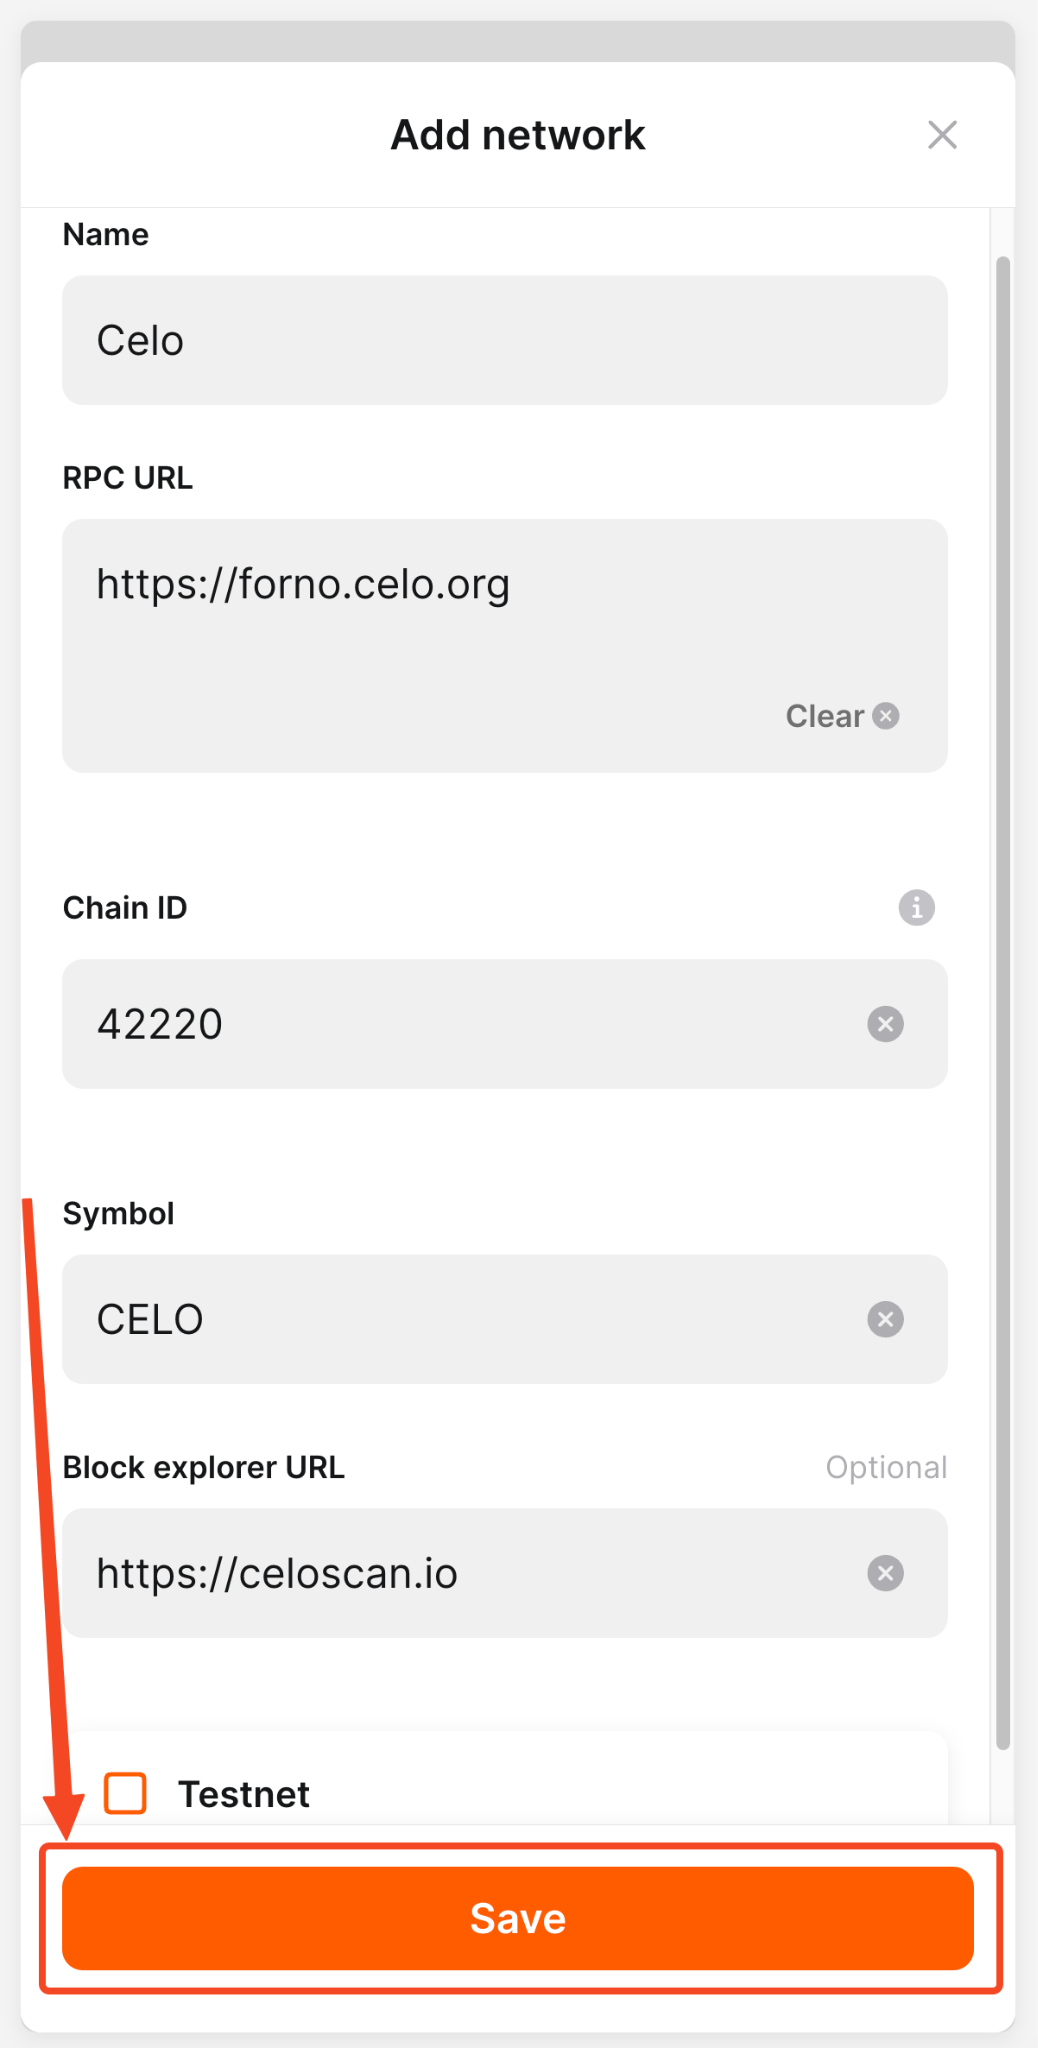
6. Verify network details and click Save button
Check if all fields were filled correctly. The automatically inserted fields consist of:
- RPC URL
- Chain ID
- Symbol
- Block explorer URL
If all of the fields listed above are correct, then click on the Save button. If not - change them before saving.
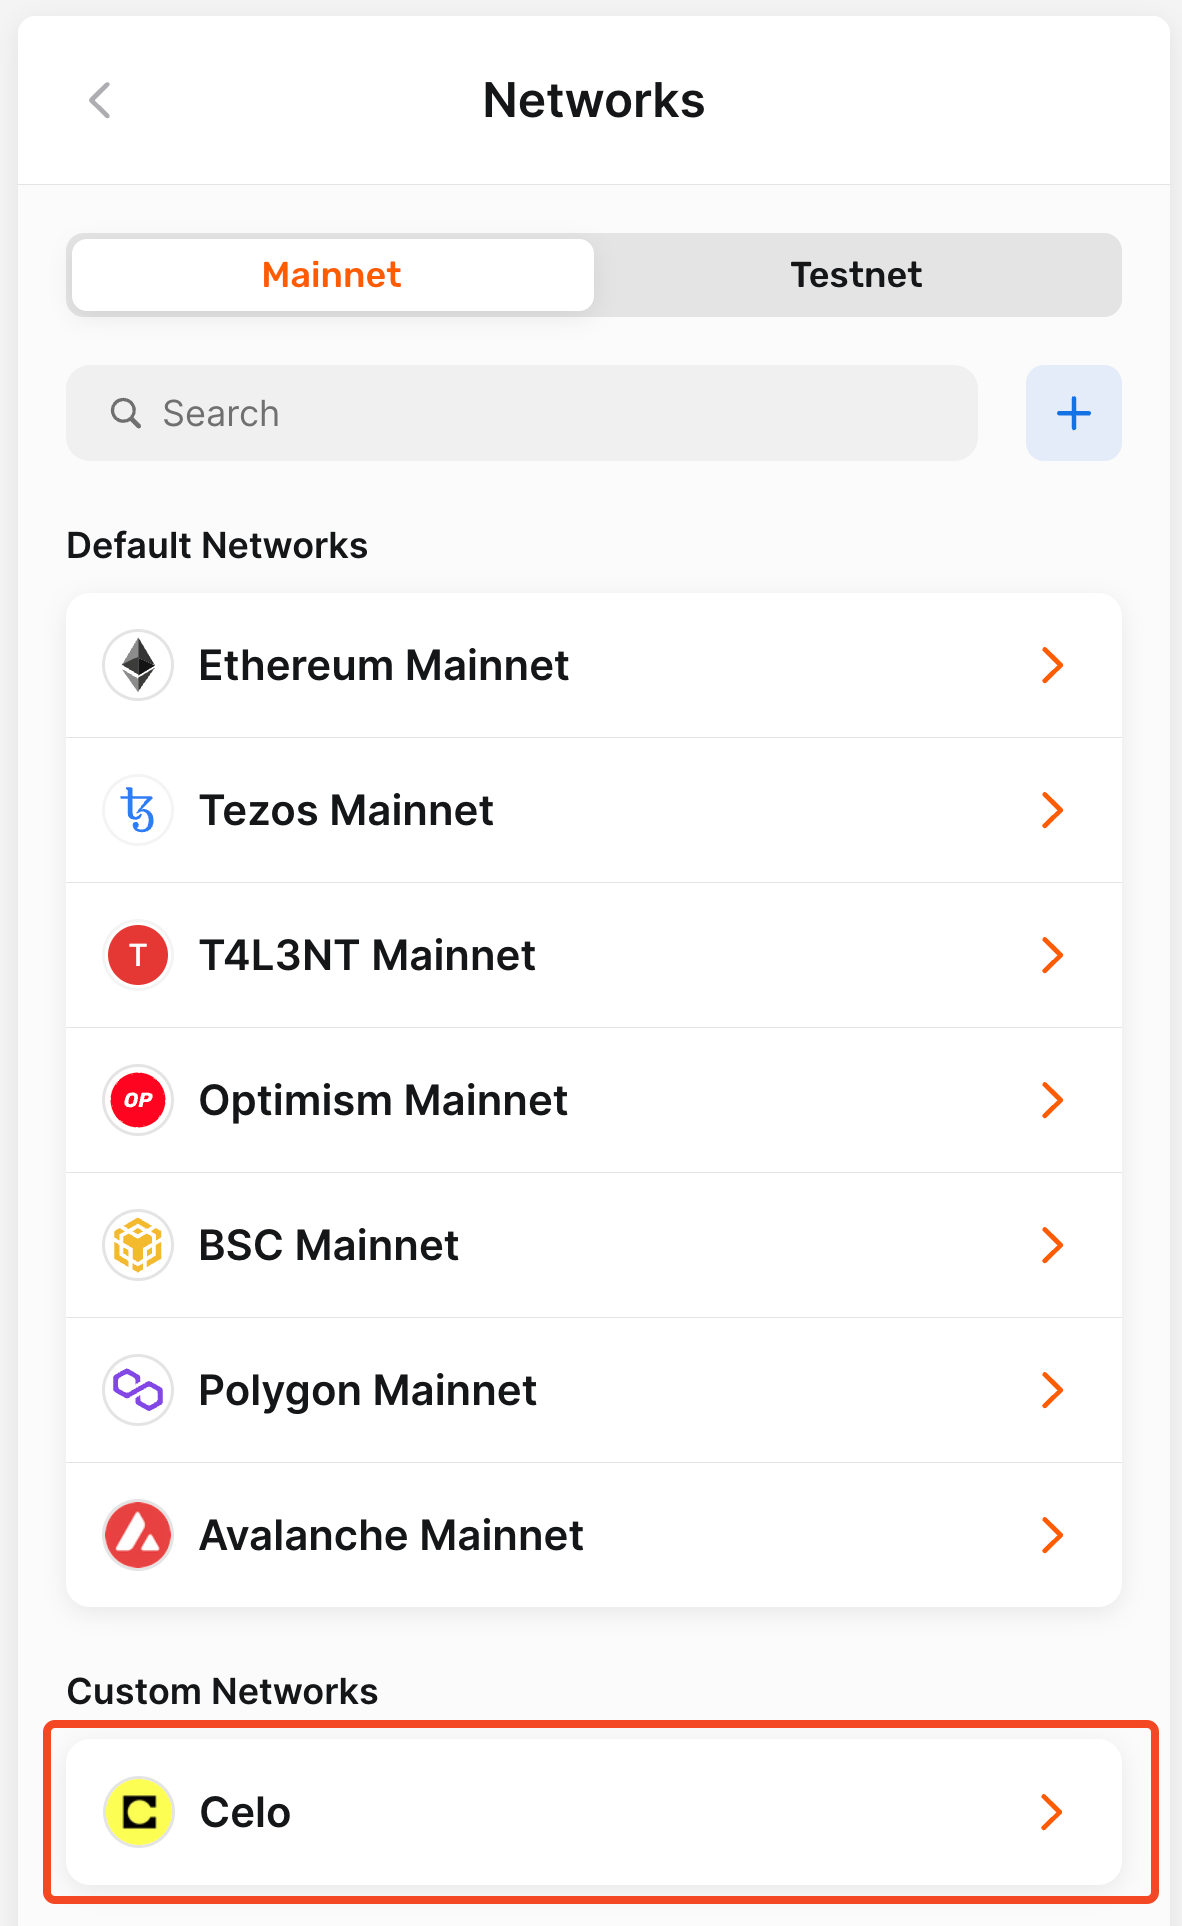
7. Verify the successful addition of the network
Your added network will appear in the Custom Networks section under the Default Networks section.
Conclusion
Adding new networks to your Temple Wallet is a straightforward process that unlocks its full multichain potential. As a versatile multichain wallet, Temple Wallet seamlessly integrates access to the Tezos ecosystem alongside a growing number of EVM-compatible (Ethereum, Polygon, Etherlink, etc.) blockchains, providing a unified experience for managing your diverse crypto assets and interacting with decentralized applications (dApps).
By following this step-by-step guide, you've learned how to easily navigate the Menu, access Settings, manage your Networks, and utilize the Add network function within the Temple Wallet Extension. Whether you're quickly adding a popular EVM network like Celo using the convenient auto-fill feature based on the network name, or manually inputting the specific RPC URL, Chain ID, Symbol, and Block Explorer details for a less common or custom configuration, Temple Wallet makes network expansion intuitive.
Remembering to verify these crucial details before clicking Save ensures a correct and secure connection to your desired blockchain. Once successfully added, your custom network will appear clearly listed under the Custom Networks section, distinct from the default networks and ready for immediate interaction.
This capability is essential for users looking to bridge assets, participate in DeFi protocols, collect NFTs, or engage with dApps across various blockchain environments directly from their trusted Temple Wallet interface. Effectively managing your custom networks allows you to leverage Temple Wallet as your central hub for navigating both the Tezos landscape and the expansive world of EVM chains. Mastering how to add networks empowers you to fully utilize the powerful multichain features of Temple Wallet, significantly broadening your access and capabilities within the decentralized web.