How to bridge tokens from EVM networks to Etherlink
Learn how to easily bridge tokens to Etherlink using your multichain Temple Wallet. This comprehensive step-by-step guide walks you through selecting networks (like Base or Ethereum), choosing tokens, and securely transferring your assets to enjoy Etherlink's fast, low-fee Layer 2 experience.
1. Open the Etherlink website
Open the official Etherlink website using this link: https://www.etherlink.com/
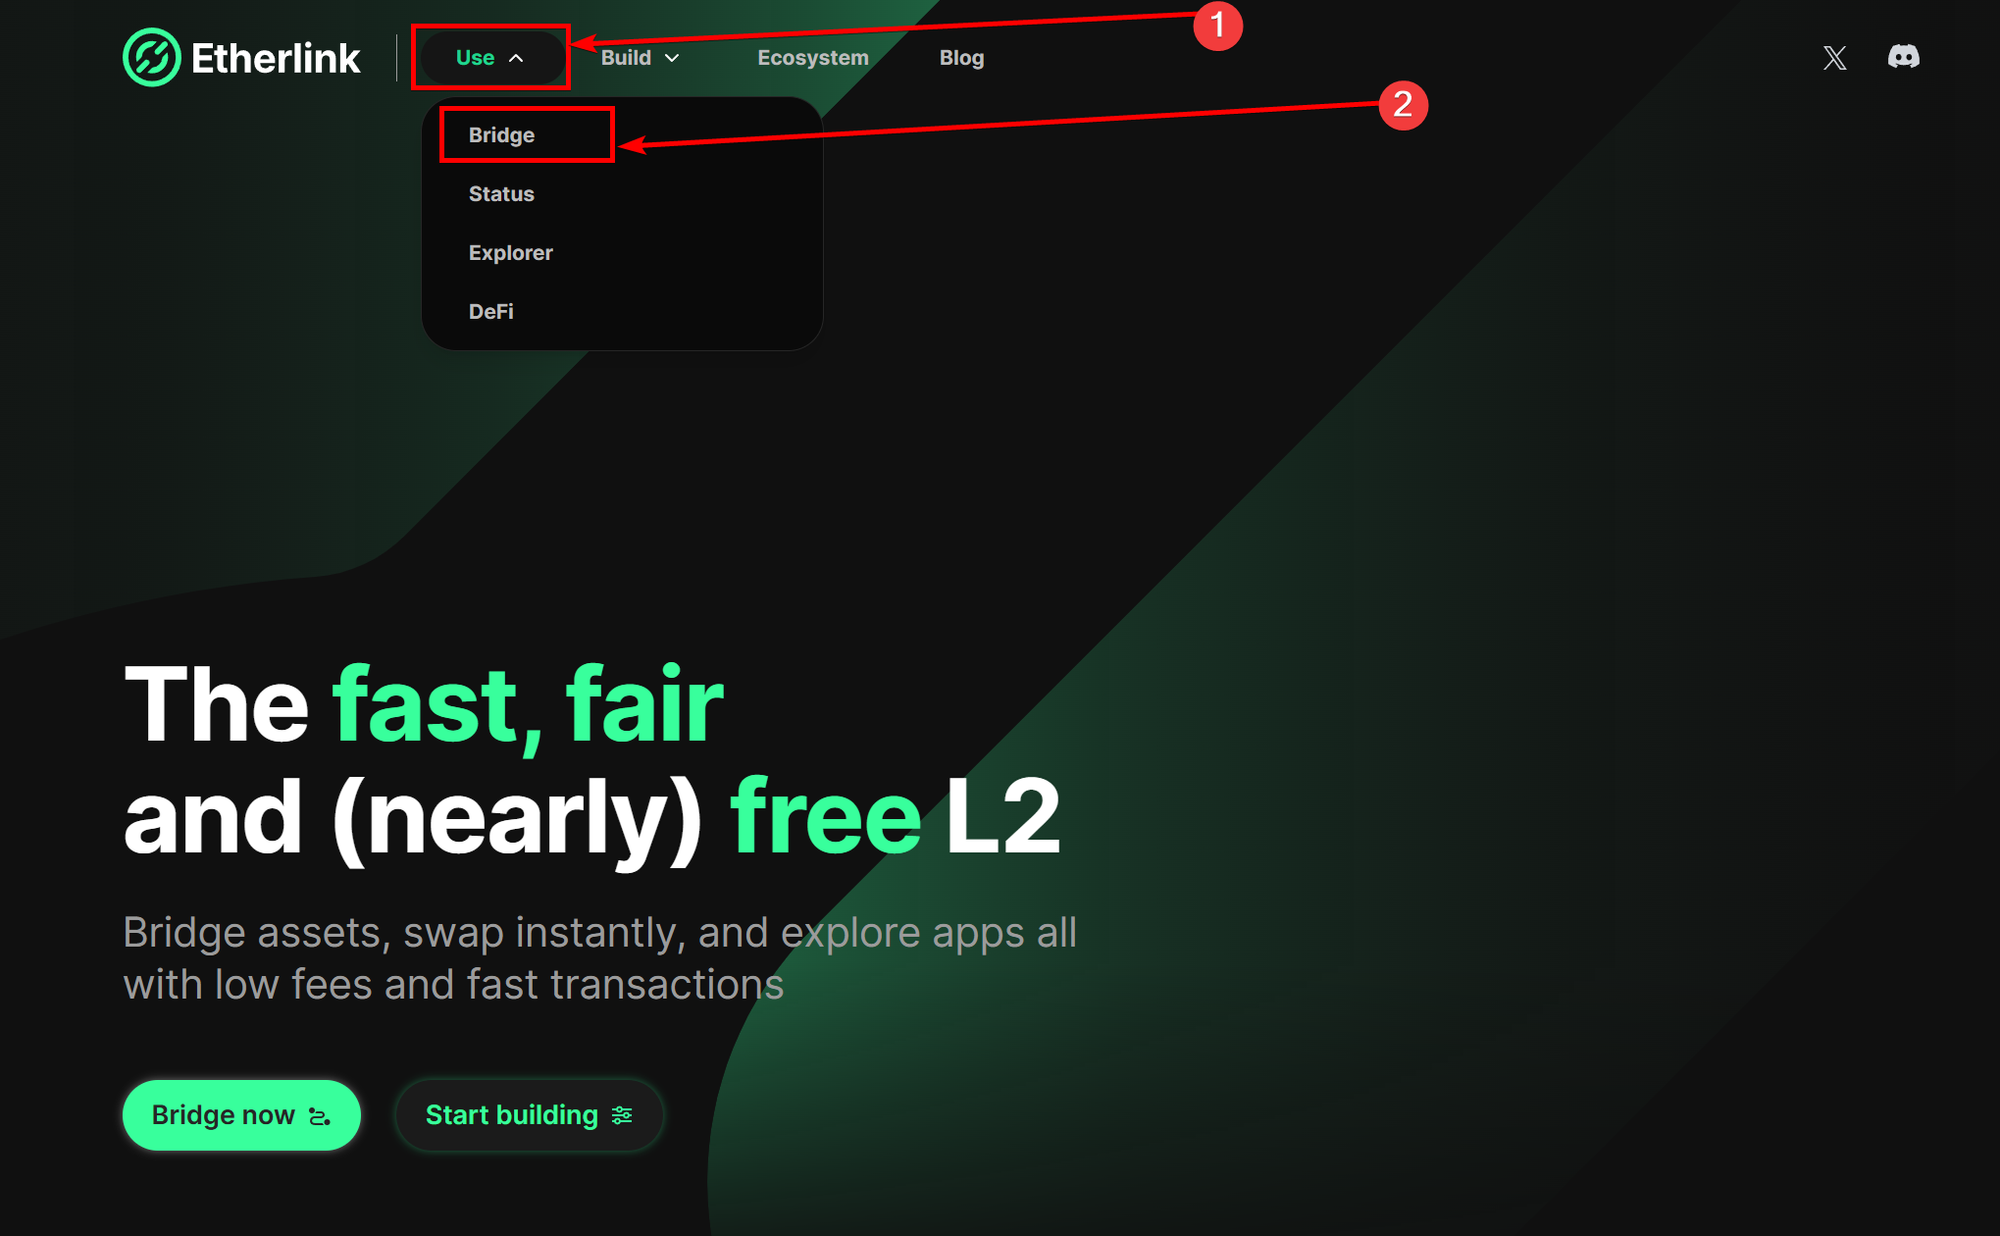
2. Open the Bridge page
Click on the Use dropdown and click on the Bridge option in the opened menu to open the native Bridge page.
3. Choose the EVM Bridge
Click on the Let's go button on the EVM Bridge option on the Etherlink Bridges page.

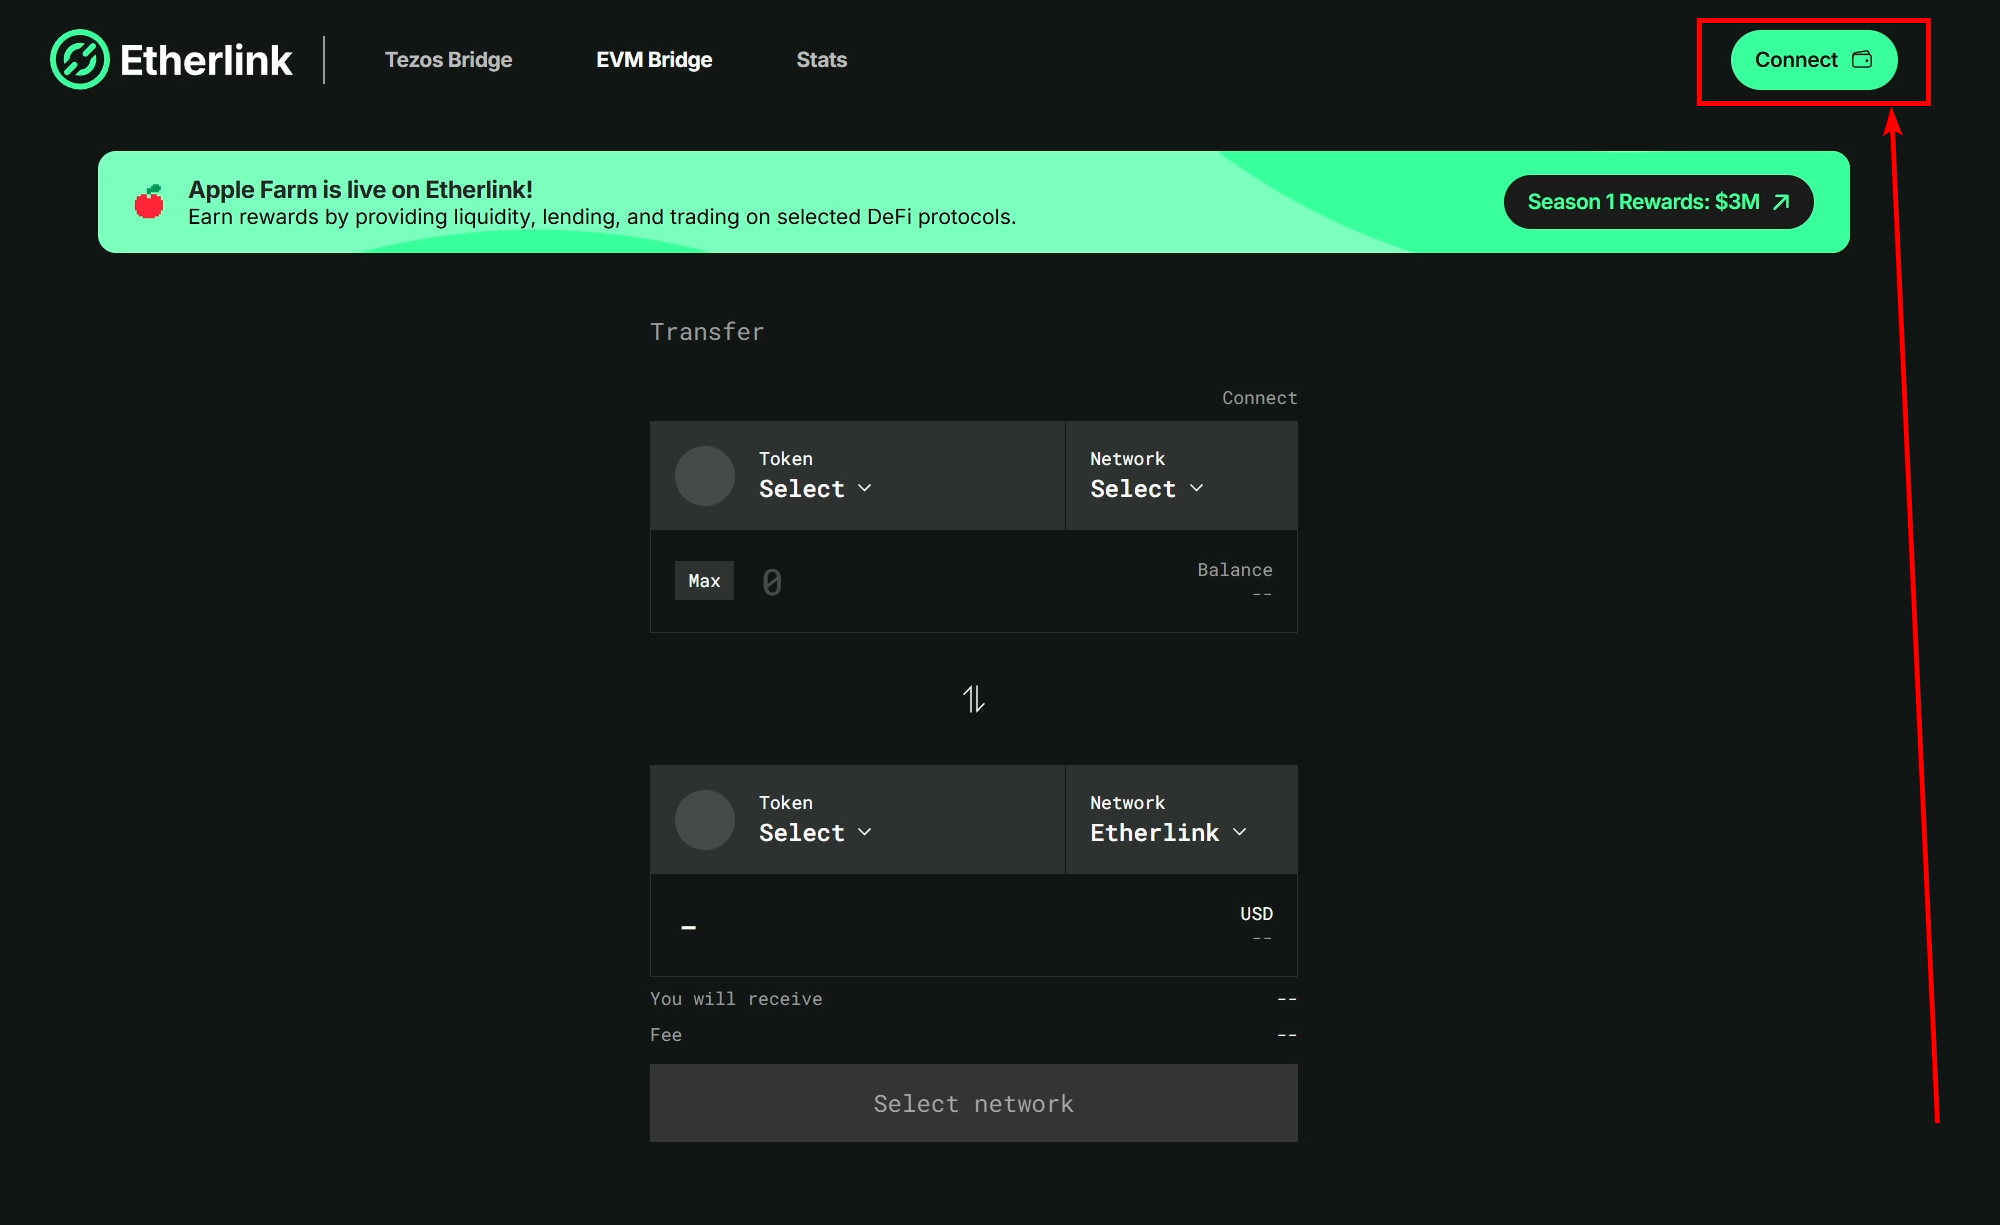
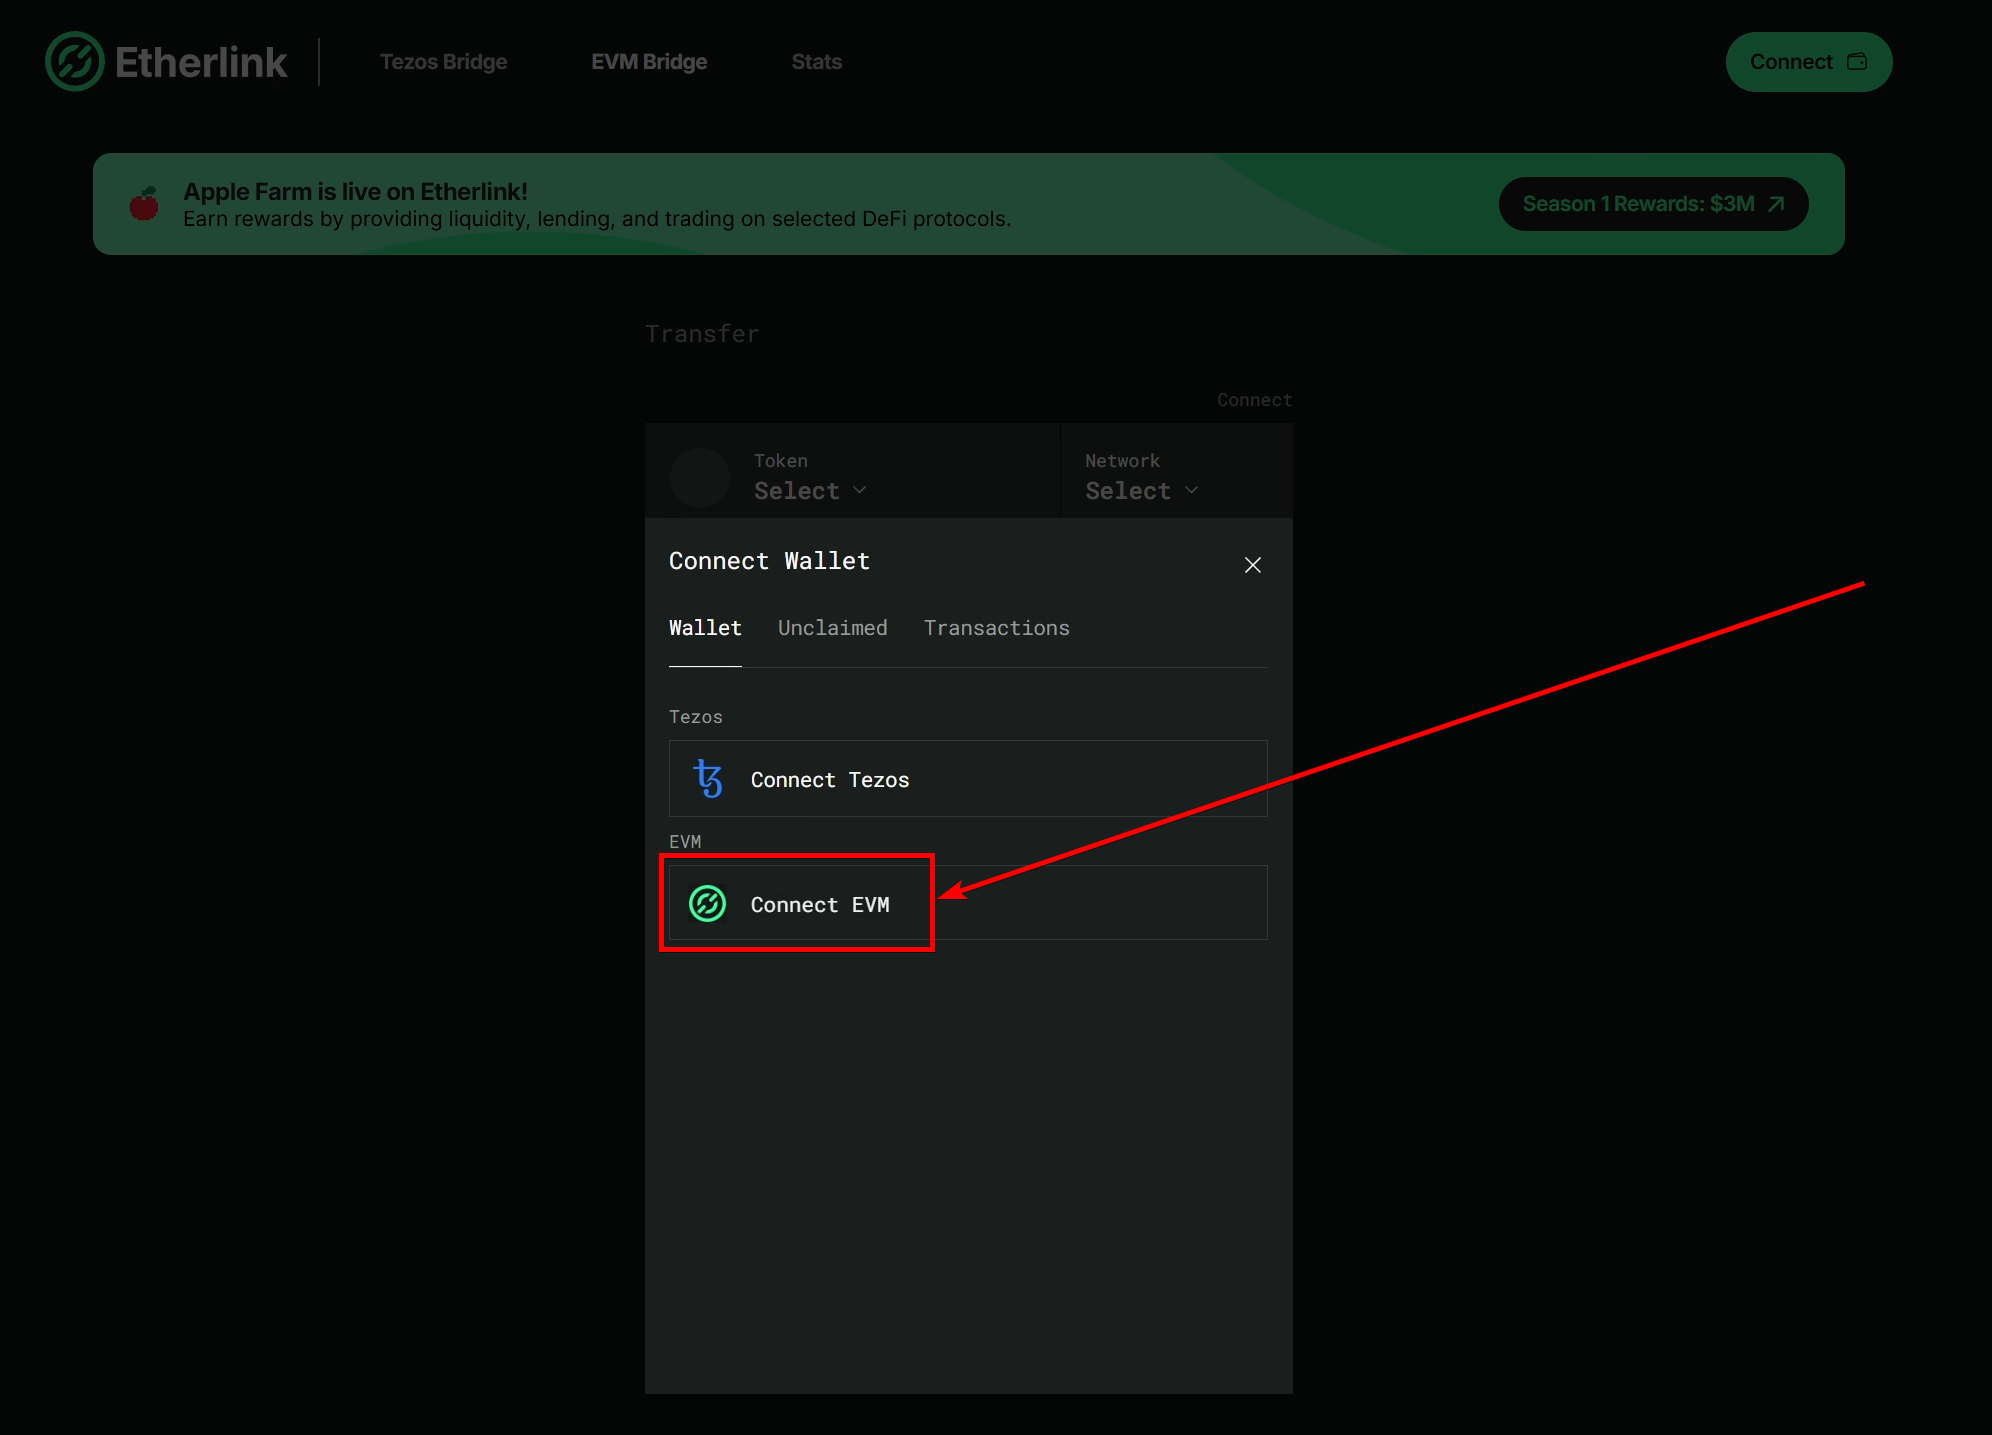
4. Click on the Connect button
Click on the Connect button, which is located in the top right corner of the page.
5. Click on the Connect EVM
In the opened menu, click on the Connect EVM option.
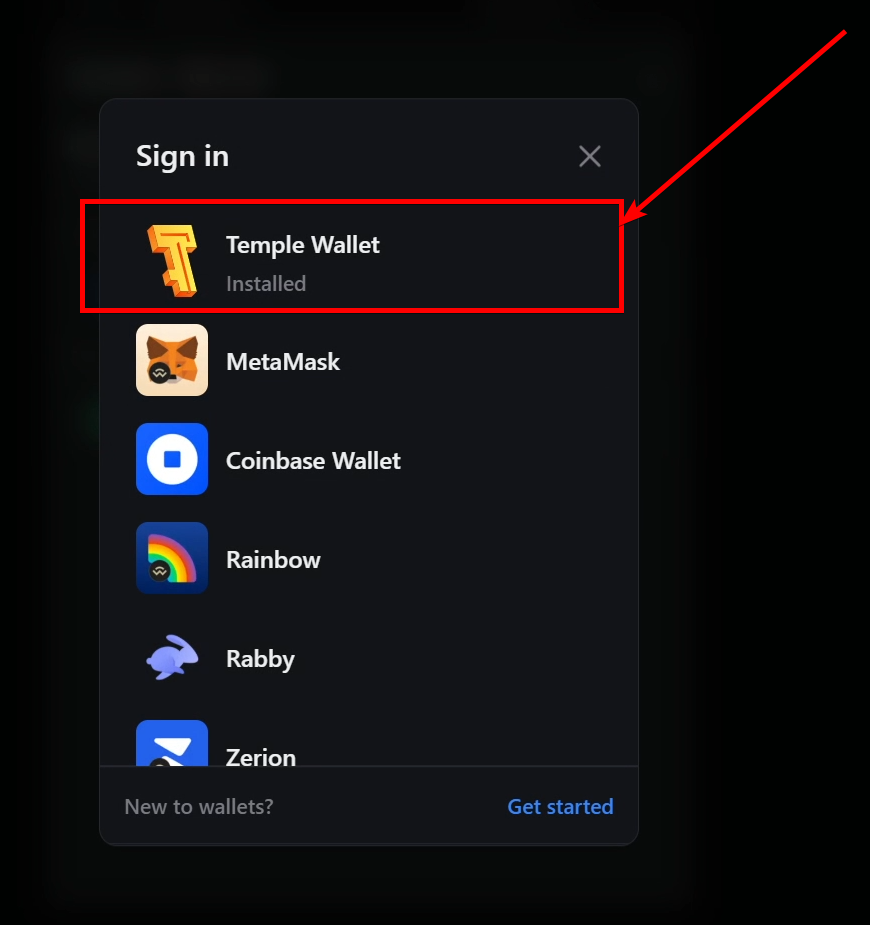
6. Choose Temple Wallet
In the opened Sign in menu, click on the Temple Wallet to connect your wallet.
If you don't have a wallet that supports Etherlink, click here to install Temple Wallet.
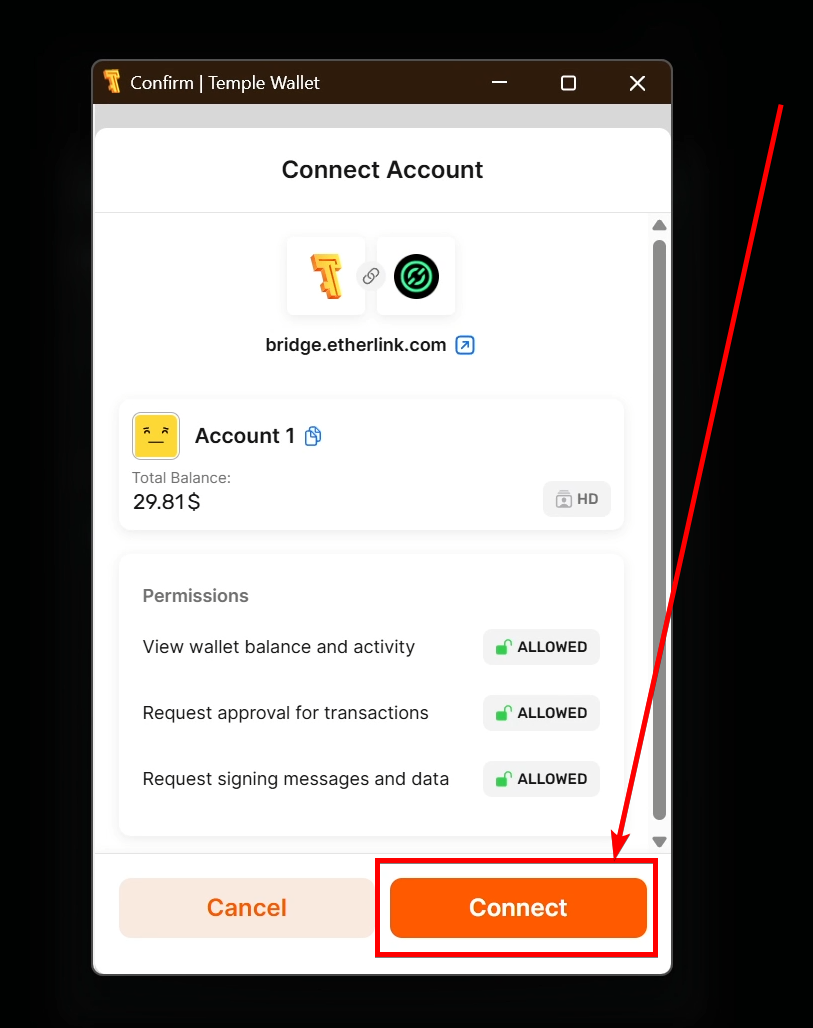
7. Click on the Connect button
After the Temple Wallet pop-up window opens, click on the Connect button to connect your Temple Wallet to the Etherlink Bridge dApp.
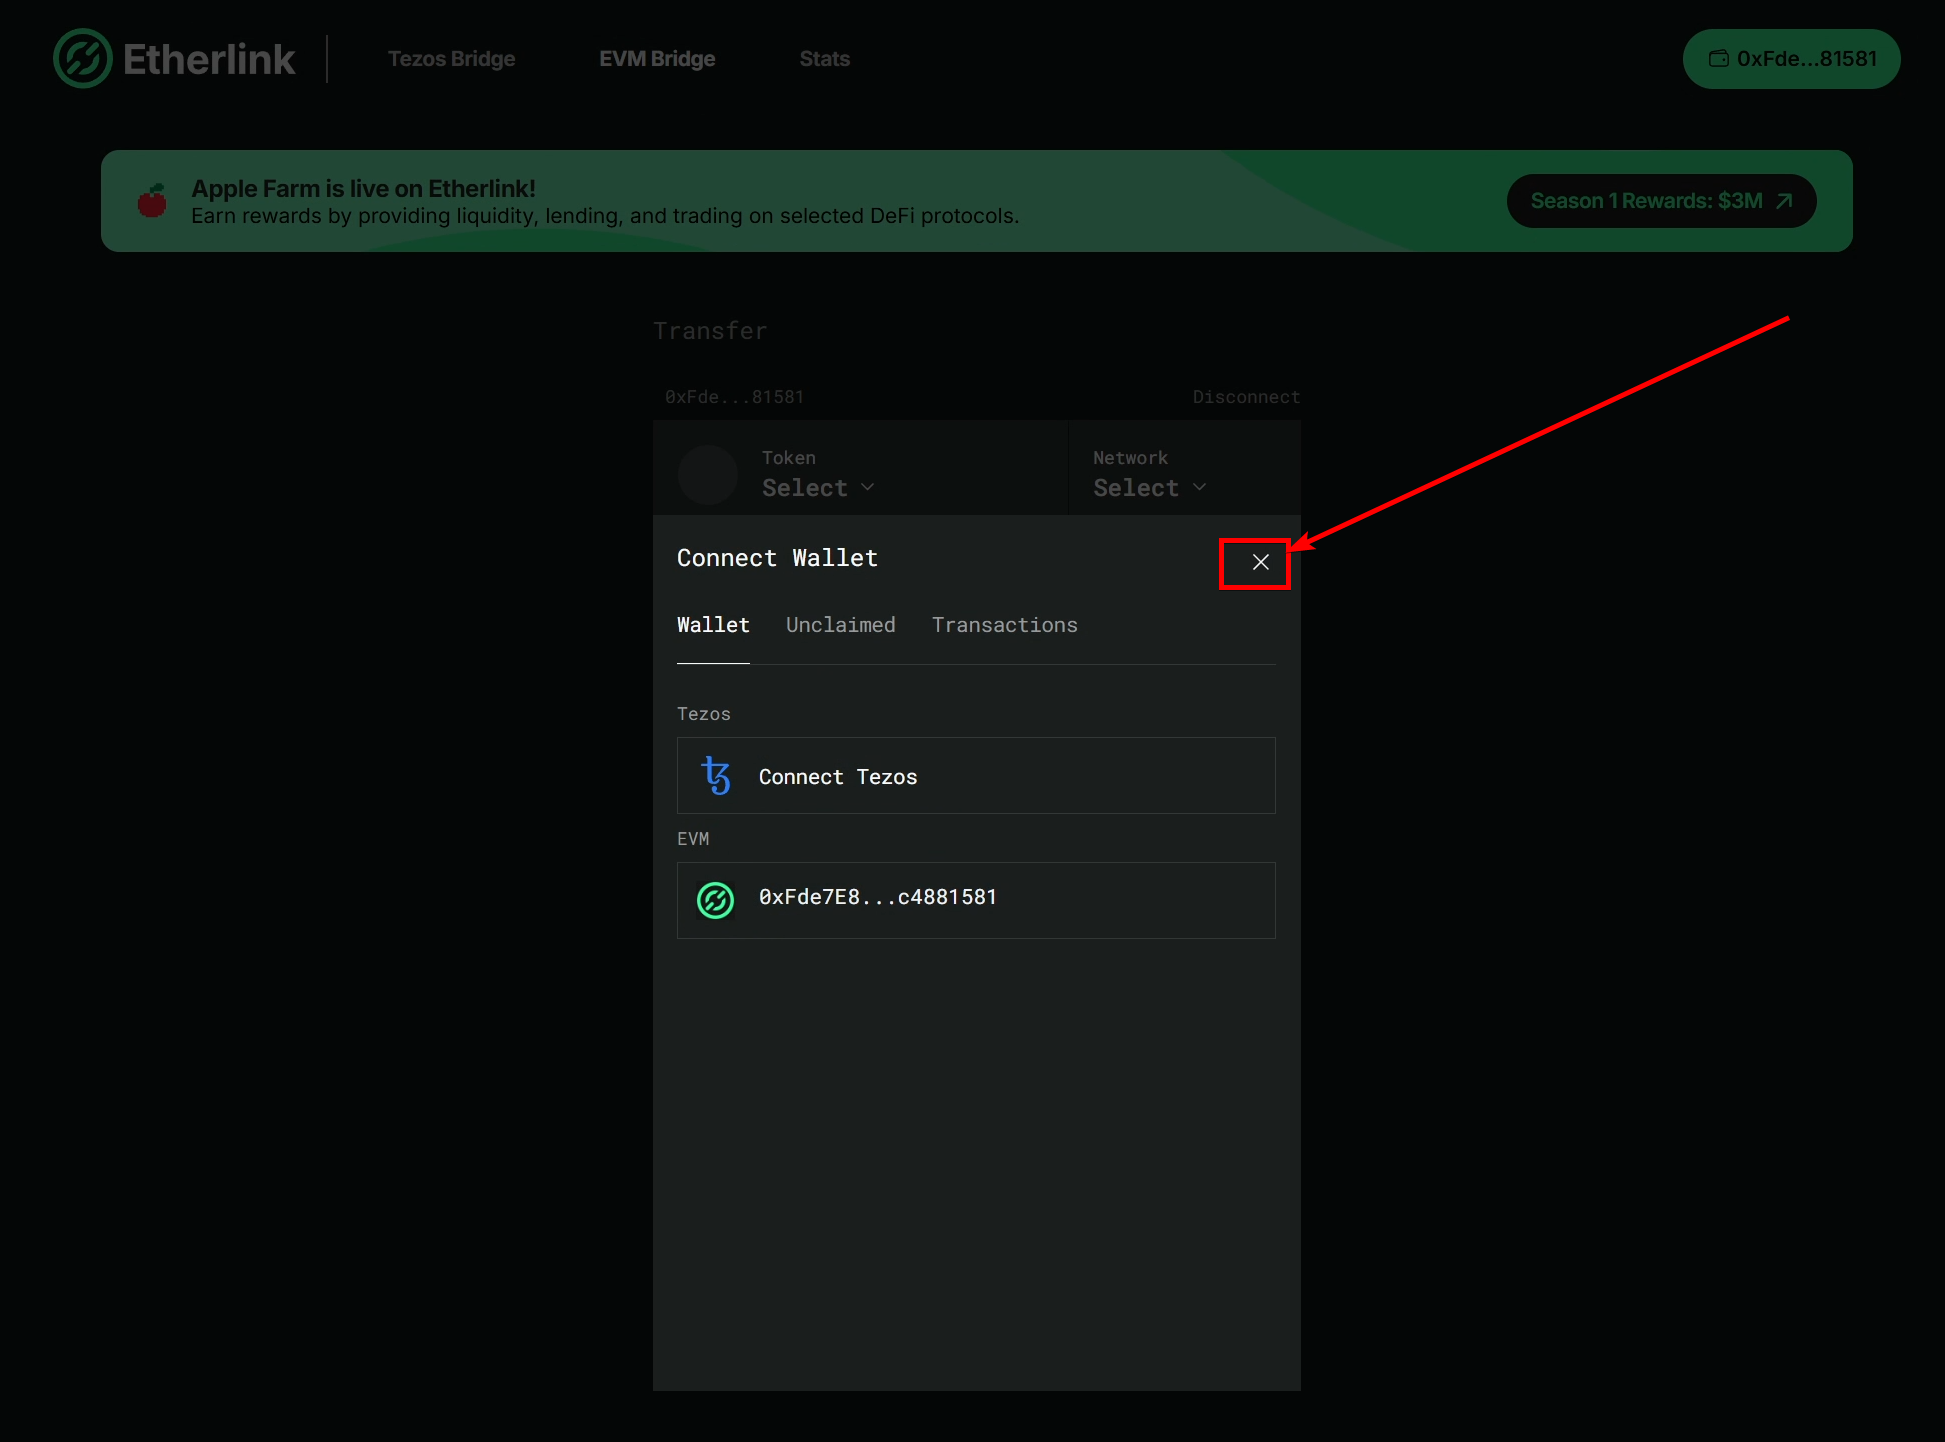
8. Close the Connect Wallet menu
Click on the cross to close the Connect Wallet menu and proceed to the bridge.
9. Choose the Network
Click on the Network Select to open the selection menu with available networks.
Currently available networks are:
- Arbitrum
- Avalanche
- BNB Chain
- Base
- Optimism
- Ethereum
For our example, we will use the Base blockchain.
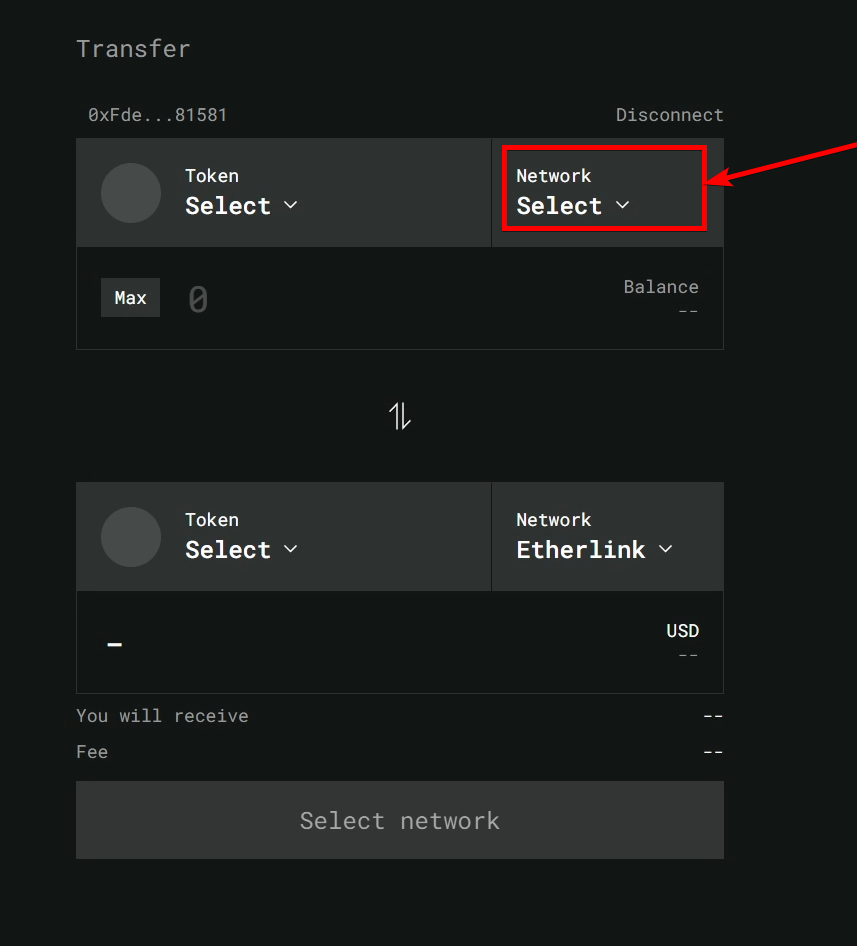
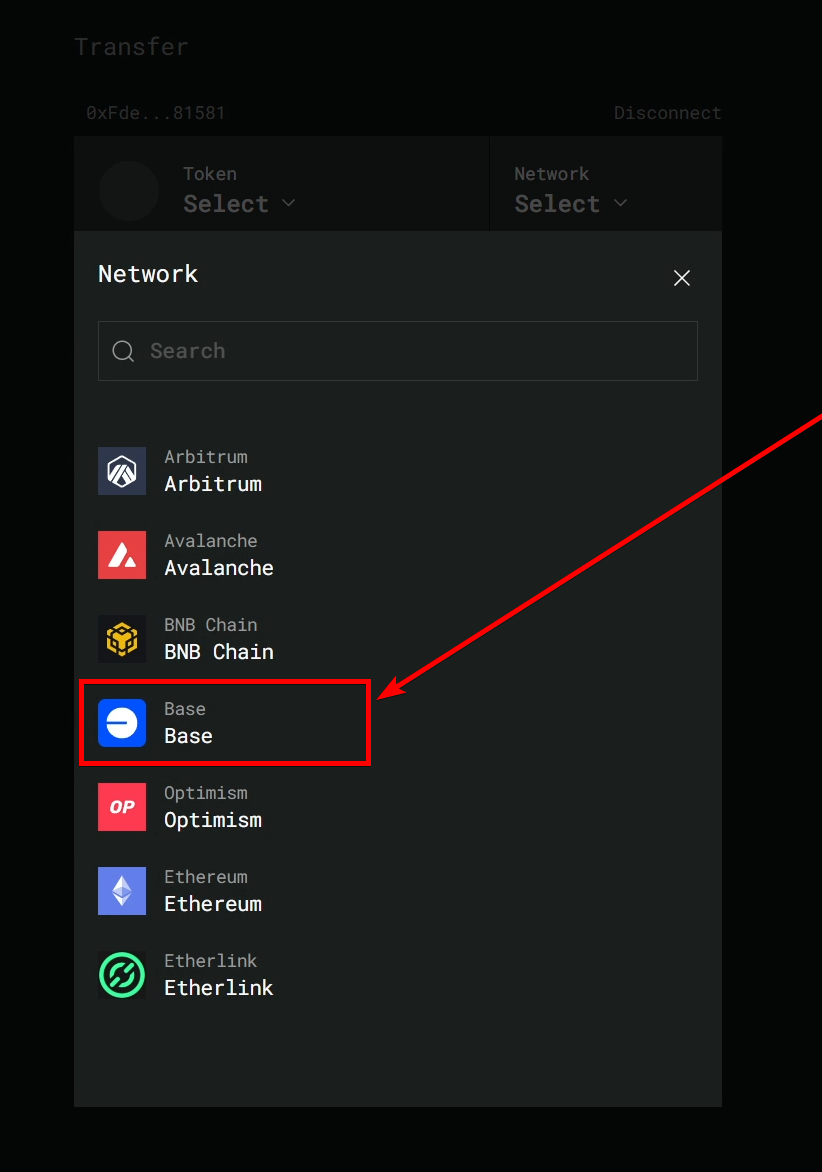
The Network selection process
10. Choose the Token
Click on the Token to open the selection menu with available tokens.
Currently available tokens for the Base blockchain are:
- ETH
- WETH
- USDC
For our example, we will use the native ETH token.

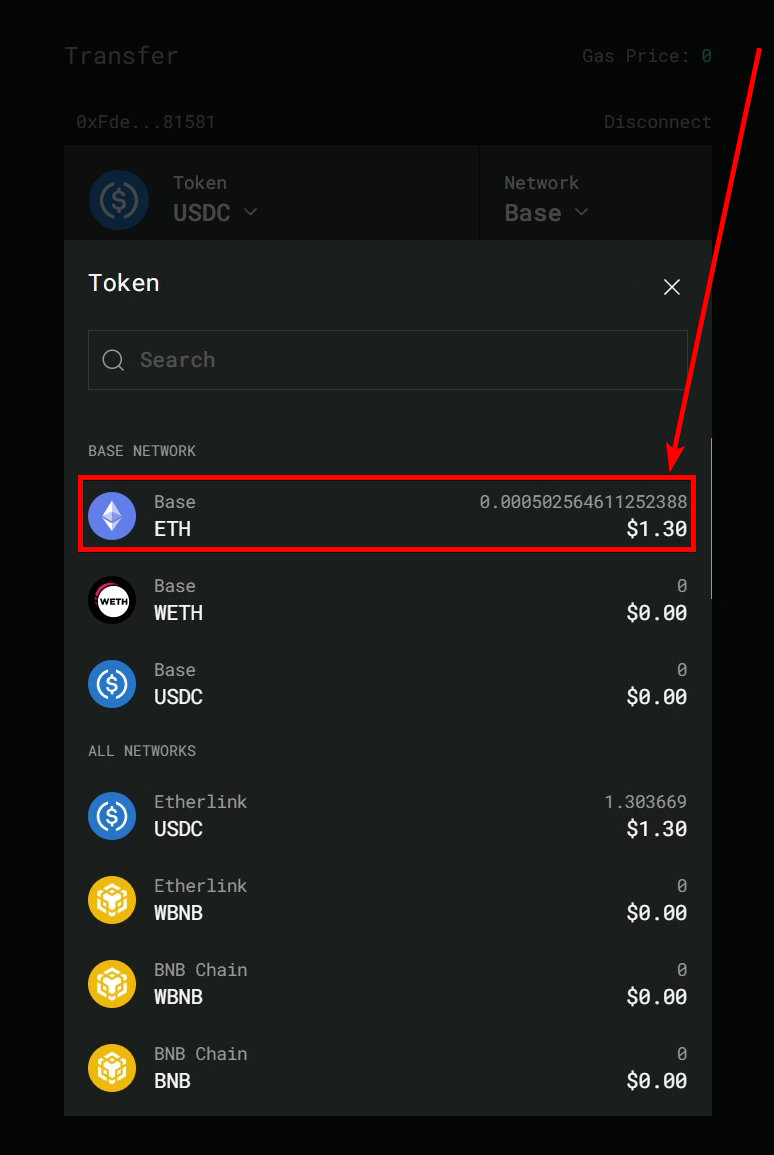
The Token selection process
11. Input the amount of tokens
Click on the input field on the left side of your balance and input the amount of the selected token that you want to bridge from Base to Etherlink.
If you want to bridge the maximum available amount of tokens, click on the Max button.
For our example, we will input 0.0001 ETH.
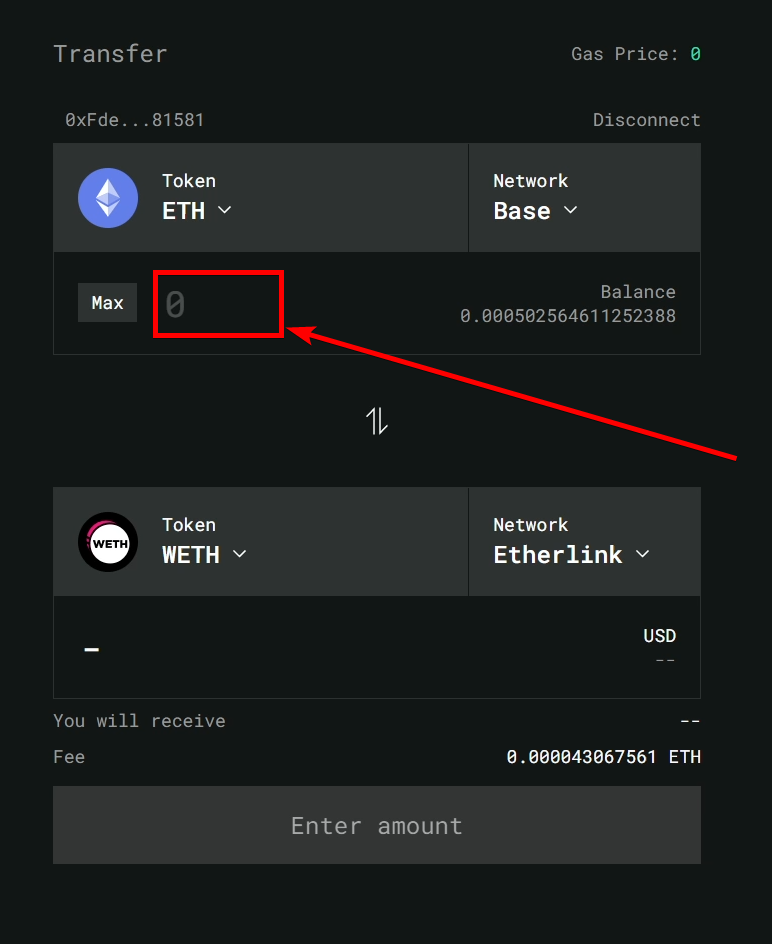
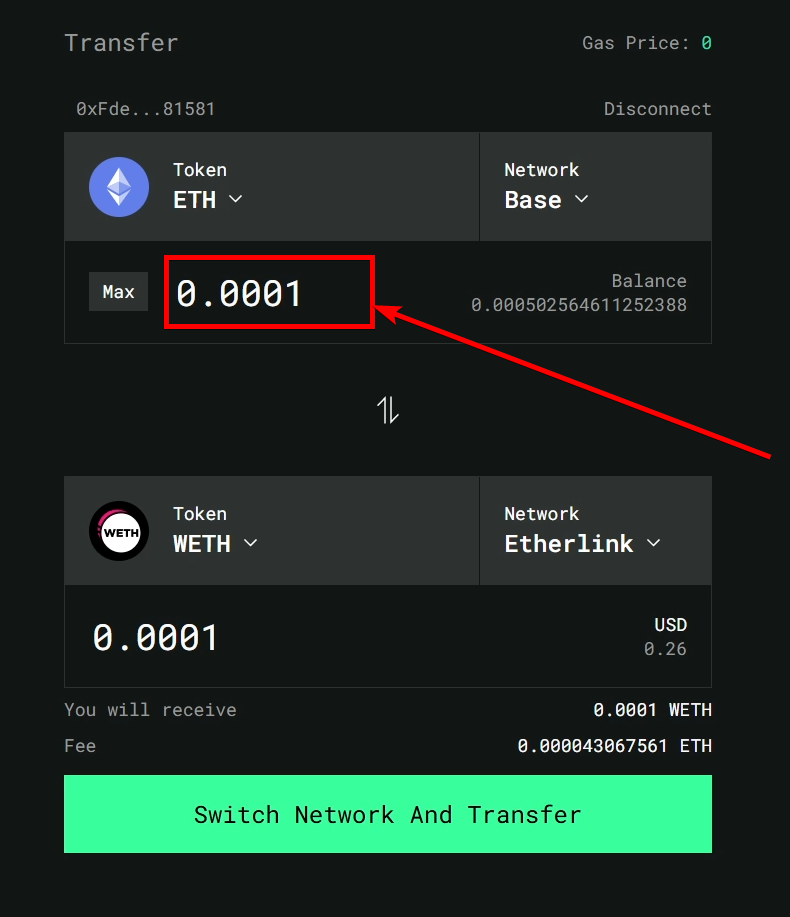
The amount of token selection process
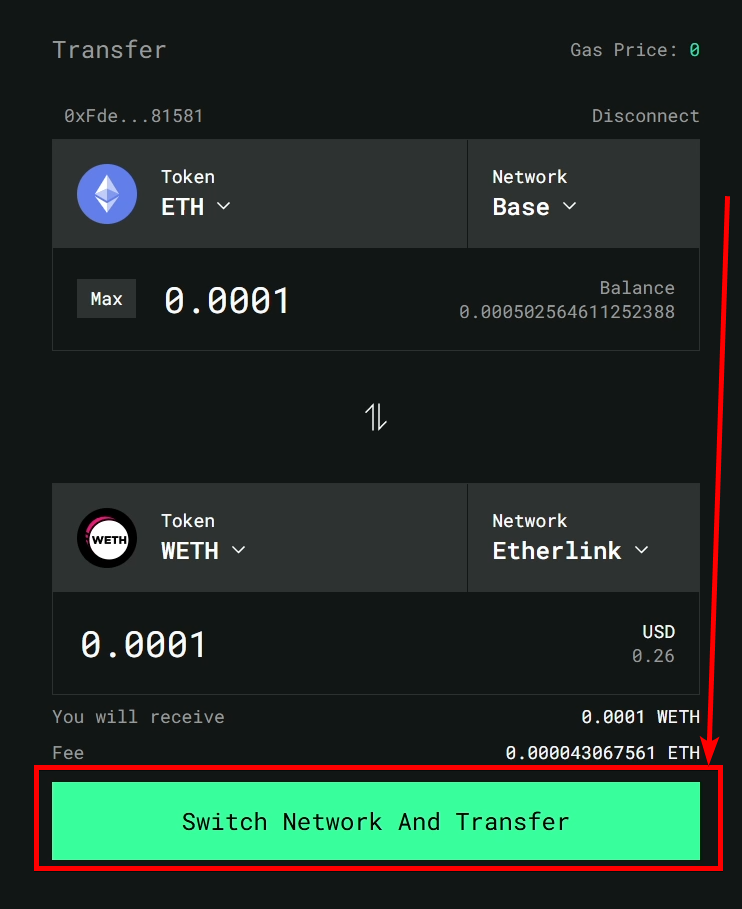
12. Click on the Switch Network And Transfer button
Click on the Switch Network And Transfer button at the bottom of the page to start the bridging process.
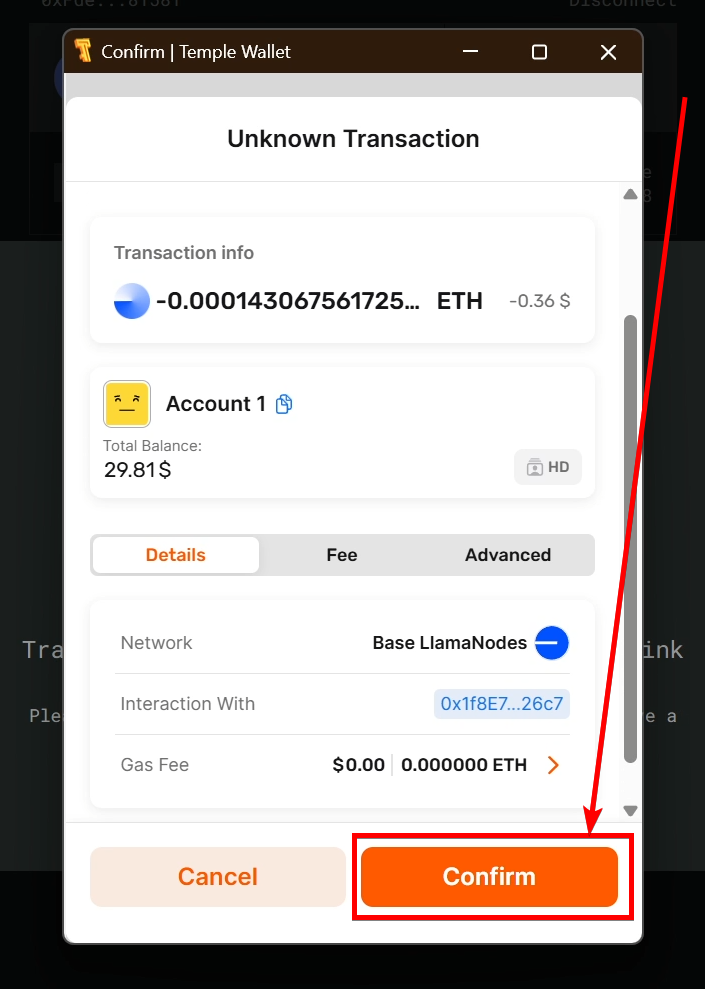
13. Confirm the transaction in the Temple Wallet
Click on the Confirm button in the pop-up menu of the Temple Wallet.
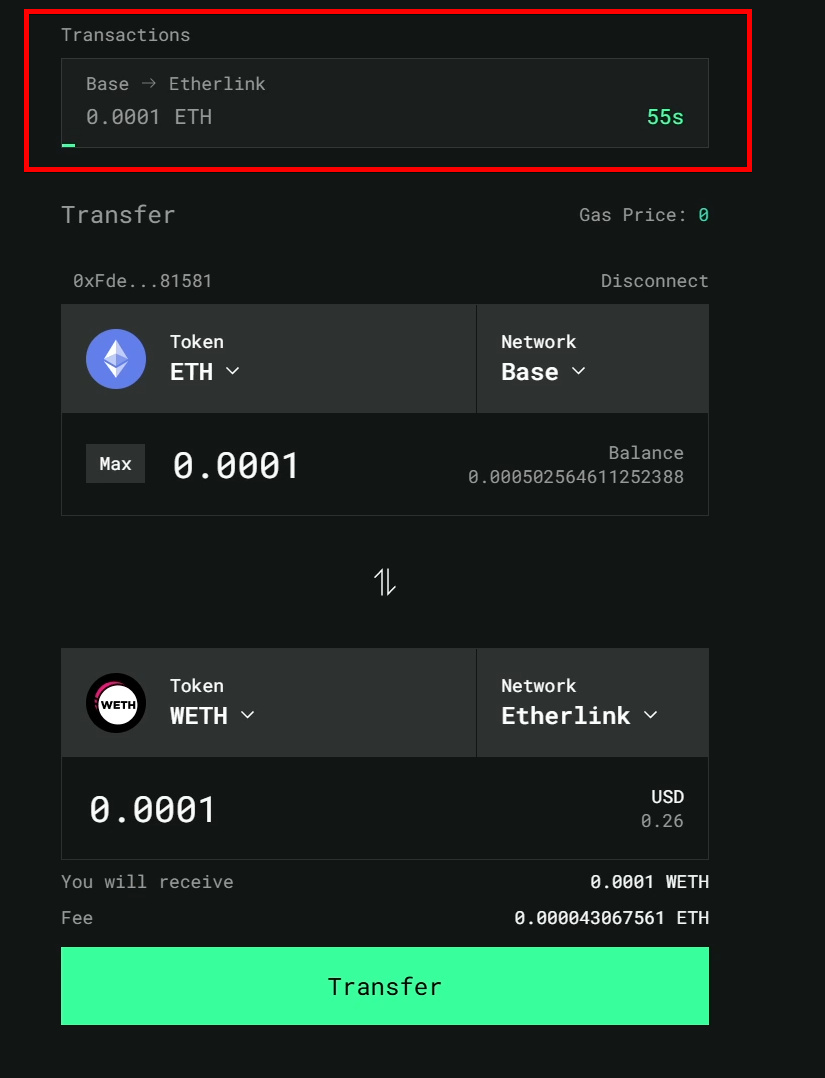
14. Wait for the completion of the bridging process
Your current bridge transaction will appear on the Transactions section, which is located above the Transfer section.
Wait until the timer with seconds turns into a Complete notification.
For our example, we waited around 30 seconds.

The waiting for the bridging
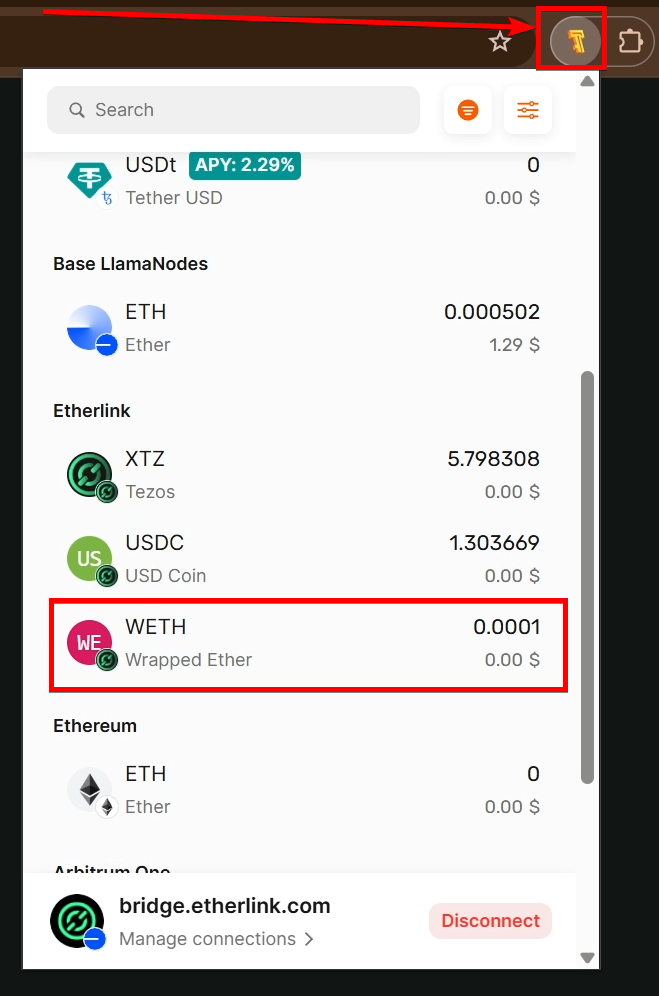
15. Check your tokens in the Temple Wallet
Click on the Temple Wallet icon to open the wallet, and scroll down to see your bridged tokens.
For our example, we have successfully received our 0.0001 ETH on the Etherlink blockchain.
Conclusion
Congratulations! By following this comprehensive step-by-step guide, you have successfully learned how to bridge tokens to Etherlink, unlocking a gateway to a faster, more cost-efficient Layer 2 experience. This process, facilitated by your Temple Wallet, showcases the power and flexibility of modern multichain solutions. Temple Wallet, now equipped with robust support for both Tezos and EVM blockchains, stands as a versatile tool for navigating the diverse crypto landscape.
You've seen firsthand how to navigate the Etherlink official website, access the Etherlink Bridge page, and specifically utilize the EVM Bridge option. Connecting your Temple Wallet in EVM mode and selecting your desired source network—be it Base, Ethereum, Arbitrum, or others—along with your chosen tokens like ETH or USDC, is now a familiar process. Confirming the transaction within your Temple Wallet is the final step to securely transfer your assets.
With your tokens now on Etherlink, you are perfectly positioned to explore its burgeoning ecosystem of decentralized applications (dApps), engage in DeFi activities, and benefit from the low fees and fast transaction speeds that Etherlink promises as a "fast, fair, and (nearly) free L2." This ability to bridge crypto assets to Etherlink is crucial for users seeking to optimize their on-chain activities and access innovative platforms.
Temple Wallet's enhanced multichain capabilities make operations like token bridging between EVM networks and Etherlink straightforward and secure. Whether you're moving stablecoins, wrapped assets, or native cryptocurrencies, the principles remain consistent, empowering you to manage your digital portfolio across various chains with greater ease.
Remember, understanding how to use the Etherlink bridge is a valuable skill in the expanding world of Layer 2 solutions. Keep this guide handy for future reference, and continue exploring the possibilities that bridging to Etherlink with Temple Wallet opens up for you. Happy exploring in the efficient and rapidly growing Etherlink environment!